User Name and Email
Introduction
In this article we will create an Alexa skill in Voiceflow allowing us to request and access user’s info like given name and email.
With a similar design and the Alexa Customer Profile API, here are a list of user’s info you will be able to retrieve:
- Full Name
- Given Name (First Name)
- Email Address
- Phone Number
Context
In order to access user’s info in a skill, you will need to use the Alexa Customer Profile API with an API token. This token can be retrieved from your Alexa project’s {_system} variable after the user has given us permission to access their data.
What we need?
Before getting user’s info, we want to check that the user give us access and if not, generate a Permissions card to inform and allow them to authorize the skill in the Alexa app.
We will then need to get the API token and setup some API request to get the user’s given name and email.
Step 1 | Setup and populate the variables
In your new Alexa project, you will have to create three variables, one to store the _system info and two more to store the Alexa API Endpoint and the API access token. Those two information are needed to make our API requests later on.
Do do so, open the model view (press the m key) and in the Variables section, click on the +
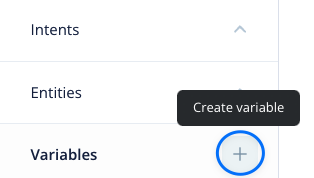
And create the needed two variables:
apiEndpoint
apiAccessToken
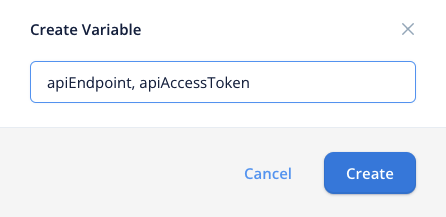
You can use the names you want for those variables but be sure to update your project accordingly.
Now we are going to populate our {apiEndpoint} and {apiAccessToken} variables with the corresponding data from the {_system} variable.
A Set step will do the job here:
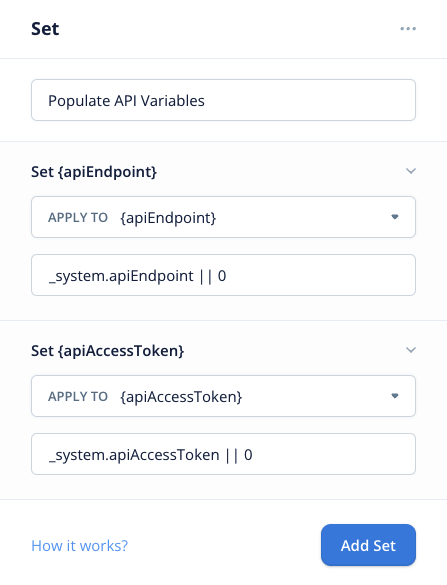
We use expressions here, so if none of those paths exist in the {_system} variable, our apiEndpoint and apiAccessToken will be set to 0.
Step 2 | Make API requests
As explained earlier, Amazon provide the Alexa Customer Profile API to access user’s info.
Because we need to access user’s given name and email, we will have to make two different calls. You can find more details on the available endpoints in the documentation section at the end of this article.
Here are the main endpoints you can use:
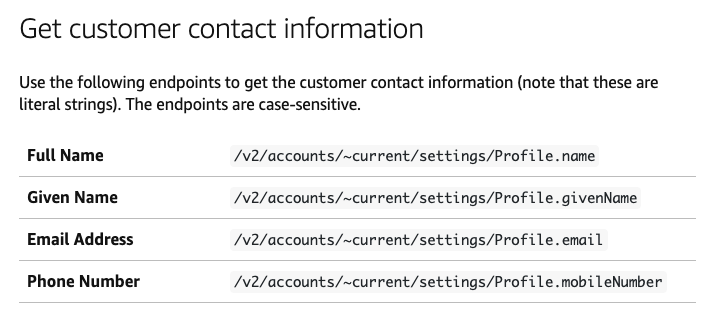
And an example of a request shared on the Alexa documentation:

As explained in the documentation, the endpoint for the Alexa Customer Profile API varies depending on the geographic location of your skill. This is the reason why we are grabbing that info from the _system variable; to dynamically set the API endpoint.
Any request to the Alexa Customer Profile API will need a token and an endpoint. This is why we need our {apiEndpoint} and {apiAccessToken} variables.
The API step setup is pretty simple, drag/drop the API step on your canvas and set it like this:
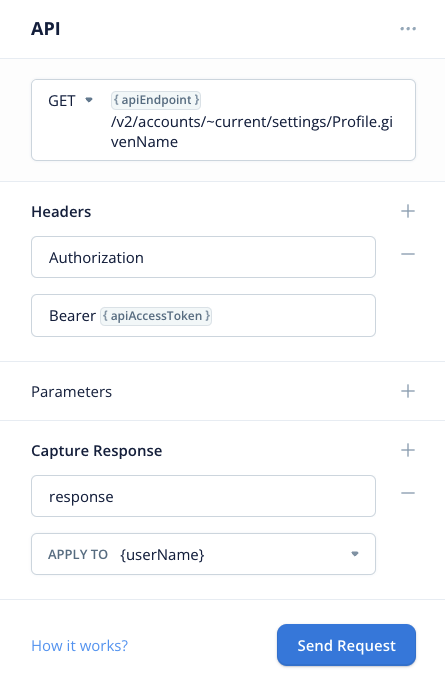
{apiEndpoint}/v2/accounts/~current/settings/Profile.givenName
As you can see, we are using the {apiEndpoint} variable in the URL with a GET method and the {apiAccessToken} in the headers as documented in the Alexa Customer Profile API.
The Profile.givenName return only the first name so the full response will be stored in the {userName} variable (this one as to be created when mapping the response to it in the API step).
To do the email request, let’s just duplicate this API step.
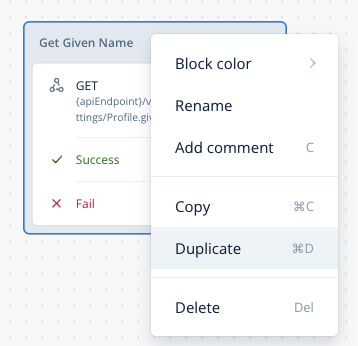
On the duplicated API step, we will have to change the endpoint and the variable mapping with a new variable called {userEmail}.
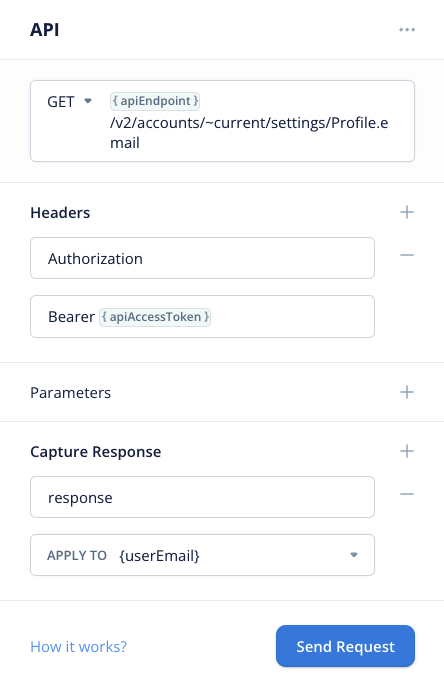
{apiEndpoint}/v2/accounts/~current/settings/Profile.email
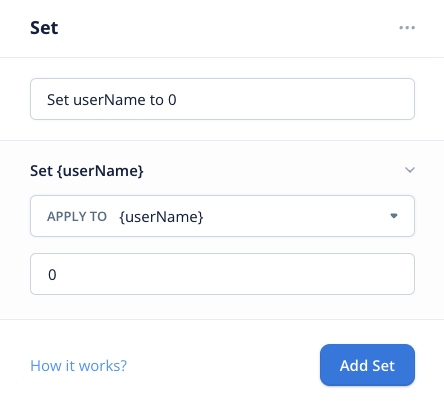
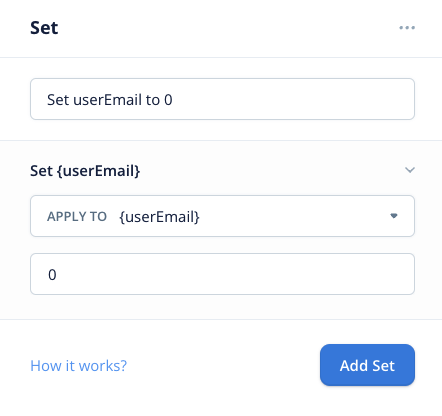
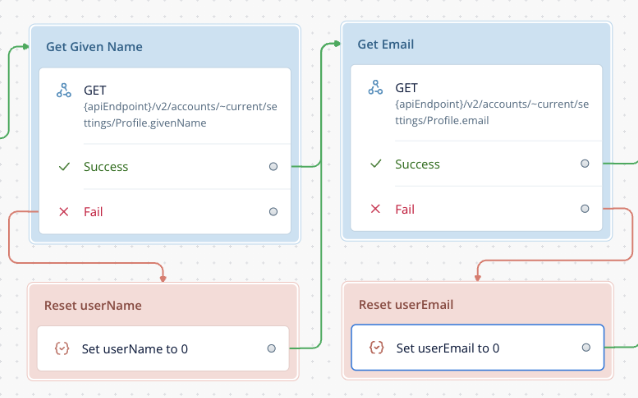
The last thing we want to do while setting up the API requests is to be sure to set our {userName} and {userEmail} variables to 0 in case the API calls return an error (not a 200 code for example).
We can do this by linking two Set steps, one on each API step Fail port.
It’s always a good practice to reset your variables to 0 in case of error to be sure not to use previously stored data when using some conditions later on to check their values.
So far so good, this is how this part should look like:
Step 3 | Logic & Conditions
As you can see, even if one (or both) of the API step hit the Fail port, we will continue to the next step but we will also reset the corresponding variable. This will be handy as we are going to use a conditions step to request the user to give us permissions in case we don’t have access to given name and/or email.
Drag a Conditions step and link the last API Step to it.
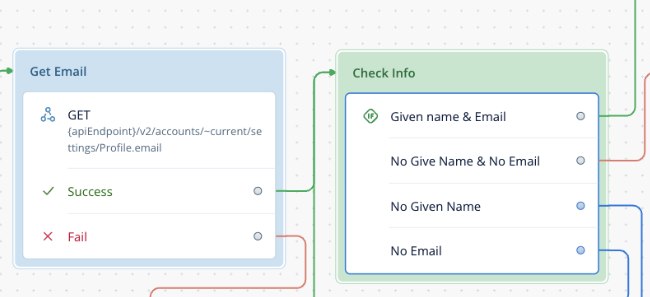
In this Condition step, we will setup 4 conditions, using the No Match for the last one.
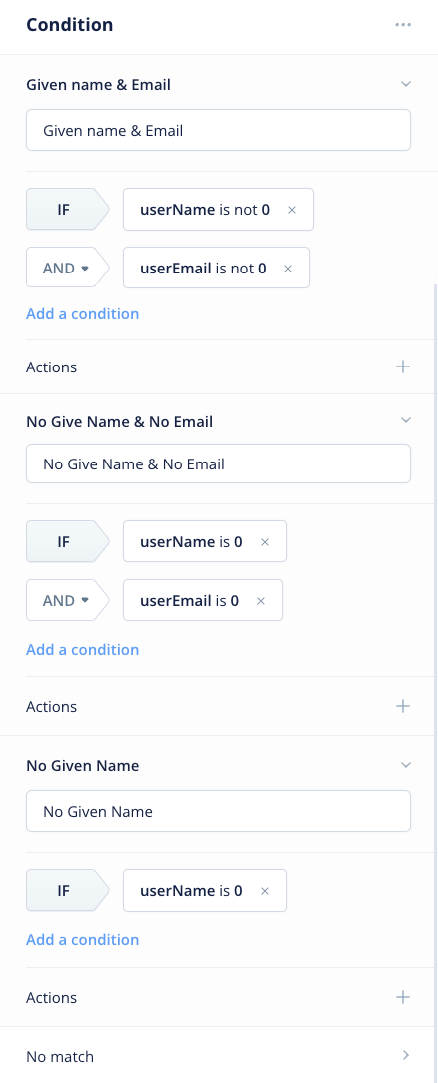
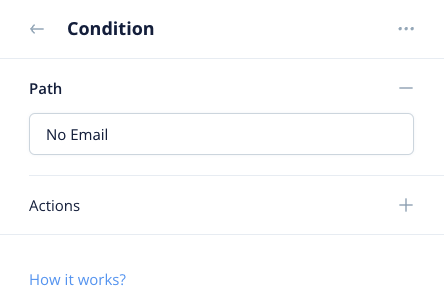
With this, we will be able to redirect the user to different paths.
- One if we have access to both info, given name and email
- One if we don’t have access at all
- One if we don’t have access to given name
- One if we don’t have access to email
Step 4 | Permissions card using _response variable
Now that our Conditions are setup, we will need to generate a dedicated Permissions card based on the missing permission(s) so the user will know what to give us access to in the Alexa app.
A Permissions card is nothing much than adding some specific info to the response we are sending to Alexa (more info in the Documentation section).
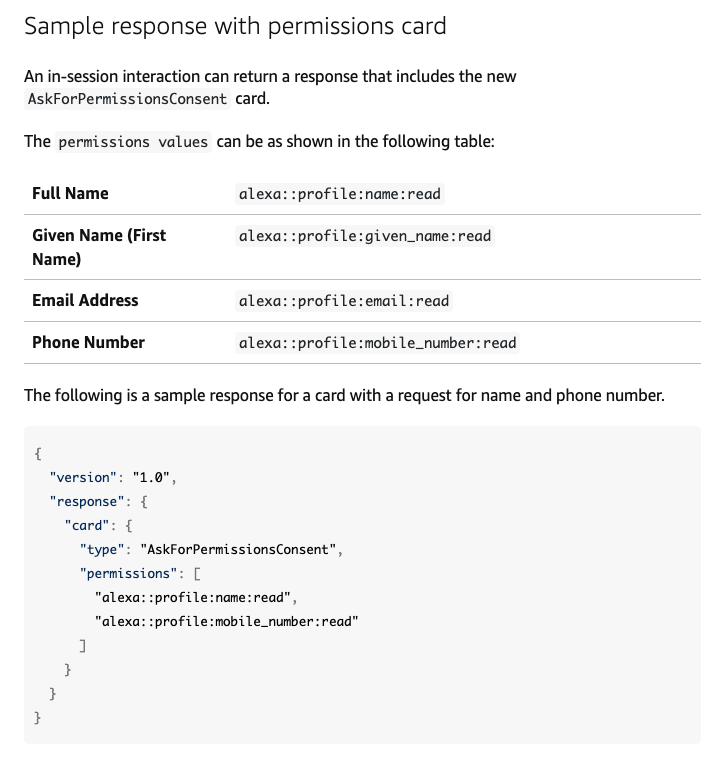
To be able to populate the response with some custom data, we’ve made the _response variable available in any Alexa project. Like with the _system variable, you can use it in a Code step.
Here, and as we are dealing with two permissions (given name and email), we will need to generate 3 cards and redirect the user to the corresponding one based on the API call responses.
One to request permissions to access given name AND email:
_response = {
  "card": {
      "type": "AskForPermissionsConsent",
      "permissions": [
        "alexa::profile:given_name:read",
        "alexa::profile:email:read"
      ]
    }
}
One to request permissions to access given name:
_response = {
  "card": {
      "type": "AskForPermissionsConsent",
      "permissions": [
        "alexa::profile:given_name:read"
      ]
    }
}
And one to request permissions to access email:
_response = {
  "card": {
      "type": "AskForPermissionsConsent",
      "permissions": [
        "alexa::profile:email:read"
      ]
    }
}
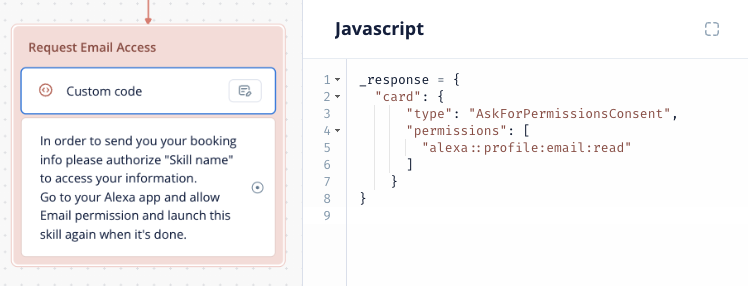
As an example, here is the design for the Email permission.
Step 5 | Final design and Testing on the Alexa Developer Console
This is our last step, your project is ready and should look to something similar to this:
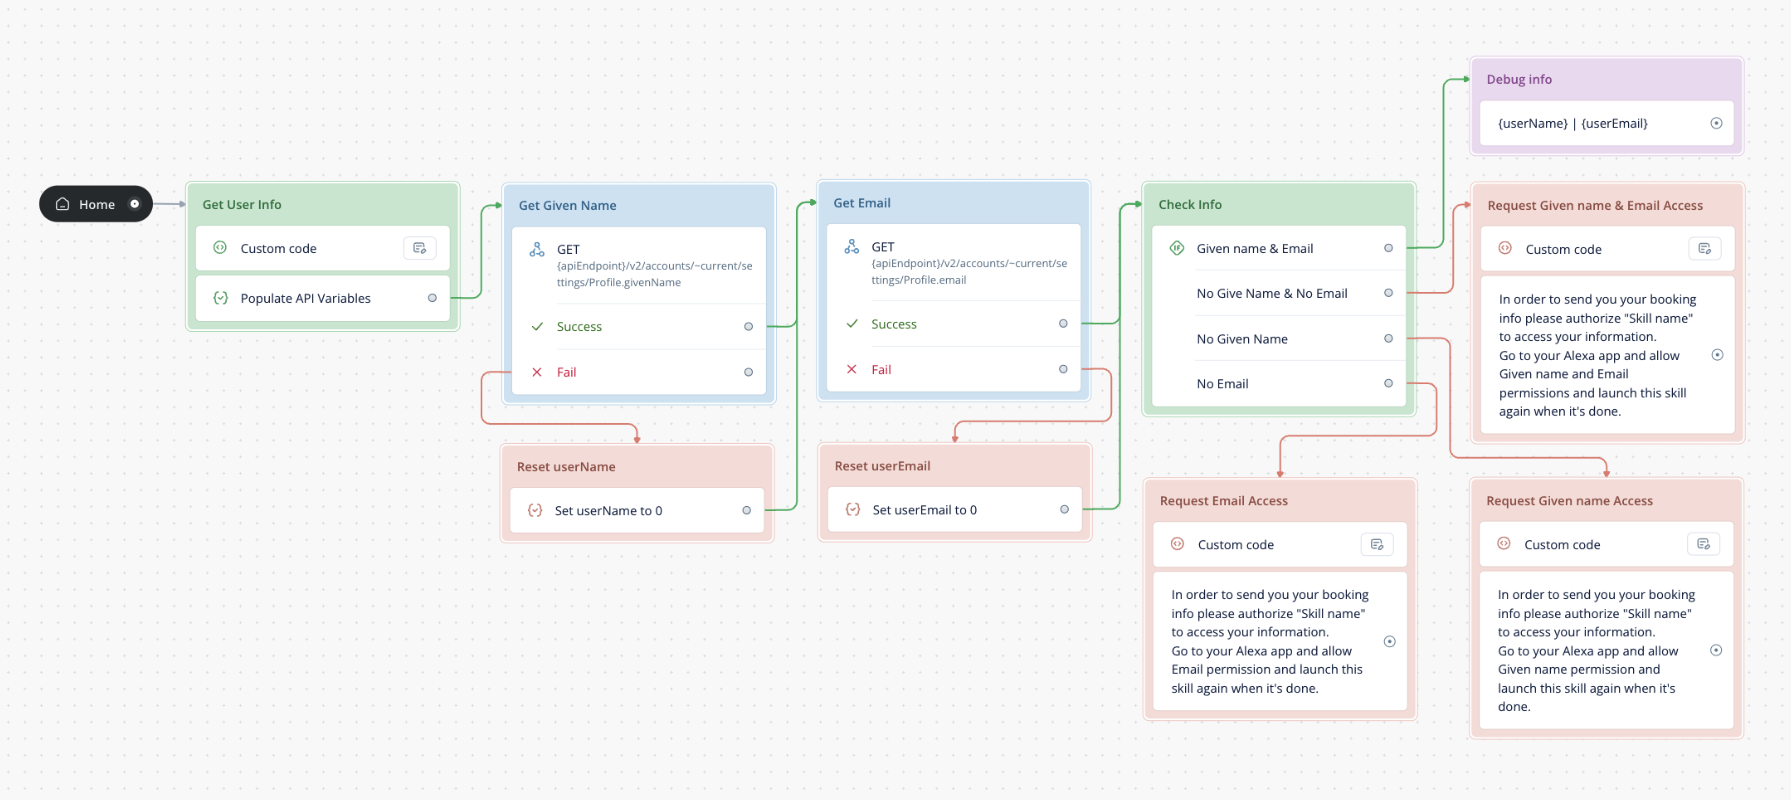
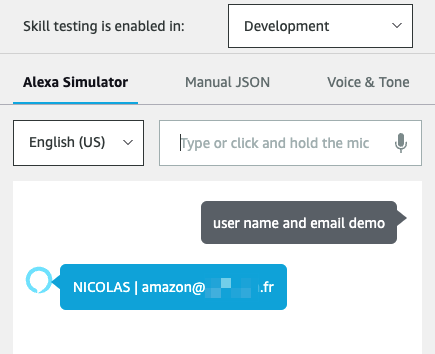
I’ve linked a Speak step to the first condition (when we have access to both given name and email) to debug the info when testing on the Alexa Developer Console or on an Echo device.
Now that you are ready to test, click on the Upload to Alexa button to upload your project to the Alexa Developer Console. When your project is successfully uploaded, you can click on the Test on Alexa button or go to <https://developer.amazon.com/alexa/console/ask>
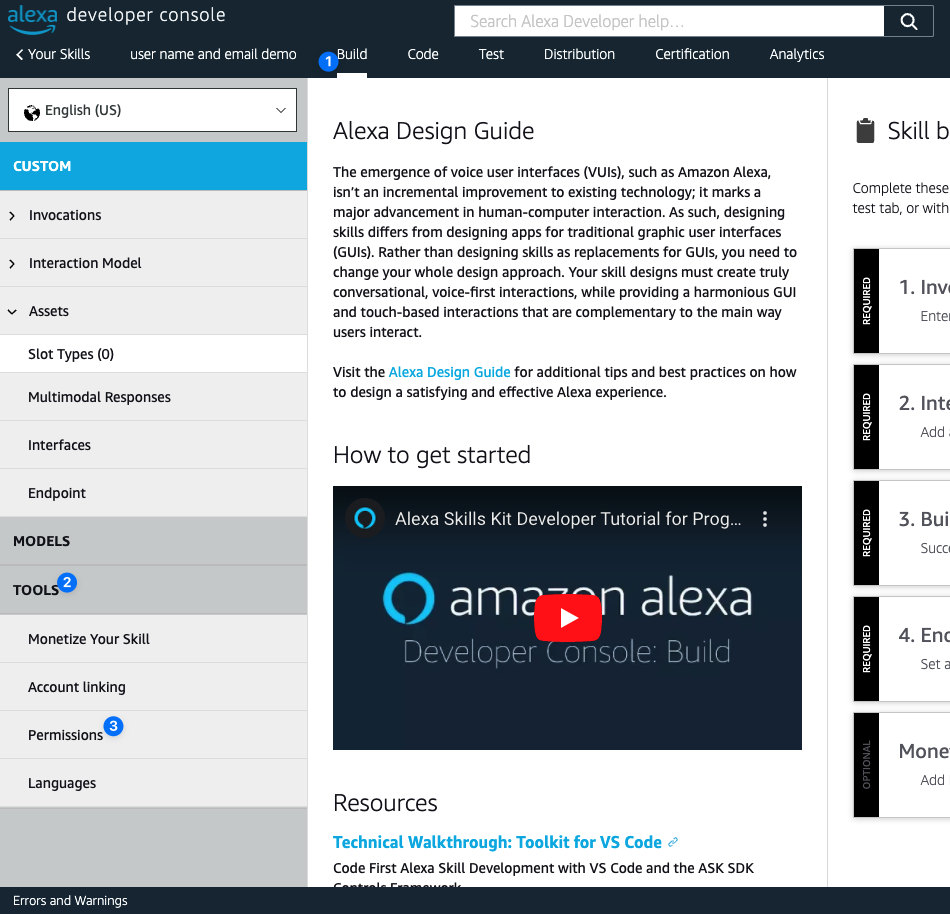
On the console, you want to click on the Build tab > TOOLS section > Permissions
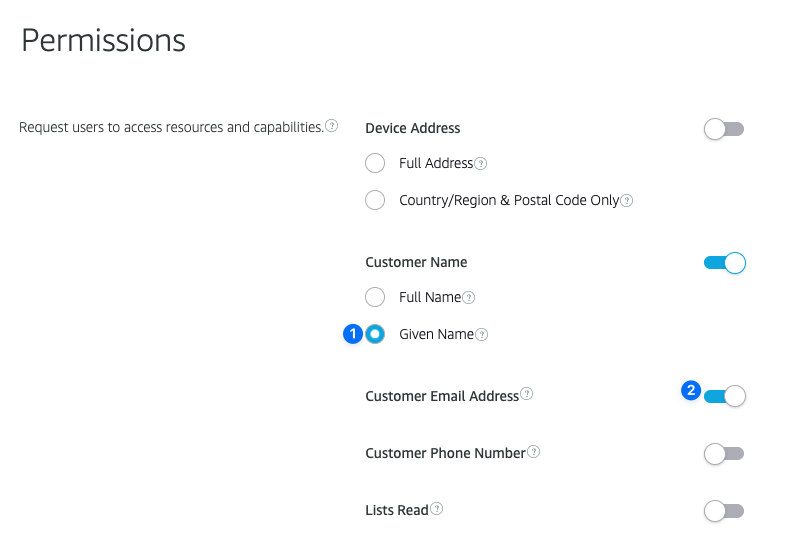
And from there, activate the needed permissions:
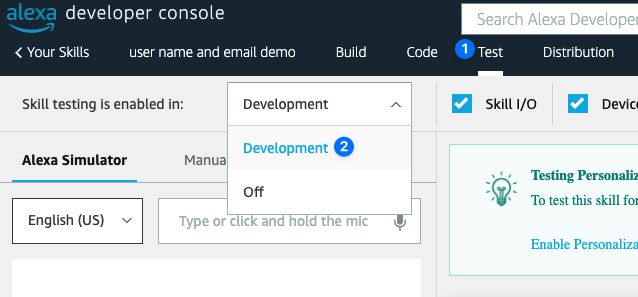
Finally, go to the Test tab, activate the skill for development if not already and run a test.
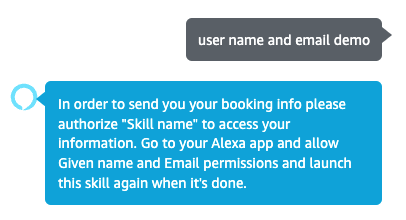
If you haven’t given access to given name and email you will have this result
If you’ve already give access to given name and email you should have this result
Further reading
Alexa Developer Documentation: Request Customer Contact Information for Use in Your Skill
Updated about 1 year ago