Button step
Introduction
The Button Step in Voiceflow allows you to present users with clickable buttons during a conversation, making it easy for them to select options without typing. This interactive element enhances user experience by providing clear choices and streamlining navigation through your conversational flow.
This guide will walk you through:
- Adding a Button Step to your project
- Creating and configuring buttons
- Setting up paths based on user selections
- Utilizing additional options like No Match, No Reply, and Listen for Other Triggers

Adding the Button Step to Your Canvas
-
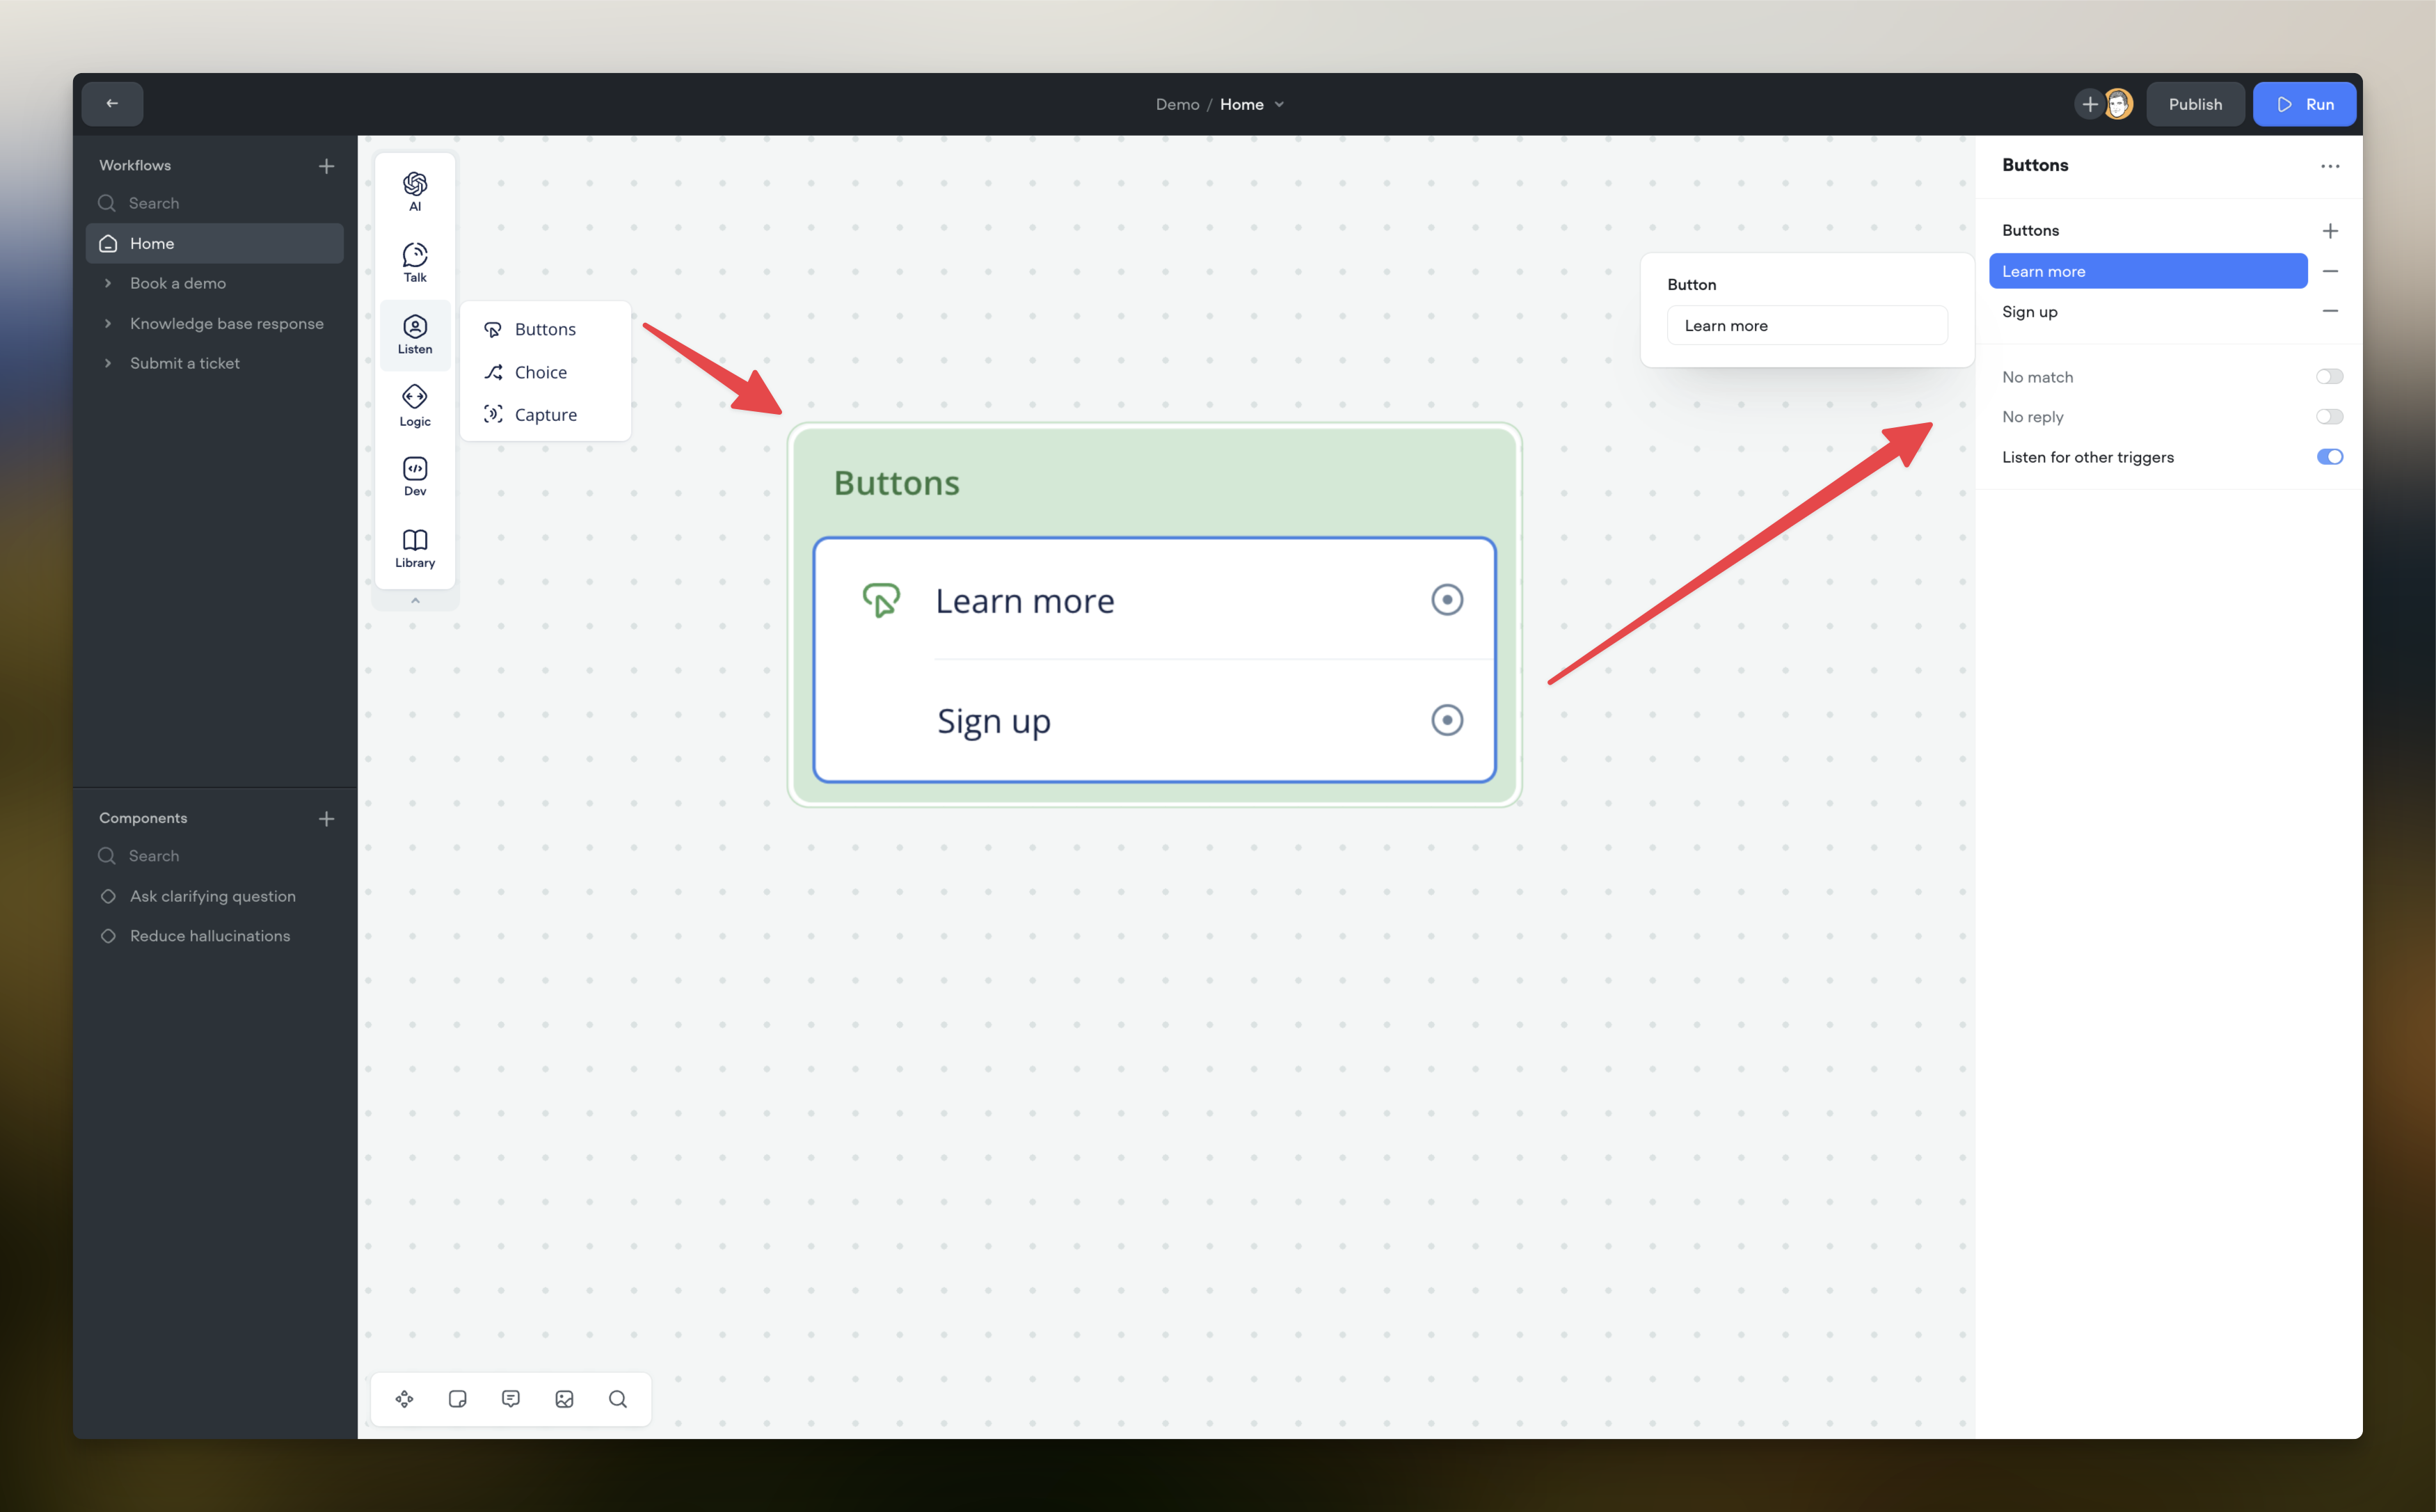
Open the Step Toolbar: On the left side of your Voiceflow workspace, you'll find the step toolbar containing various steps you can use in your project.
-
Drag the Choice Step onto the Canvas: Hover over Listen and locate the Button step and drag it onto your canvas where you want to introduce decision-making based on user input.
Creating Buttons
1. Accessing the Button Editor
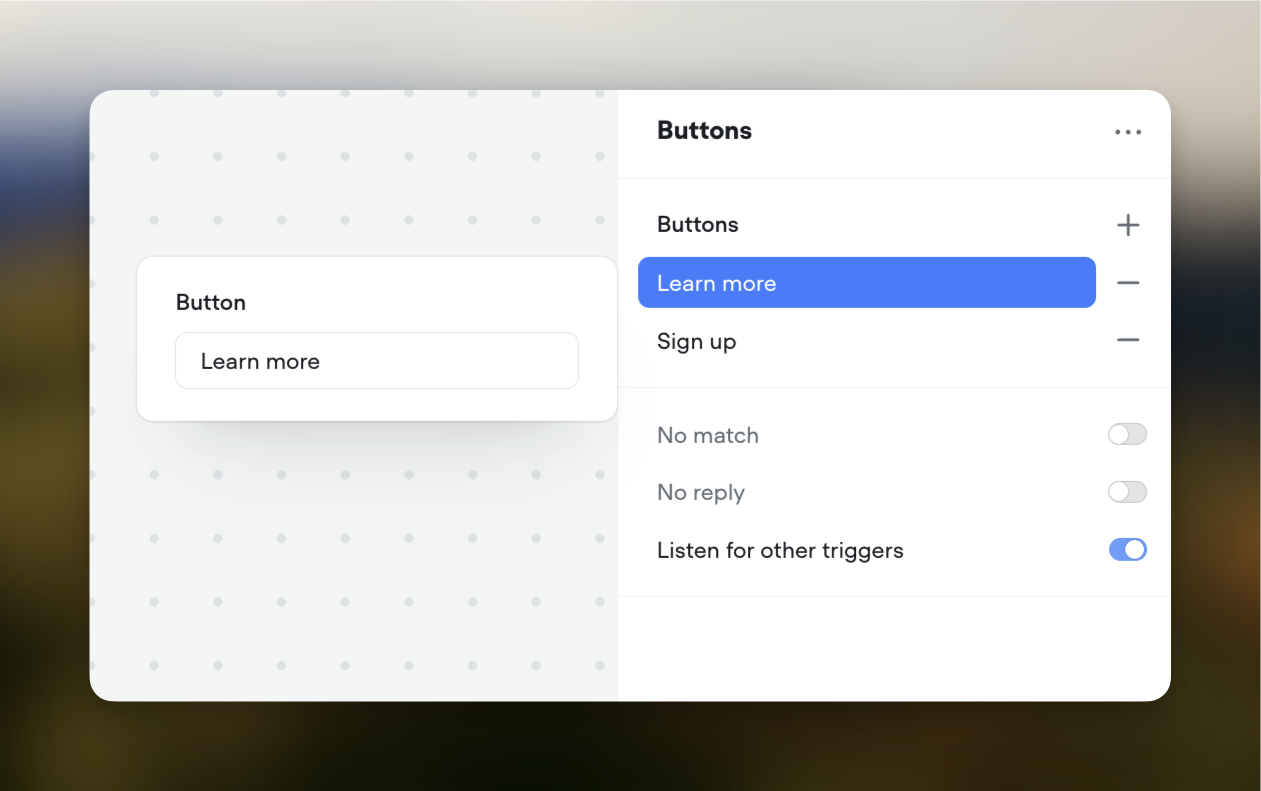
Once the Button Step is on your canvas, click on it to open the Button Editor. This is where you'll create and configure your buttons.
2. Adding Buttons
- Click the "+" Button: Beside the Buttons label, click the "+" button to add a new button.
- Enter Button Label:
- Hardcoded Text: Type the label text directly (e.g., "Yes", "No", "Get Started").
- Using Variables: You can use variables in the button label by typing
{variableName}. This allows the button text to be dynamic based on user data or prior inputs.

3. Multiple Buttons
- You can add multiple buttons by clicking the "+" button again.
- Each button you add will create a corresponding port (connection point) on the Button Step, allowing you to direct the conversation flow based on the user's selection.
Connecting Button Paths
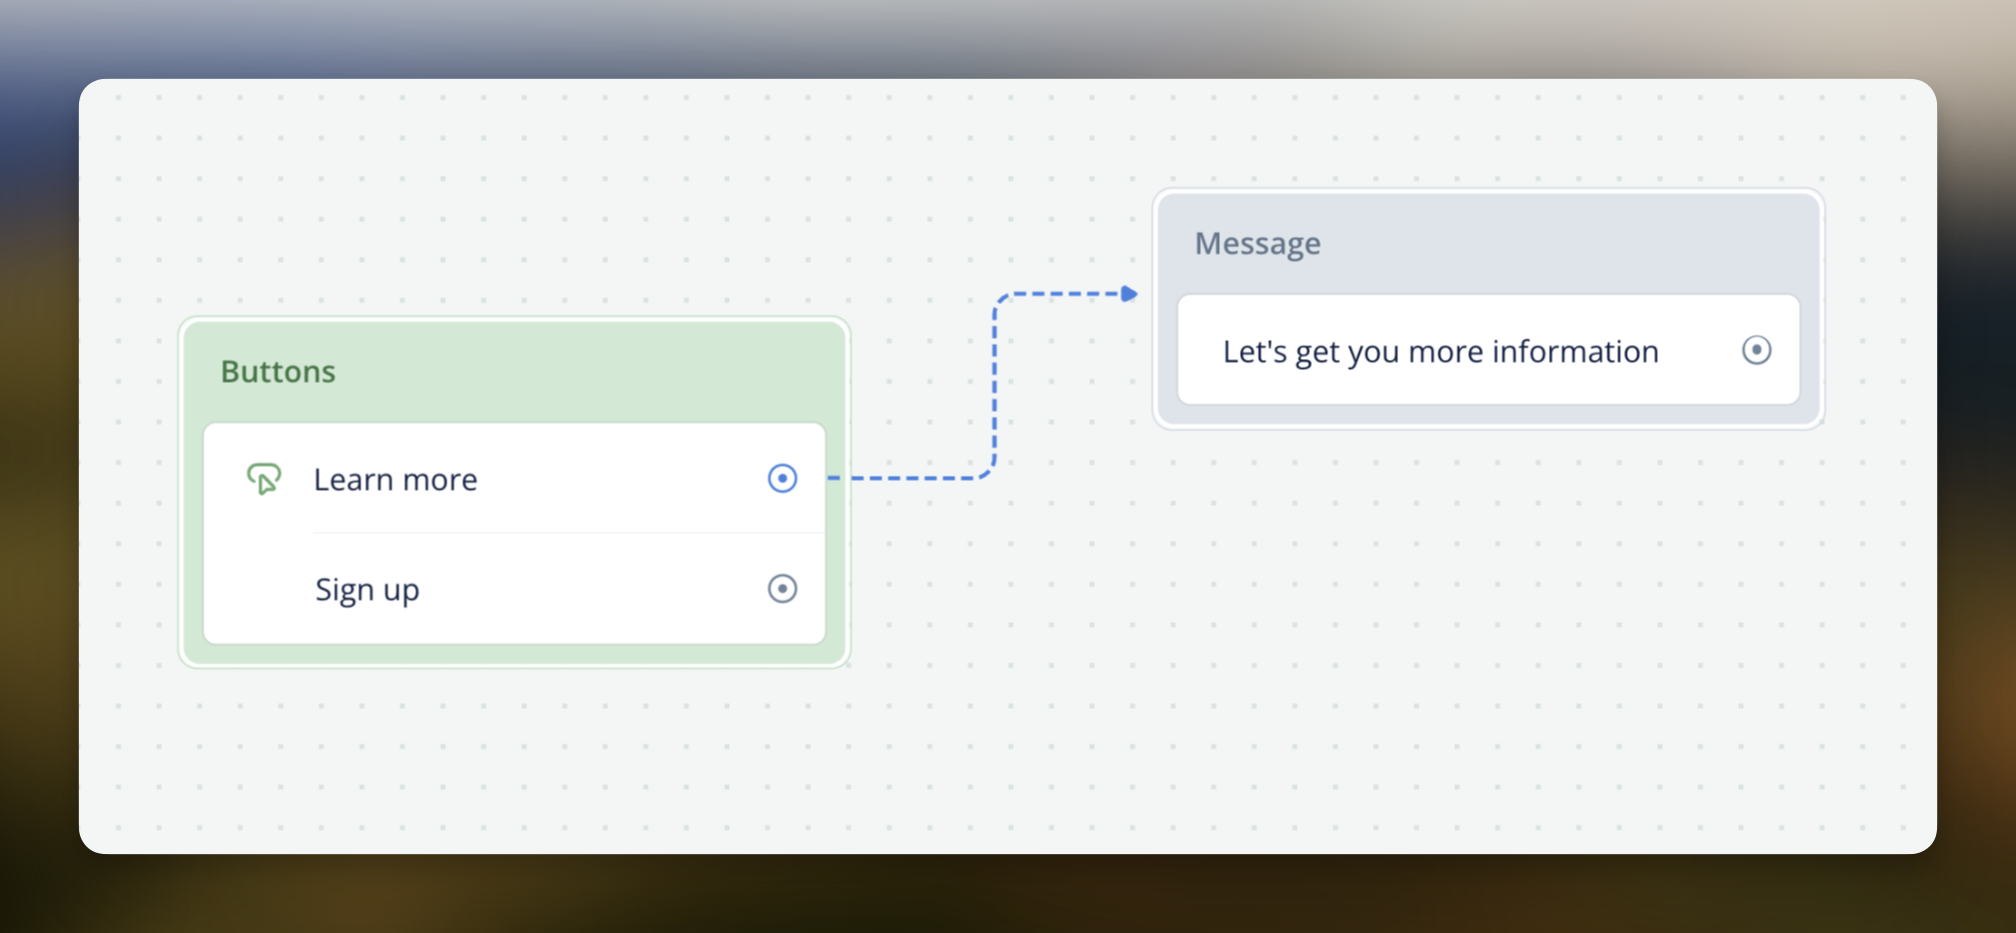
For each button you create, a port appears on the Button Step. This allows you to define what happens when the user selects that button.
How to Connect Paths
-
Locate the Ports: In the Button Step, you'll see ports labeled with your button names.
-
Connect to Other Steps:
- Click and drag from a port to another step on your canvas.
- This sets the path the conversation will follow when the user selects that button.

Example
- Button "Learn More": Connect this port to a step that provides additional information.
- Button "Sign Up": Connect this port to a step that initiates the sign-up process.
Additional Options
The Button Step includes several toggles that enhance how it handles user interactions:
1. No Match
Purpose
- Handles situations where the user's input doesn't match any of the button labels or expected responses.
How to Enable
- Toggle No Match to ON in the Button Editor.
Configuration
- No Match Reprompt:
- Provide a message to be sent when the user's input doesn't match any button labels (e.g., "Please select one of the options above.").
- Follow Path After Reprompts:
- Toggle ON: After the set number of reprompts are exhausted, the conversation will follow the No Match path.
- Toggle OFF: The agent will continue to reprompt indefinitely until the user provides a valid input.
No Match Path
- Enabling No Match creates an additional port labeled No Match on the Button Step.
- You can connect this port to a step that handles unmatched inputs, such as providing assistance or ending the conversation gracefully.
2. No Reply
Purpose
- Manages situations where the user doesn't respond within a specified time frame.
How to Enable
- Toggle No Reply to ON in the Button Editor.
Configuration
- Inactivity Time:
- Set the duration (in seconds) the system should wait for a user response before considering it a no-reply.
- No Reply Reprompt:
- Provide a message to be sent when the user doesn't respond in time (e.g., "Are you still there?").
- Follow Path After Reprompts:
- Toggle ON: After the set number of reprompts are exhausted, the conversation will follow the No Reply path.
- Toggle OFF: The agent will continue to reprompt indefinitely until the user responds.
No Reply Path
- Enabling No Reply creates an additional port labeled No Reply on the Button Step.
- You can connect this port to a step that handles no-response situations, such as ending the session or providing alternative contact options.
3. Listen for Other Triggers
Purpose
- Allows the agent to recognize and respond to other intents while the Button Step is active.
How to Enable
- Toggle Listen for Other Triggers to ON in the Button Editor.
Behavior
- ON:
- If the user says something that matches another intent (e.g., "I need help"), the agent will trigger that intent, potentially jumping to a different part of the conversation.
- OFF:
- The agent will focus solely on the Button Step, ignoring other intents until the user makes a selection or the step resolves through No Match or No Reply.
Summary of Button Step Configuration
-
Add Buttons:
- Use the "+" button to create one or more buttons.
- Set labels using hardcoded text or variables.
- Each button creates a port for connecting conversation paths.
-
Configure Options:
- No Match:
- Enable to handle unrecognized inputs.
- Set reprompts and connect the No Match path.
- No Reply:
- Enable to manage user inactivity.
- Set inactivity time, reprompts, and connect the No Reply path.
- Listen for Other Triggers:
- Decide whether the agent should recognize other intents during this step.
- No Match:
Practical Example: Navigating a Menu
Let's illustrate how to use the Button Step in a conversation where the user is choosing from a main menu.
Scenario
You want to present the user with options to View Products, Check Order Status, or Contact Support.
Steps
-
Add a Button Step to Your Canvas.
-
Create Buttons:
- Button 1:
- Label: "View Products"
- Button 2:
- Label: "Check Order Status"
- Button 3:
- Label: "Contact Support"
- Button 1:
-
Connect Paths:
- View Products Port: Connect to a step that displays product categories.
- Check Order Status Port: Connect to a step that asks for the order number.
- Contact Support Port: Connect to a step that provides support contact options.
-
Configure No Match:
- Enable No Match: Toggle No Match to ON.
- No Match Reprompt: "I'm sorry, I didn't catch that. Please select one of the options above."
- Follow Path After Reprompts: Toggle ON.
- Connect No Match Port: Connect to a step that offers to transfer the user to a human agent.
-
Configure No Reply:
- Enable No Reply: Toggle No Reply to ON.
- Inactivity Time: Set to 30 seconds.
- No Reply Reprompt: "Are you still there? Please select an option to continue."
- Follow Path After Reprompts: Toggle ON.
- Connect No Reply Port: Connect to a step that ends the conversation politely.
-
Listen for Other Triggers:
- Enable: Toggle Listen for Other Triggers to ON.
- Behavior: If the user says something like "I need help with my account," the agent can recognize this intent and respond accordingly.
Conversation Flow Example
-
Agent: "Welcome! How can I assist you today?"
[Displays Buttons: View Products | Check Order Status | Contact Support] -
User: "I want to see what's new."
-
Agent: [Since "what's new" doesn't match a button label but could match an intent for viewing products, and Listen for Other Triggers is ON]
"Great! Let me show you our latest products."
[Proceeds to the View Products path] -
User: [No response within 30 seconds]
-
Agent: "Are you still there? Please select an option to continue."
[Waits for user response] -
User: [Still no response]
-
Agent: [After exhausting reprompts, follows No Reply path]
"It seems we're having trouble connecting. Please reach out if you need assistance later. Goodbye!"
Best Practices
- Clear Button Labels: Ensure button text is concise and clearly indicates the action.
- Use Variables Wisely: When using variables in button labels, make sure they are populated to avoid confusing the user.
- Plan for Unrecognized Inputs: Enable No Match to handle unexpected responses gracefully.
- Manage Inactivity: Use No Reply to keep the conversation active or end it politely if the user is unresponsive.
- Consider User Intent: Enabling Listen for Other Triggers allows the agent to be flexible and responsive to user needs beyond the presented options.
- Test Thoroughly: Simulate conversations to ensure all paths and scenarios work as intended.
Updated 9 months ago
