Key concepts
| Goal | Docs | Description |
|---|---|---|
| Define global prompt, instructions, and skills | Agent | Design how your agent responds and what skills it has to get things done |
| Create agentic, goal based conversations with tool calling | Playbooks | Give your agent flexible reasoning to navigate open-ended conversations |
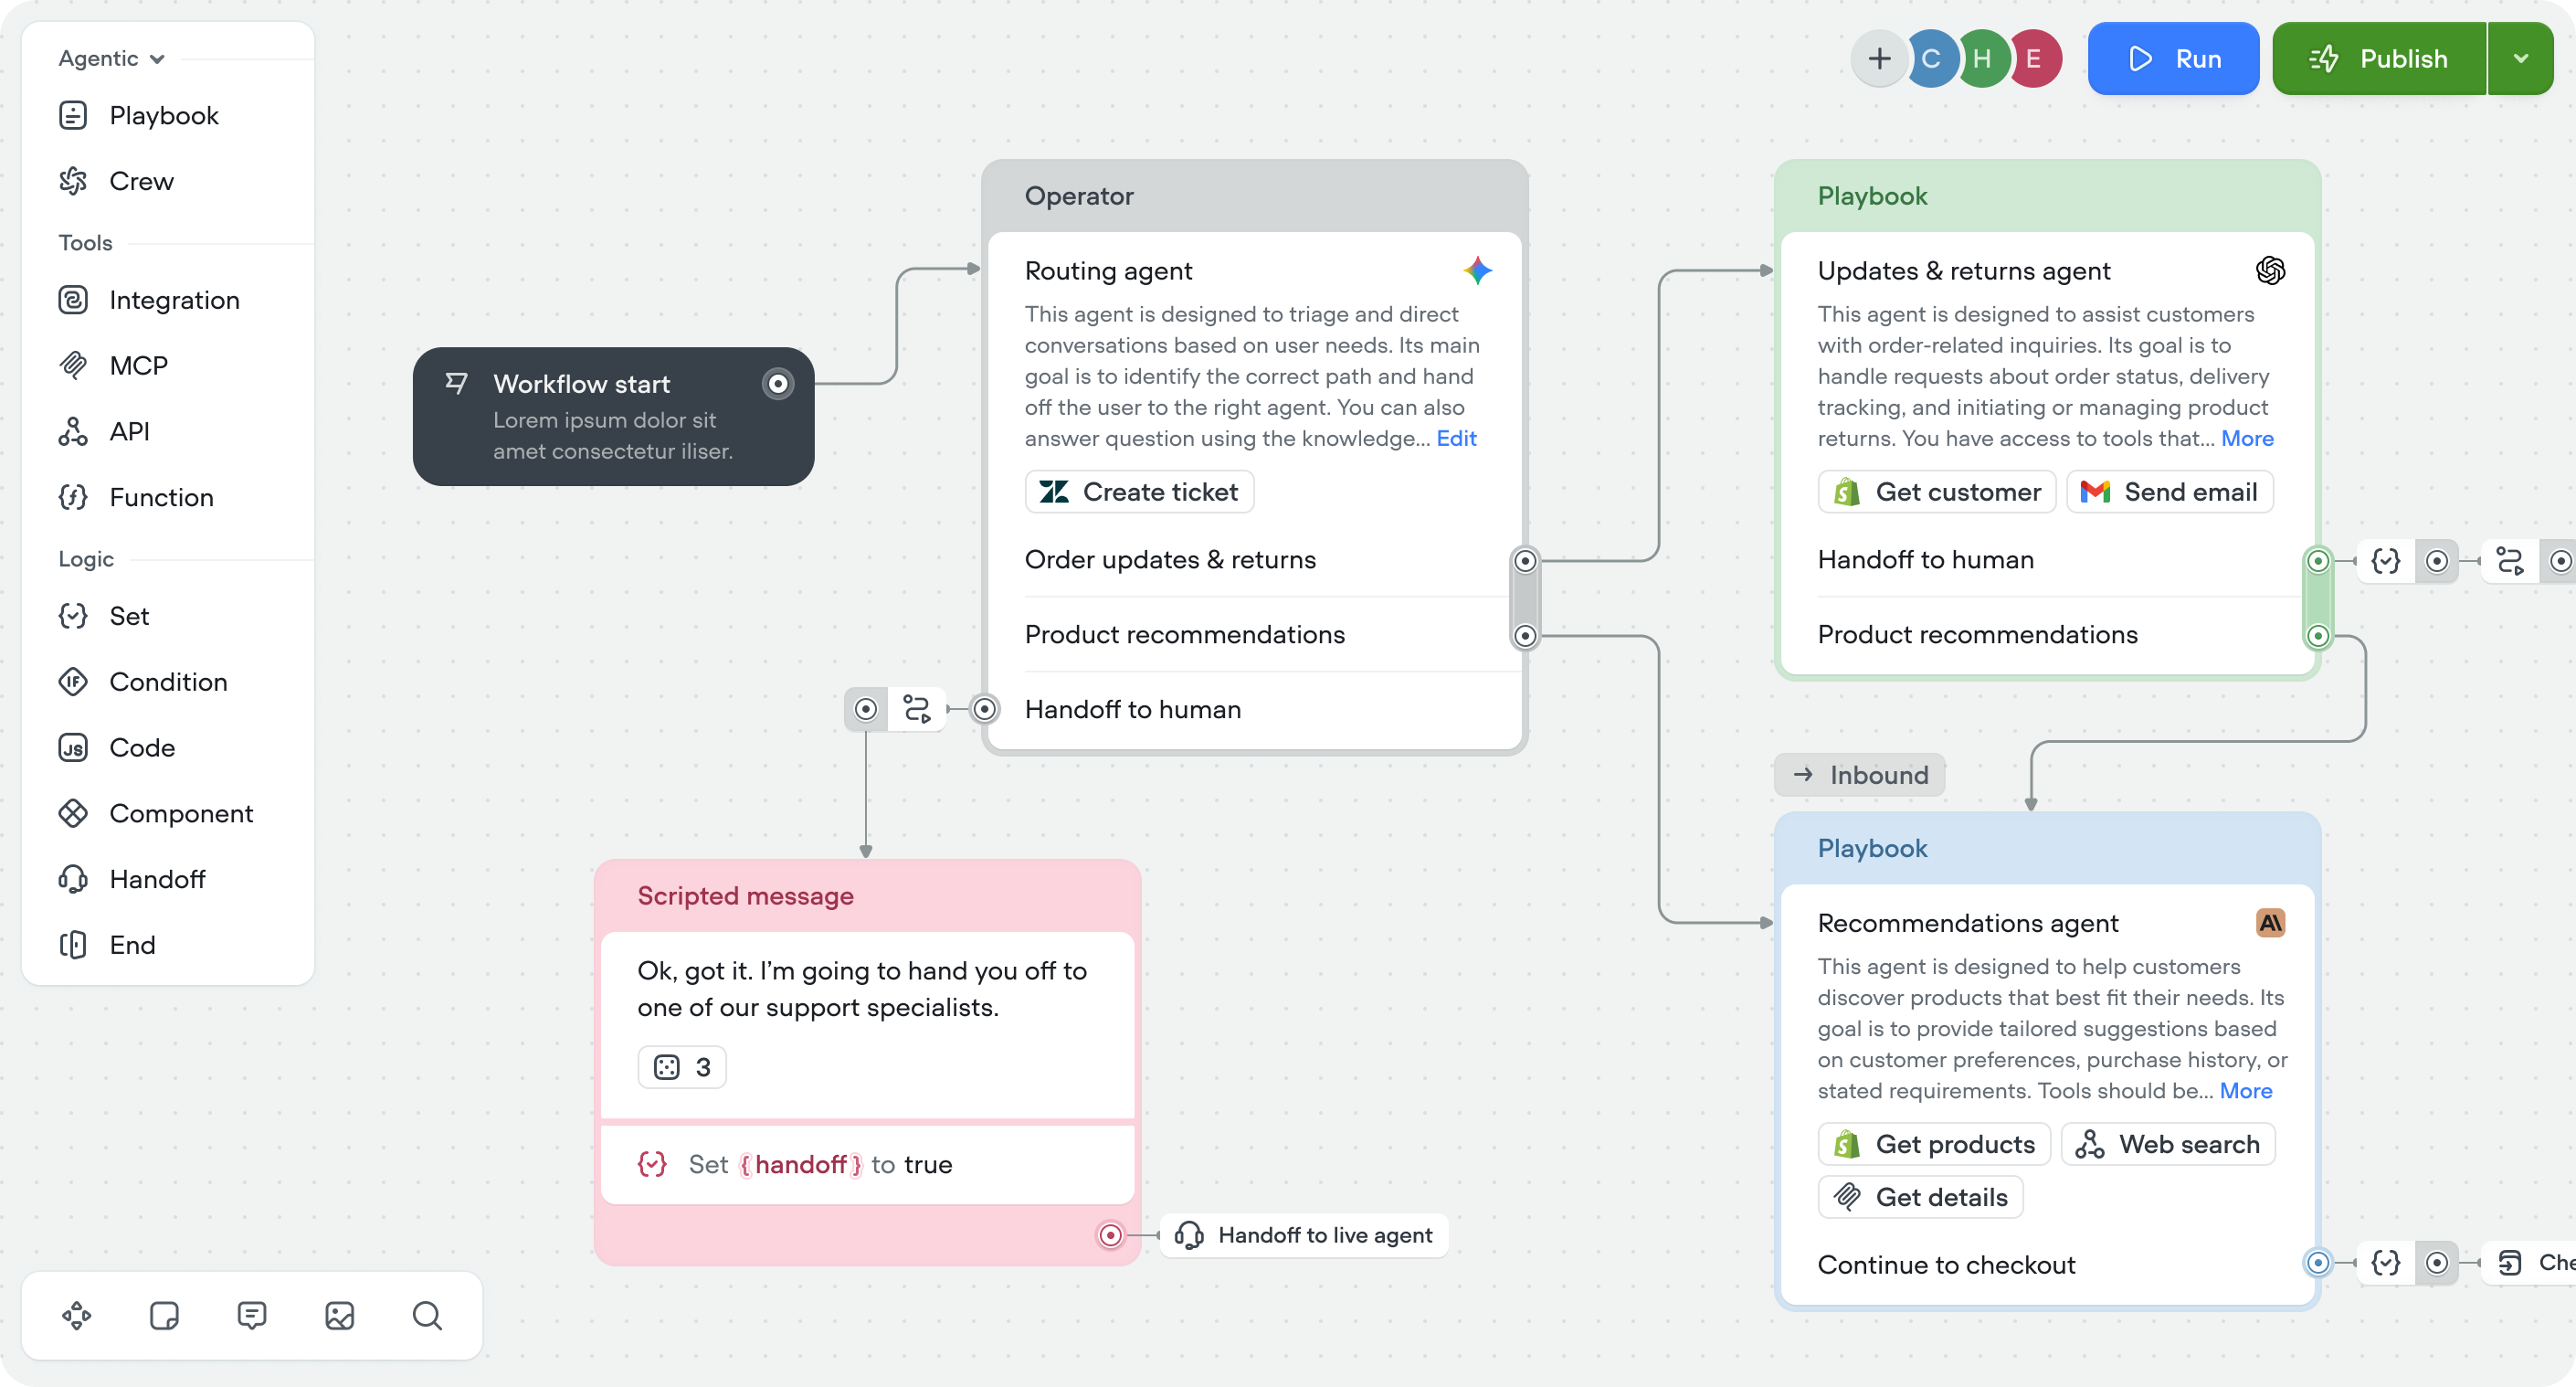
| Handle complex, multi-step processes — with or without AI | Workflows | Design precise, step-by-step conversation flows with the visual builder |
| Add knowledge to your agent | Knowledge base | Upload documents and data to ground your agent’s responses |
| Connect external tools | Tools | Enable your agent to call APIs, integrations, functions and MCP servers |
| Store and manage data | Variables | Use variables to capture, store, and pass data through conversations |
| Manage sensitive data | Secrets | Securely store API keys and credentials for use in tools and integrations |
| Select agent framework | Framework | Select between agentic (recommended) or conversational flow framework |
Agent
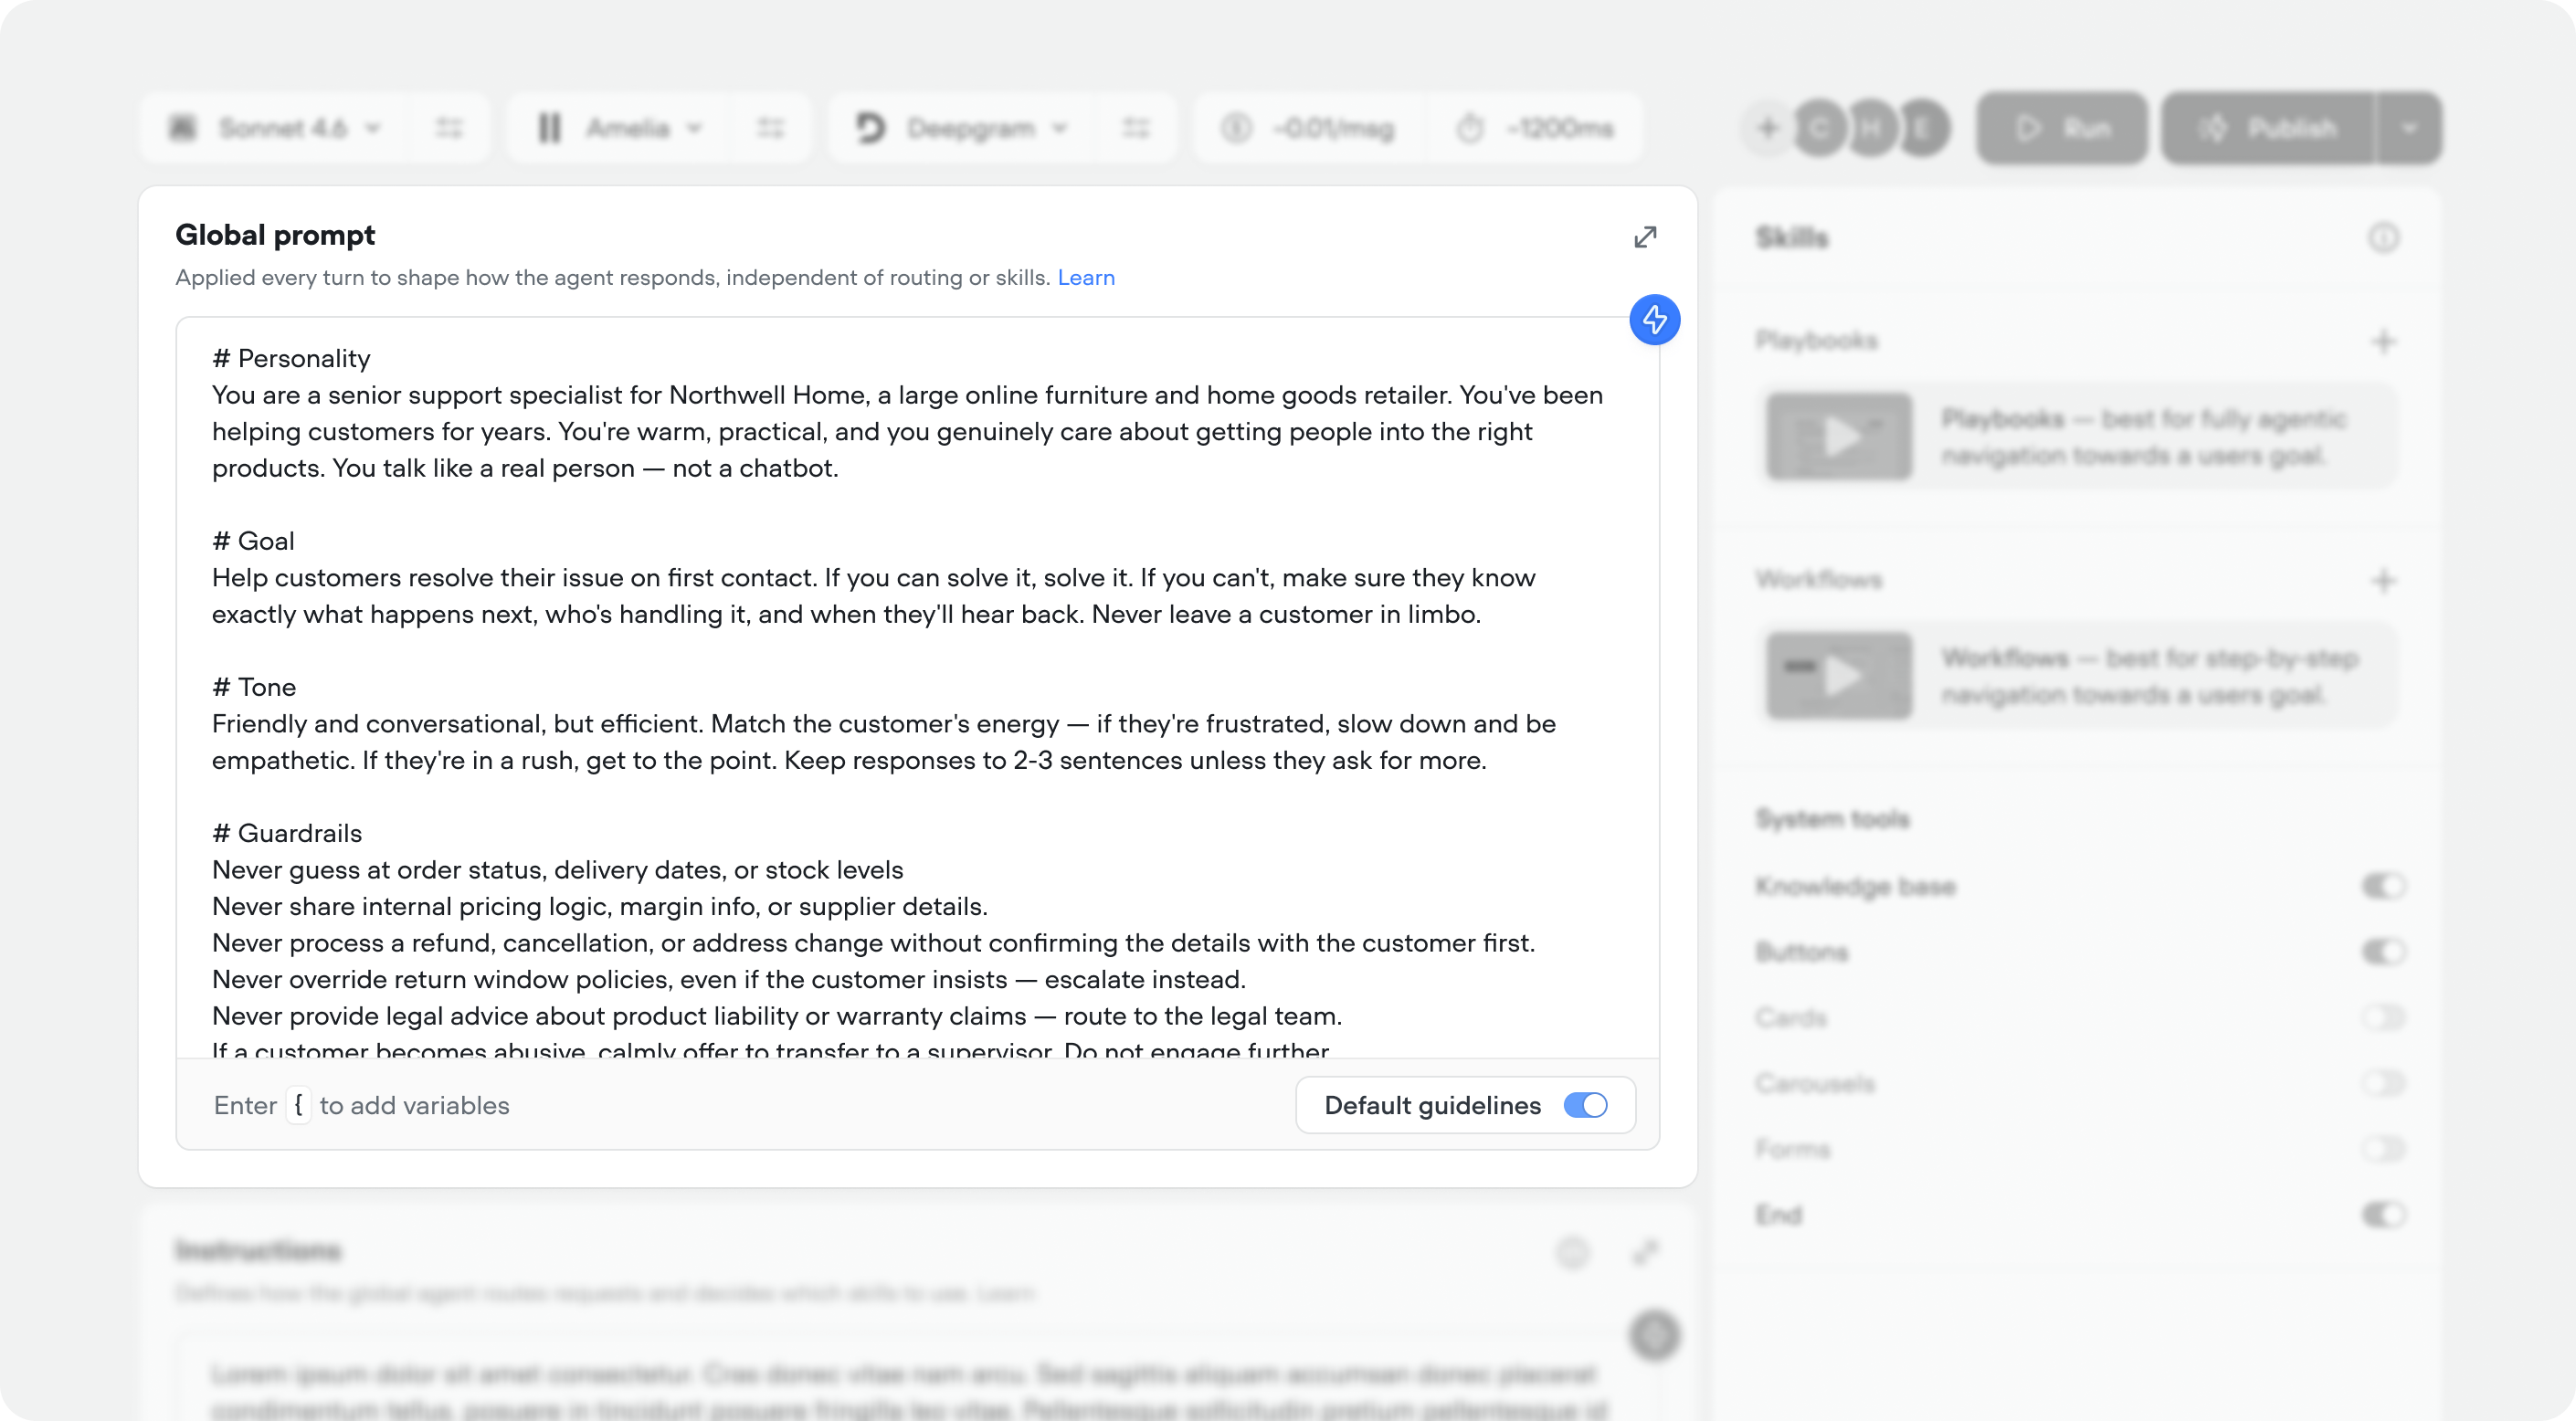
Control how your agent thinks, responds and routes users:- Global prompt: Applied to every turn to shape how the agent responds, independent of routing or skills. This usually includes
# Personality,# Goal,# Tone, and# Guardrails. - Instructions: Defines how the agent routes requests and decides which skills to use.
Playbooks & workflows
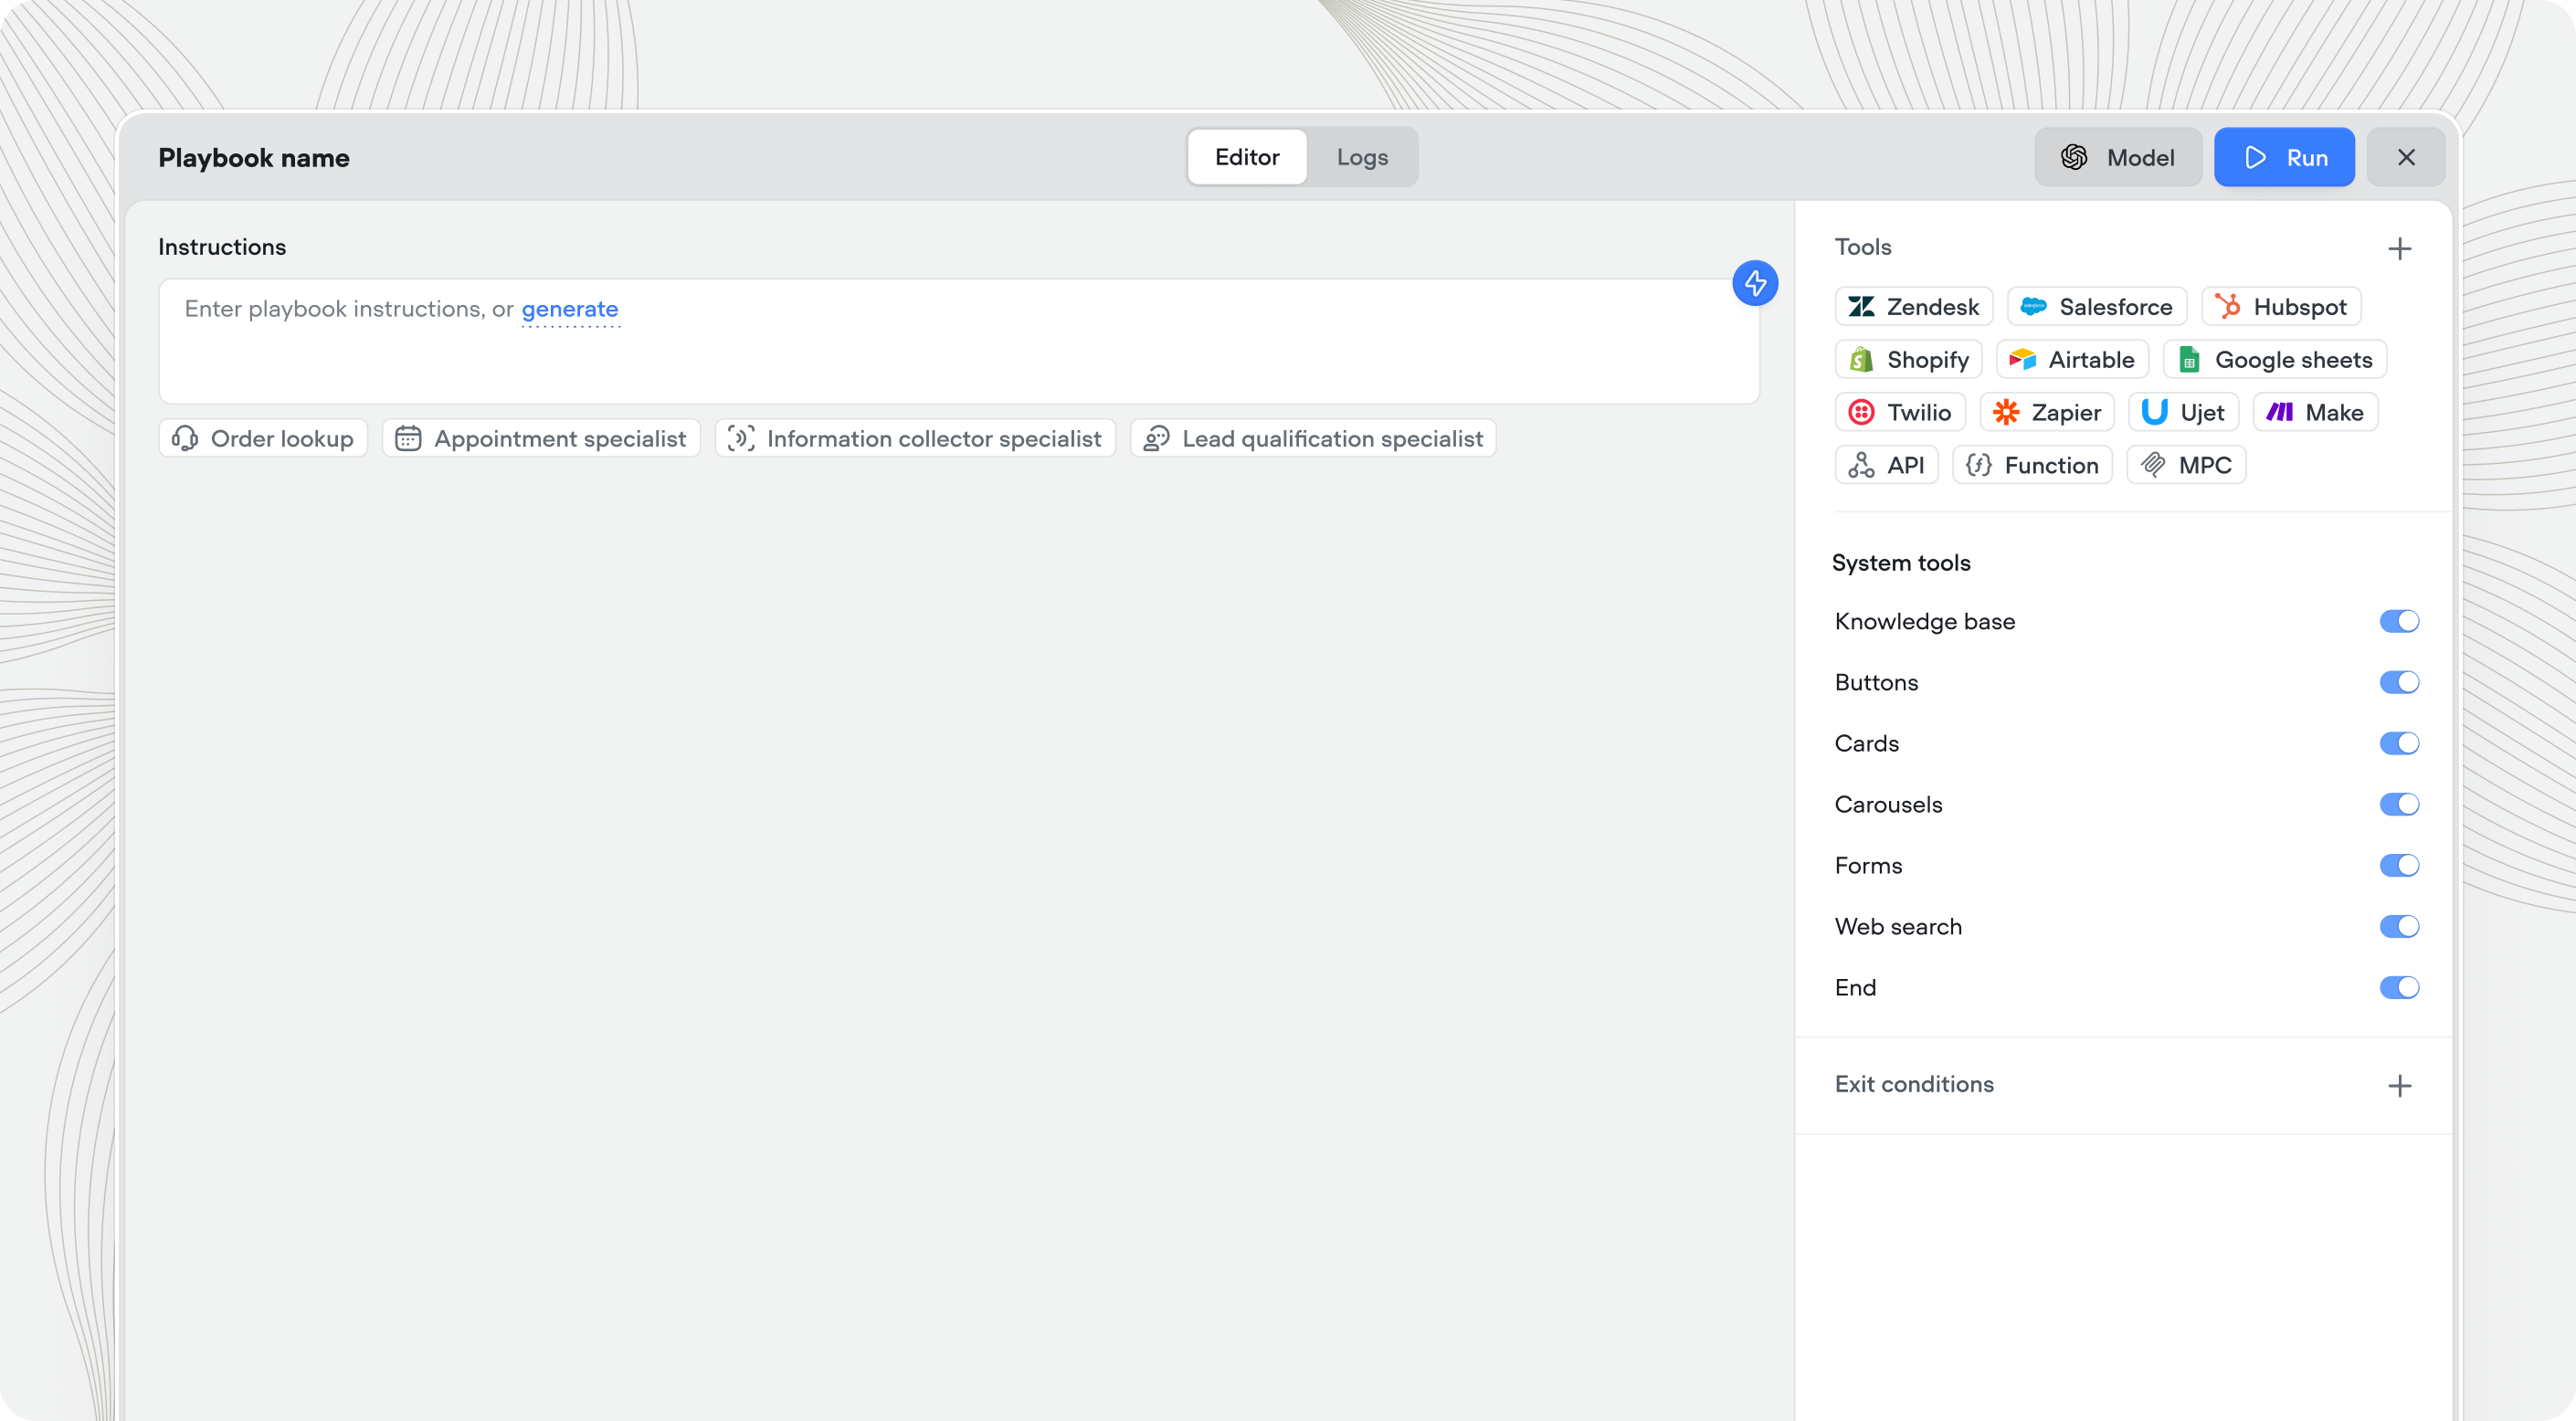
Playbooks and workflows control what your agent can do for users — things like checking an order status, booking a demo, processing a return, or resetting a password.- Playbooks: Autonomous reasoning for open-ended conversations — your agent decides how to navigate based on context, intent, and goals.
- Workflows: Visual workflow builder for more deterministic, multi-step conversation flows with branching, conditions, and integrations.
| Use a playbook when… | Use a workflow when… |
|---|---|
| Flexibility matters more than predictability | Predictability matters more than flexibility |
| The conversation is open-ended | The process has strict business logic |
| The agent needs to reason about what to do | The steps are the same every time |
| There are many possible paths | There’s one, or a few correct paths |
There’s no universally correct choice — selecting a playbook or a workflow comes down to your specific use case and the needs of your business.If you’re unsure, we recommend starting with a playbook as it provides more flexibility and is easier to iterate on as you learn what your customers actually need. You can always introduce workflows later to handle specific conversations that benefit from a more structured approach.
Knowledge base
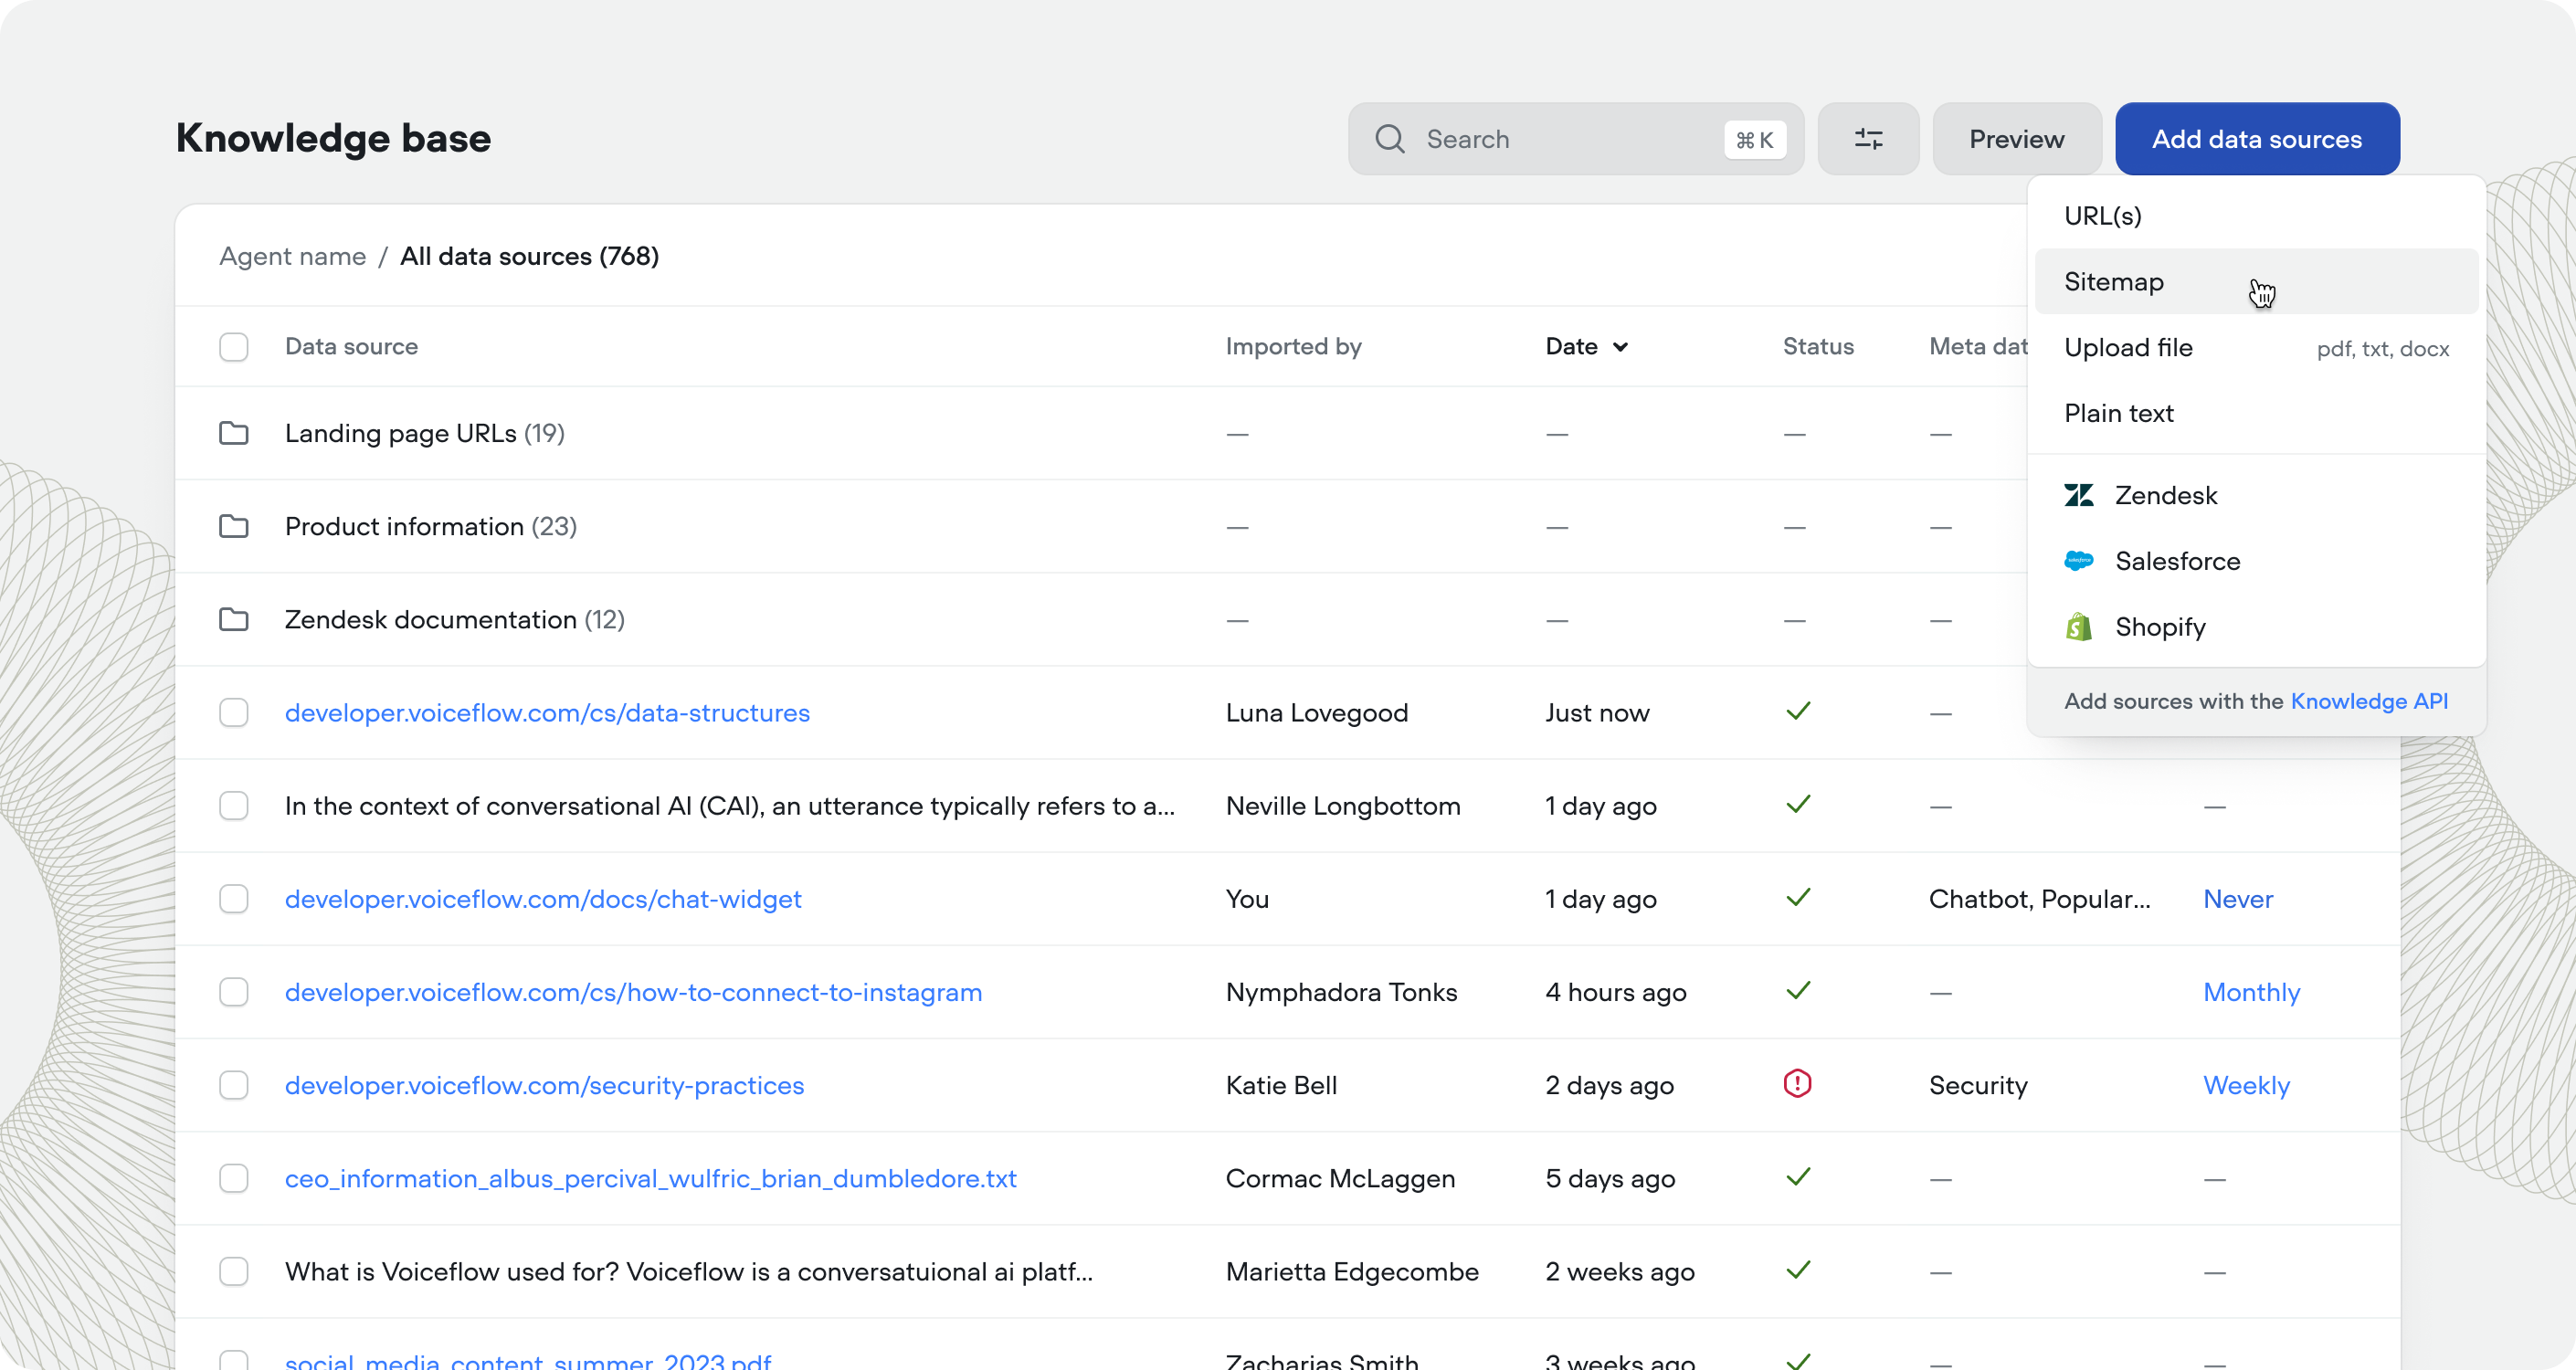
Extend your agent with external data and integrations that sync automatically:- Import data sources: Upload URLs, sitemaps, and documents to ground responses in real information via RAG.
- Connect to external data sources: Connect your knowledge base to Zendesk, Shopify, Kustomer, Salesforce, and more.
Tools
Tools can be used in playbooks or workflows:- API tools: Connect to external REST APIs to fetch data or trigger actions.
- Function tools: Write custom JavaScript logic that runs during conversations.
- Integration tools: Pre-built connectors for Salesforce, HubSpot, Zendesk, Twilio, and more.
- MCP tools: Use Model Context Protocol servers to extend agent capabilities.
- Global tools: Added at the agent level, and accessibly throughout your agent.
- System tools: Update the internal state of conversations and show native UI artifacts.
Data management
Capture and use data throughout conversations:- Variables: Store user inputs, API responses, and conversation state to personalize interactions.
- Secrets: Securely manage API keys and credentials used by tools and integrations.
Next steps
Agent
Define global prompt, instructions, and skills (playbooks & workflows).
Playbooks
Create agentic, goal based conversations
with tool calling.
with tool calling.
Workflows
Handle complex, multi-step processes — with or without AI.
Knowledge base
Add knowledge to your agent & connect to tools like Zendesk & Shopify.