Custom forms and extensions

Render custom widgets like file upload, date pickers, and more!

Overview

The new extensions feature allows you to render custom responses and effects inside of your Voiceflow Web Chat.

There are two types of extensions:

Response: These are extensions that render a custom widget inside the Voiceflow Web Chat. This includes examples like:

  • File Upload
  • Calendar Picker
  • Payment Modal

Effects These are extensions that don't render a widget, you may use these to change a status icon on your page, deep link someone within your app, or trigger a custom piece of code.

How it works

📘

Find the examples repo here

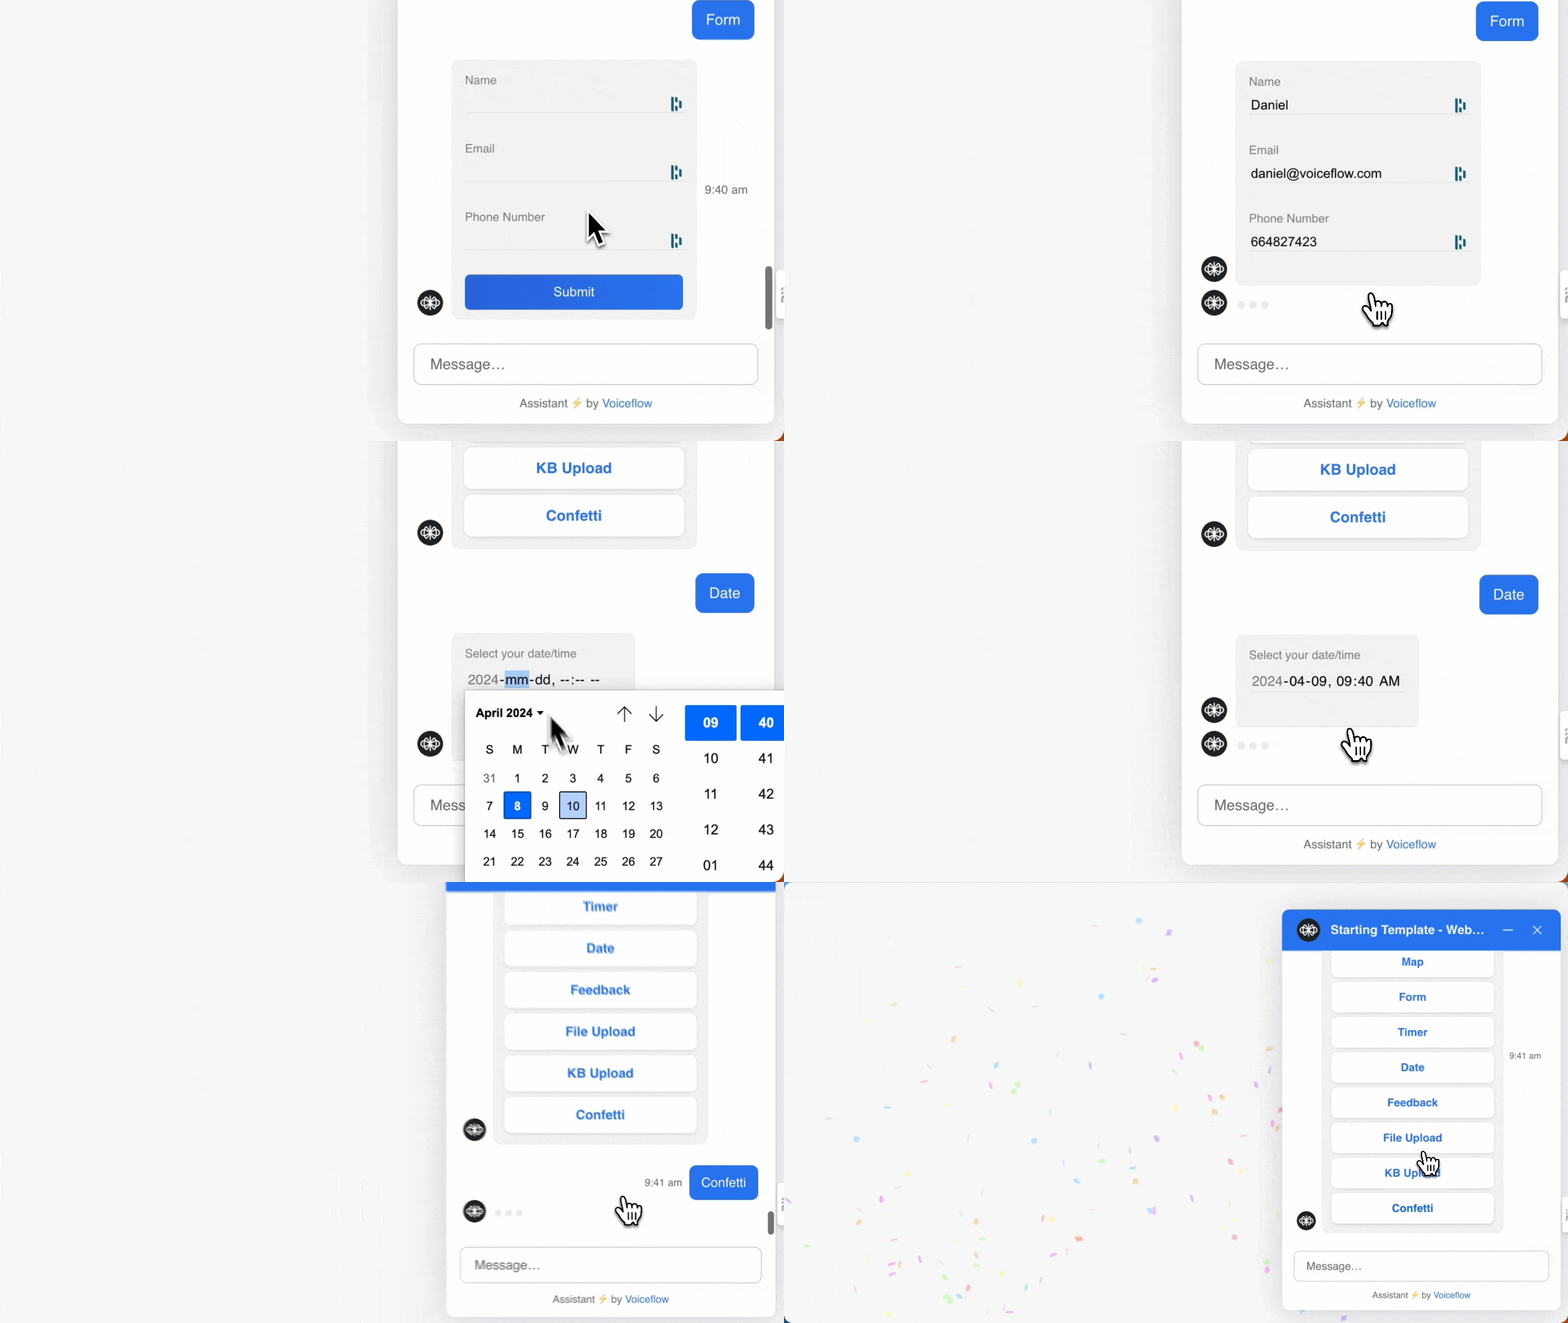
Extensions allows you to use the custom action step or a function in your Voiceflow design to trigger a piece of custom code (the extension) in the code of your website. An example of a form is shown below.

An extension follows the pattern below

Response Extension

interface ResponseExtension {
	name: string,
	type: "response",
	match: (args: { trace: Trace }) => boolean,
	render?: (args: { trace: Trace, element: HTMLDivElement }) => (() => void) | void
}

Effects Extension

interface EffectExtension {
	name: string,
	type: "effect",
	match: (args: { trace: Trace }) => boolean,
	effect?: (args: { trace: Trace }) => Promise<void> | void
}

To activate these extensions, you would include them in your Web Chat installation code in the following way.

window.voiceflow.chat.load({
	...config,
	assistant: {
		extensions: [extension1, extension2, extension3, ...etc]
	}
});

These extensions can be triggered in your design using the custom action step or a function.

Let's walk through an example of a simple form below.

Example 1: Custom Form

1. Create the extension

An extension called Custom_Form is written. This extension contains a field for name, email, and phone number. It also has a submit button. It also contains custom CSS that styles the form to appear like it does above.

Where do I add this on my website?

If you are using a Website builder you can add this above the chat widget script before the tag on your website. You can also include it on a separate file in your website and import the extension as shown in the github repository.

<script>
const FormExtension = {
  name: 'Forms',
  type: 'response',
  match: ({ trace }) =>
    trace.type === 'Custom_Form' || trace.payload.name === 'Custom_Form',
  render: ({ trace, element }) => {
    const formContainer = document.createElement('form');

    formContainer.innerHTML = `
      <style>
        label {
          font-size: 0.8em;
          color: #888;
        }
        input[type="text"], input[type="email"], input[type="tel"] {
          width: 100%;
          border: none;
          border-bottom: 0.5px solid rgba(0, 0, 0, 0.1);
          background: transparent;
          margin: 5px 0;
          outline: none;
          padding: 8px 0; /* Added some padding for better UX */
        }
        .phone {
          width: 150px;
        }
        .invalid {
          border-color: red;
        }
        .submit {
          background: linear-gradient(to right, #2e6ee1, #2e7ff1);
          border: none;
          color: white;
          padding: 10px;
          border-radius: 5px;
          width: 100%;
          cursor: pointer;
        }
      </style>

      <label for="name">Name</label>
      <input type="text" class="name" name="name" required><br><br>

      <label for="email">Email</label>
      <input type="email" class="email" name="email" required pattern="[a-z0-9._%+-]+@[a-z0-9.-]+\\.[a-z]{2,}$" title="Invalid email address"><br><br>

      <label for="phone">Phone Number</label>
      <input type="tel" class="phone" name="phone" required pattern="\\d+" title="Invalid phone number, please enter only numbers"><br><br>

      <input type="submit" class="submit" value="Submit">
    `;

    formContainer.addEventListener('input', function () {
      // Remove 'invalid' class when input becomes valid
      const name = formContainer.querySelector('.name');
      const email = formContainer.querySelector('.email');
      const phone = formContainer.querySelector('.phone');

      if (name.checkValidity()) name.classList.remove('invalid');
      if (email.checkValidity()) email.classList.remove('invalid');
      if (phone.checkValidity()) phone.classList.remove('invalid');
    });

    formContainer.addEventListener('submit', function (event) {
      event.preventDefault();

      const name = formContainer.querySelector('.name');
      const email = formContainer.querySelector('.email');
      const phone = formContainer.querySelector('.phone');

      if (
        !name.checkValidity() ||
        !email.checkValidity() ||
        !phone.checkValidity()
      ) {
        name.classList.add('invalid');
        email.classList.add('invalid');
        phone.classList.add('invalid');
        return;
      }

      formContainer.querySelector('.submit').remove();

      window.voiceflow.chat.interact({
        type: 'complete',
        payload: { name: name.value, email: email.value, phone: phone.value },
      });
    });

    element.appendChild(formContainer);
  },
};
</script>

You can get the full sample of extensions here.

2. Modify the Chat Widget Installation Code

The Web Chat widget is modified to include the extension Custom_Form

window.voiceflow.chat.load({
  verify: {
    projectID: "<ID>"
  },
  url: "https://general-runtime.voiceflow.com",
  versionID: "production",
	assistant: {
		extensions: [FormExtension]
	}
});

There is no limit on the number of extensions you can add.

3. Trigger the Extension with a Custom Action

A custom action is added to the flow with the name Custom_Form. We have turned the 'stop on action' setting on. This means that when this step is reached, the extension will be triggered and the agent will wait for a response to be received before proceeding.

When a user reaches the custom action, it will send the following trace to the Web Chat. This is what triggers the extension to appear.

  {
    "type": "Custom_Form",
    "payload": "{ }",
    "defaultPath": 0,
    "paths": [
      { "event": { "type": "Response_Submitted" } }
    ]
  }

4. Retrieve the response

Responses from the custom action are saved in a variable called last_eventin Voiceflow. This can be accessed and parsed using the JavaScript step.

name = last_event.payload.name

Other Examples

For a number of other examples including file upload, forms, timers, date pickers, thumbs up/down and more please see the video and GitHub repo below.

https://github.com/voiceflow-gallagan/vf-extensions-demo/tree/c7a5eda8116dc915f0b85cf9014baeefe92a22c5