const FORM_FIELDS = [
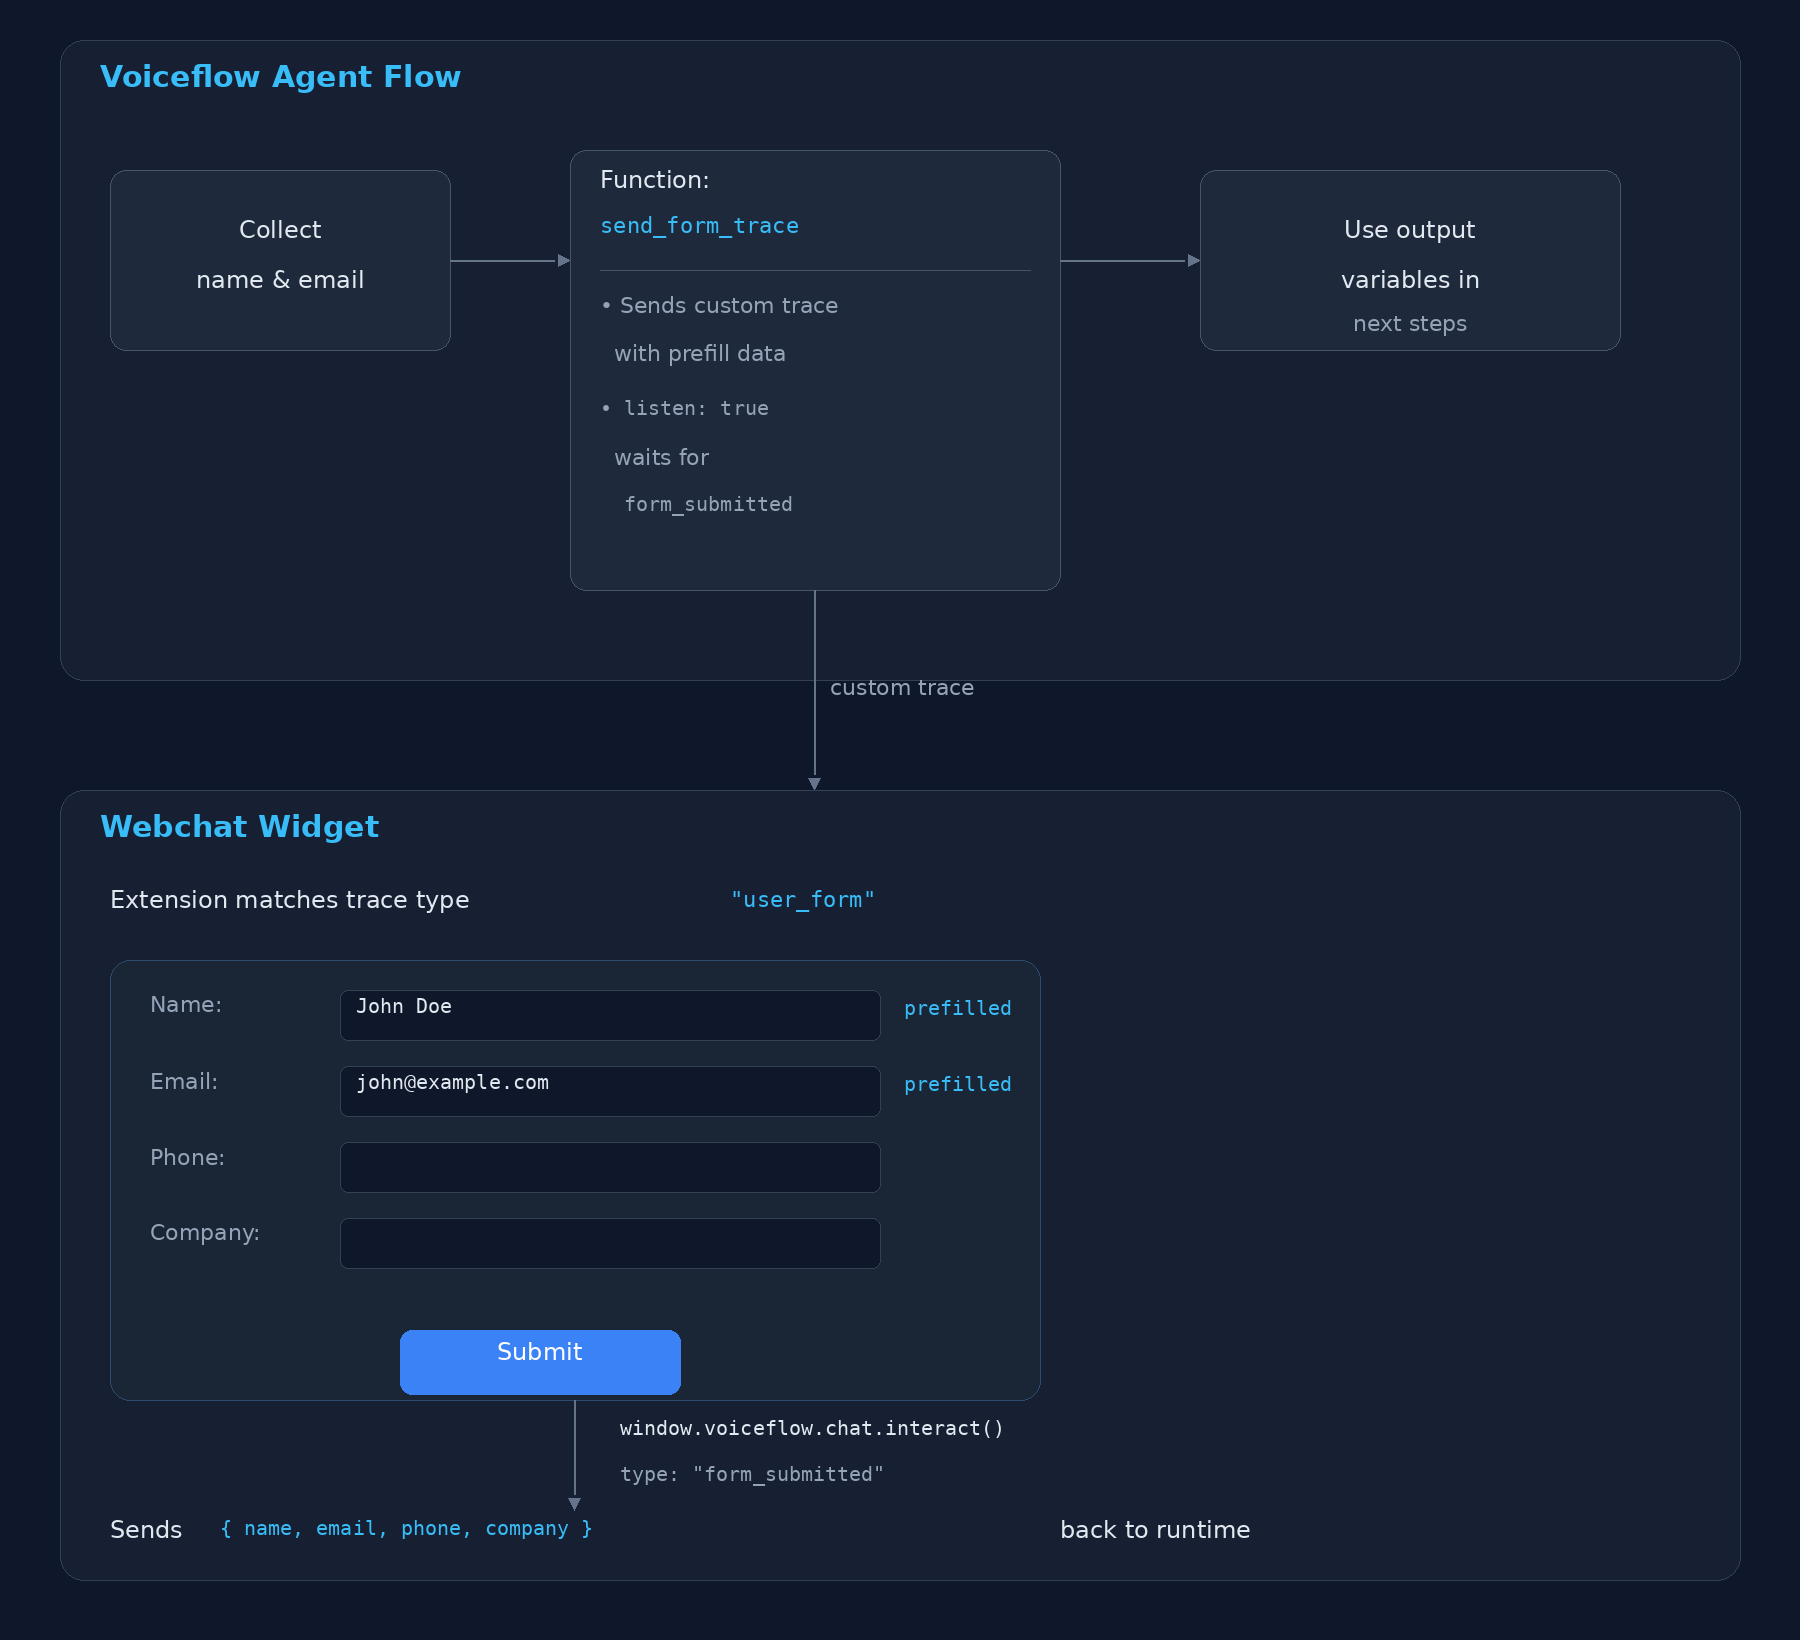
{ name: "name", label: "Name", type: "text", prefilled: true },
{ name: "email", label: "Email", type: "email", prefilled: true },
{ name: "phone", label: "Phone", type: "tel", placeholder: "(555) 123-4567" },
{ name: "company", label: "Company", type: "text", placeholder: "Acme Inc." },
];
const FORM_CSS = [
".vf-form { display:flex; flex-direction:column; gap:12px; padding:16px; font-family:sans-serif; }",
".vf-form label { display:flex; flex-direction:column; gap:4px; font-size:13px; font-weight:500; color:#333; }",
".vf-form input { padding:8px 12px; border:1px solid #ddd; border-radius:6px; font-size:14px; outline:none; transition:border-color 0.15s; }",
".vf-form input:focus { border-color:#387dff; }",
".vf-form input.error { border-color:#e74c3c; }",
".vf-form button { padding:10px 16px; background:#387dff; color:#fff; border:none; border-radius:6px; font-size:14px; font-weight:600; cursor:pointer; margin-top:4px; }",
".vf-form button:hover { background:#2f68db; }",
".vf-form button:disabled { background:#ccc; cursor:not-allowed; }",
].join("\n");
function createFormField(field, prefillData) {
const label = document.createElement("label");
label.textContent = field.label;
const input = document.createElement("input");
input.type = field.type;
input.name = field.name;
input.required = true;
if (field.prefilled && prefillData[field.name]) {
input.value = prefillData[field.name];
}
if (field.placeholder) {
input.placeholder = field.placeholder;
}
label.appendChild(input);
return label;
}
const FormExtension = {
name: "UserForm",
type: "response",
match: function (ctx) {
return ctx.trace.type === "user_form";
},
render: function (ctx) {
const prefillData = ctx.trace.payload || {};
const style = document.createElement("style");
style.textContent = FORM_CSS;
const form = document.createElement("form");
const container = document.createElement("div");
container.className = "vf-form";
FORM_FIELDS.forEach(function (field) {
container.appendChild(createFormField(field, prefillData));
});
const button = document.createElement("button");
button.type = "submit";
button.textContent = "Submit";
container.appendChild(button);
form.appendChild(style);
form.appendChild(container);
form.addEventListener("submit", function (event) {
event.preventDefault();
const data = {};
let valid = true;
FORM_FIELDS.forEach(function (field) {
const input = form.querySelector('input[name="' + field.name + '"]');
const value = input.value.trim();
input.classList.toggle("error", !value);
if (!value) valid = false;
data[field.name] = value;
});
if (!valid) return;
button.disabled = true;
form.querySelectorAll("input").forEach(function (input) {
input.disabled = true;
});
window.voiceflow.chat.interact({
type: "form_submitted",
payload: data,
});
});
ctx.element.appendChild(form);
},
};