How do I test my assistant on-the-go or in-canvas? — Testing your bot as-you-build, in-tool

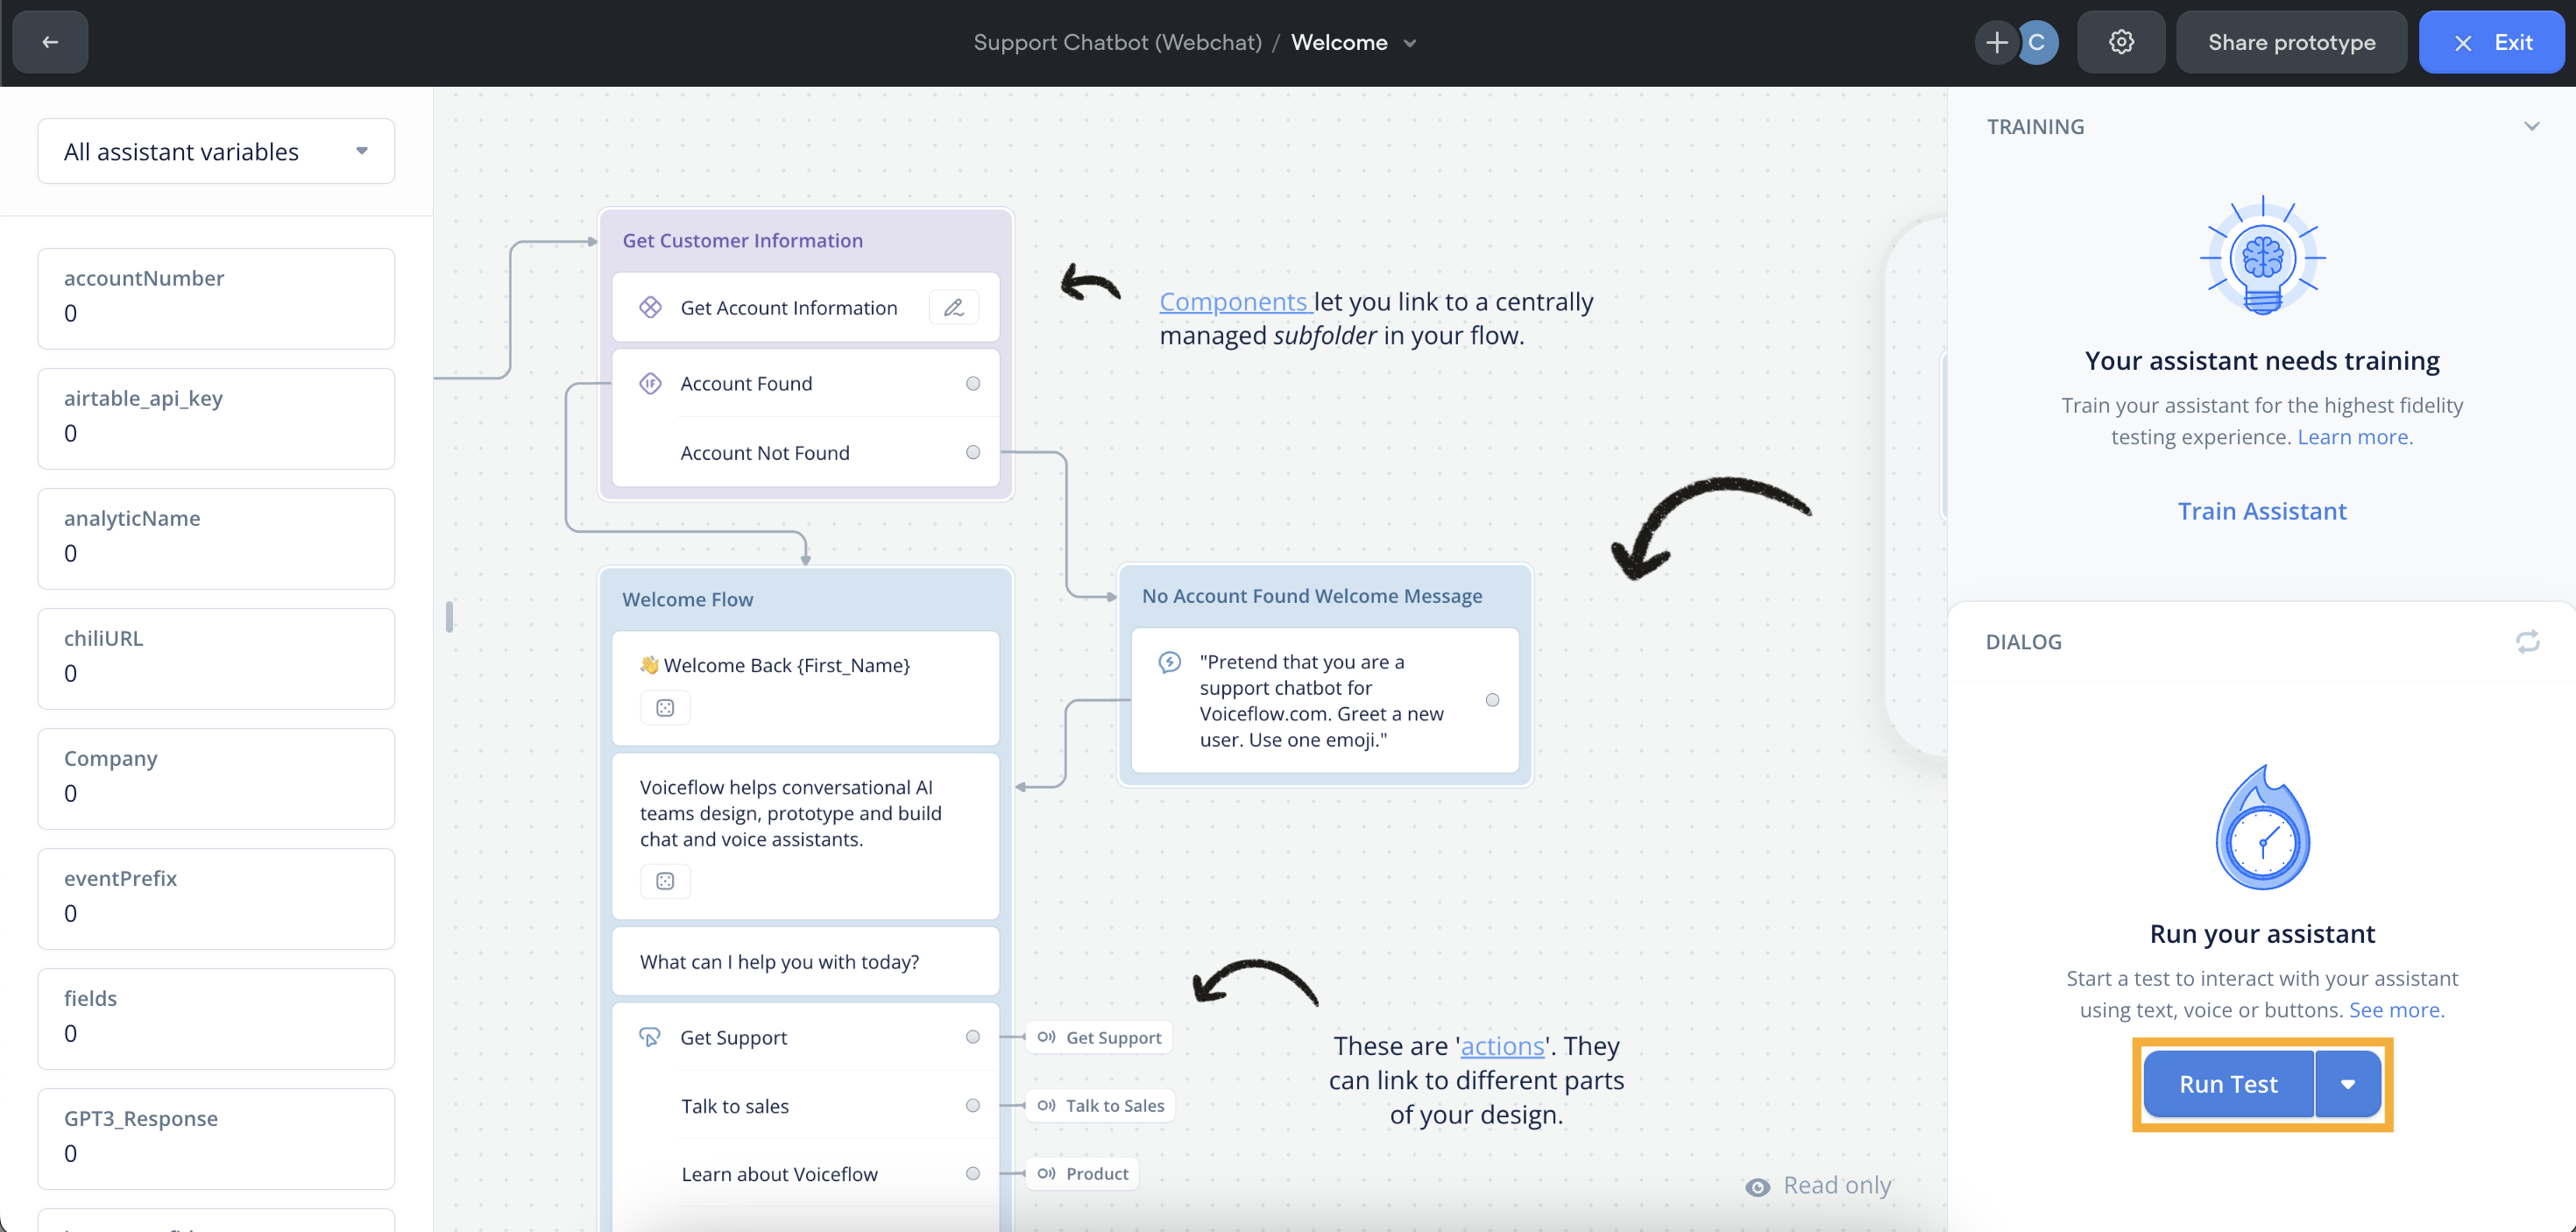
To run a test from the start of your flow, click the play icon in the top right of your assistant's canvas. This opens the Test modal where you can preview your design.

Make sure to train your test assistant if you’ve made changes to your intents, utterances, entities or variables. Doing this ensures you’re testing with up-to-date interaction model data. Once your assistant is trained, click the ‘Run Test’ button to begin.

You can also toggle specific testing conditions with variables or personas by clicking the arrow located next to Run Test and by choosing 'Select variable state'.

Tip: You can quickly launch the Test modal by hitting ‘R’

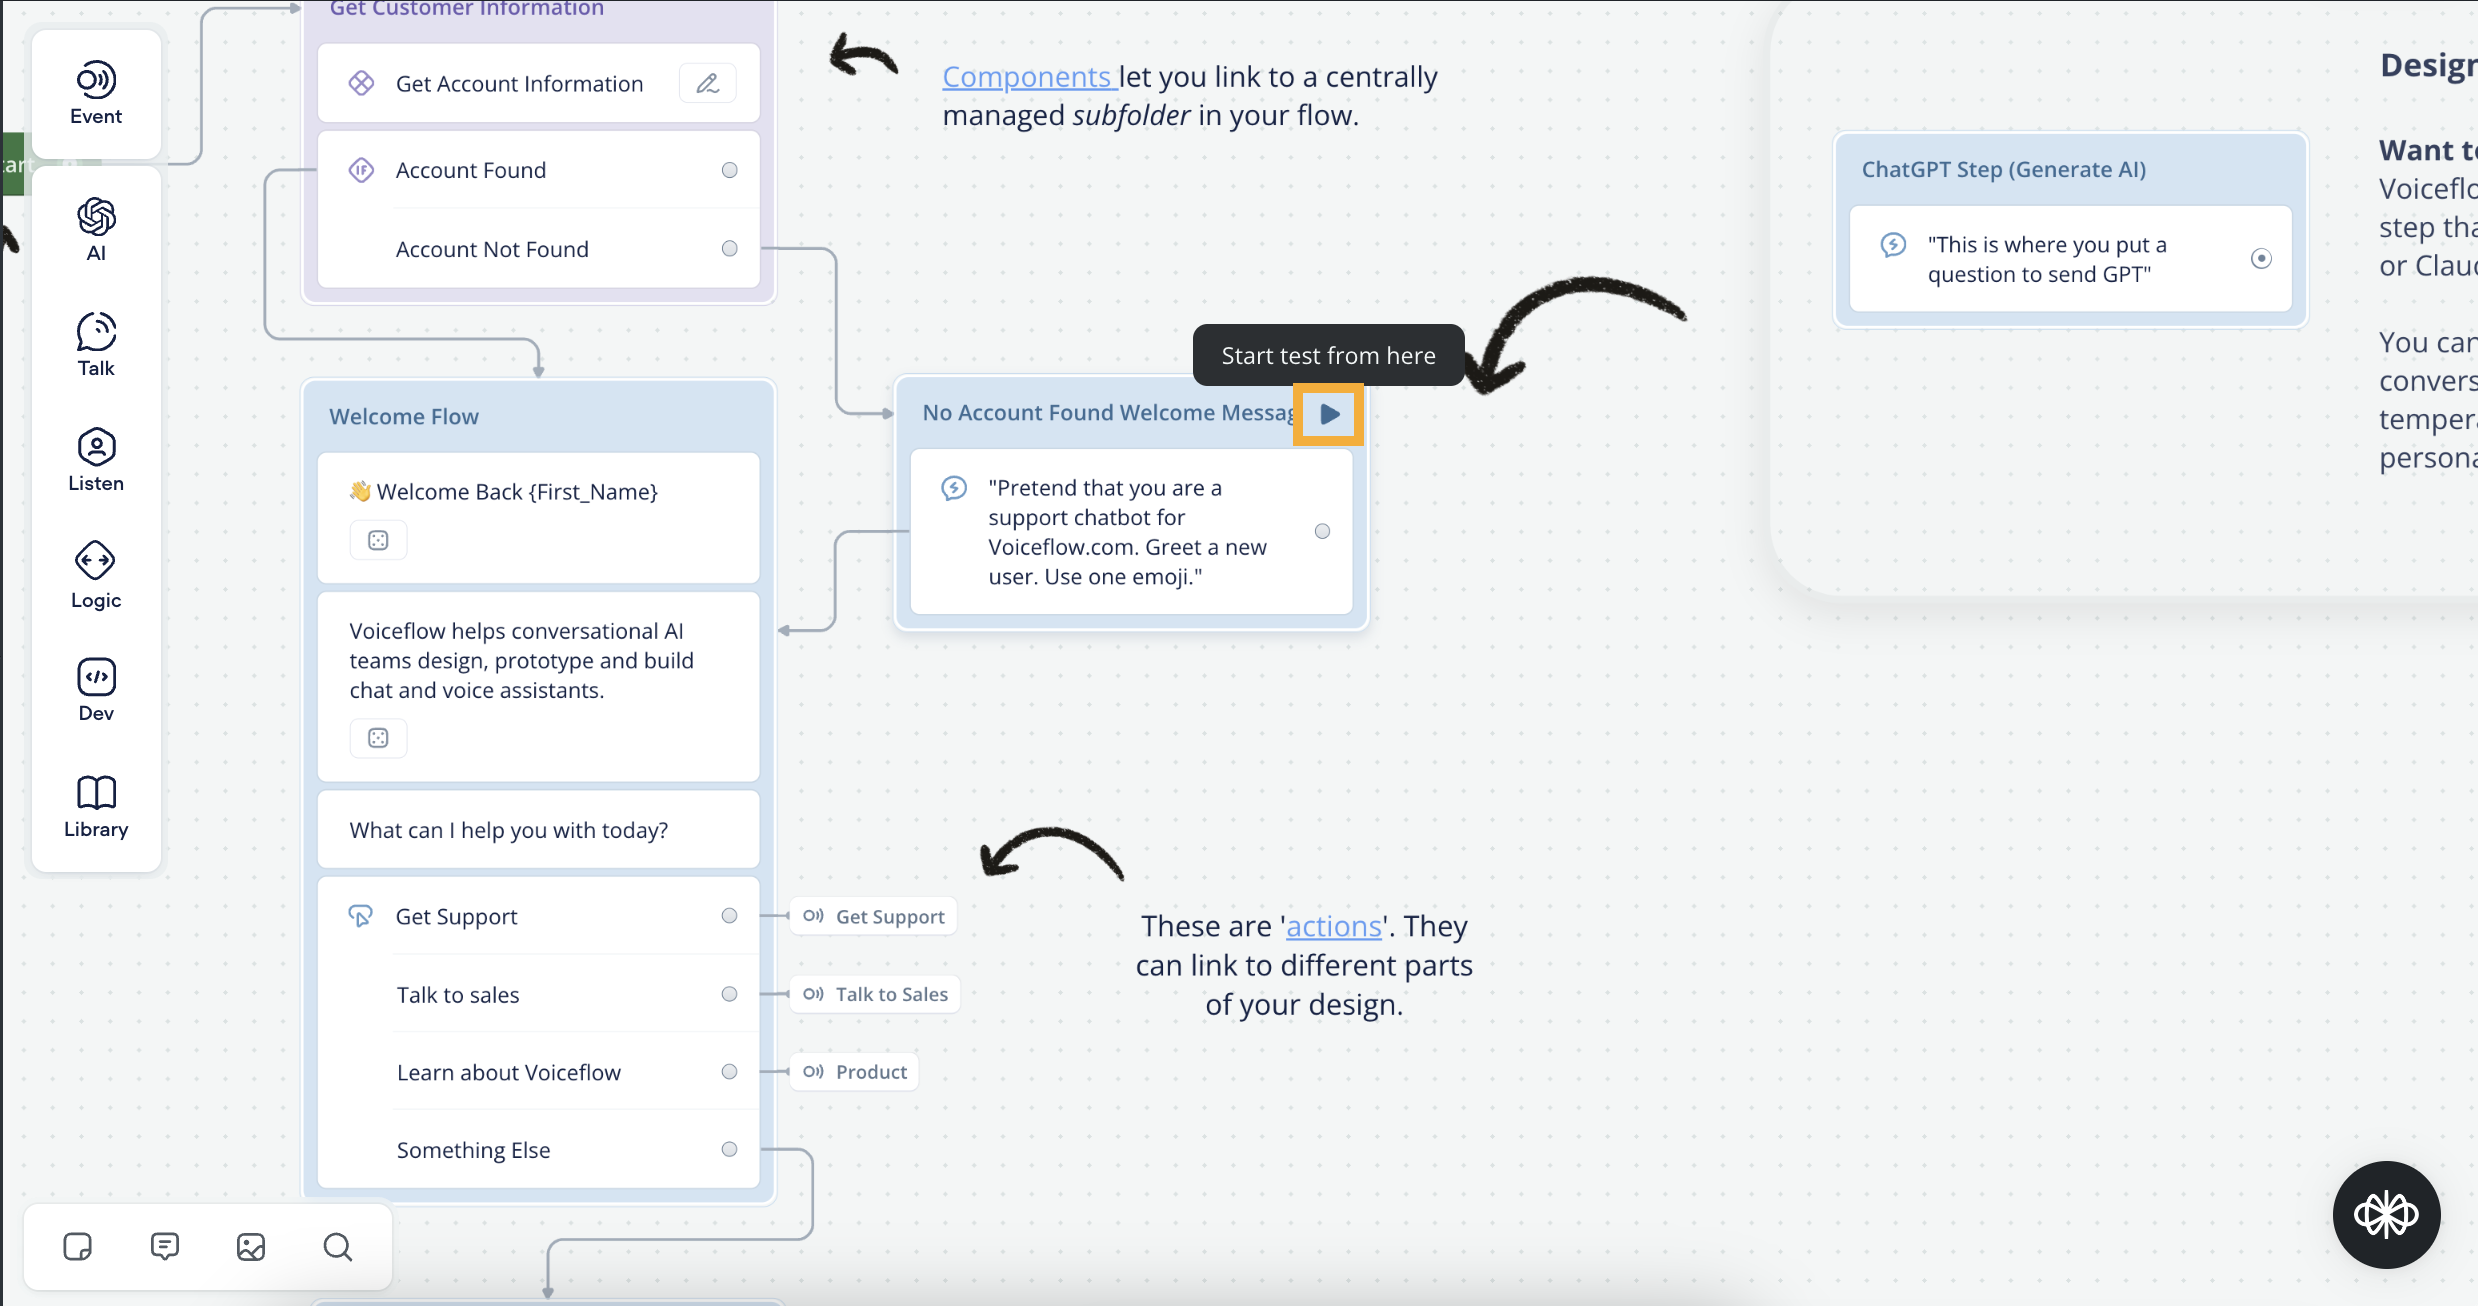
Testing from any block

You can also start a test from any block on the canvas. Hover over the block’s right corner and click the ‘Play’ icon in the block to begin.
Test Controls

Voice, Chat or Button Inputs

You can switch between voice, chat or button inputs during your test. Choose your input by clicking on a respective icon above the test input. Once you’ve selected your input:

  • Voice: Hold the spacebar to submit an input. Make sure you’ve enabled your mic.
  • Chat: Type in the test input and hit enter/return.
  • Button: Click the button. (Note: buttons are set using Choice Steps)

Mute Dialog Audio

You can mute your test assistant’s dialog by clicking the speaker icon in the test modal.

Undo/Redo

During your test, you can undo or redo your last test action by hitting the back or forward buttons above the test input.

Reset Test

If you want to reset your test, click the reset icon in the test modal. This will let you restart your test from the beginning.

Test Settings

To access your test’s settings, click the gear icon in the top nav bar.

Debug Mode

Debug mode lets you see what’s happening behind the scenes when you’re running a test. This could include things like the triggered intent, the path selected, or changes to variable values. Debug messages are shown inline in the dialog so you can understand your assistant’s actions.

Debug mode can be toggled on or off before and during a test.

Intent Confidence Score

When enabled, this setting shows you how confident the natural language model was when matching your test input to a trained intent. Confidence scores and the matched intent are visible under your submitted input.

Intent Confidence Score can be toggled on or off before and during a test.

Guided Navigation

You can use Guided Navigation to manually test your IF conditions and custom action paths. This makes it easy to preview flows that require variable values or inputs from external systems.

When enabled, custom actions or IF conditions will be displayed as buttons in the dialog. Clicking a button will run the selected condition or path.

How to use personas and variables in tests?

Setting variables for testing

To configure variable values for your test, choose ‘All Assistant Variables’ from the dropdown in the left sidebar. Update the variable values and run your test.

Note: All Variables have a default value of 0 before testing

Testing with Personas and Use Cases

Test Personas (AKA Variable States) let you define variable pre-sets for the scenarios, use cases or user personas for which you’re designing (e.g., New/Return, Authenticated/Unauthenticated users). States are managed on the assistant-level and can be used by all team members.

Creating a Test Persona

  • To create a persona, enter Test mode.
  • From the ‘Select a Persona’ dropdown, hit "Add New".

  • Enter a name for your persona (e.g., Authenticated User)
  • Choose a starting block — this defines where the test conversation will begin.
  • Lastly, choose the variables and values you want to associate with the persona.
  • Once saved, the persona will automatically be applied to your Test.

‍Applying a Persona to a Test

  • To apply a Persona to your test, either choose a persona from the left sidebar or from the selector in the Test Dialog.
  • Once you’ve selected one, hit ‘Run Test’
  • You can reset the test’s selected persona by clearing it in the Test Dialog or the left sidebar.

Note: Personas can also be applied to Shared Prototypes

‍Manually changing Test Persona values

  • To run a Test using different state values, click into the desired variable input in the left sidebar
  • Update the value and run your test

Note: You can choose to save your updated state values by hitting the update icon in the left sidebar

‍Modifying Test Personas

  • To edit the name, starting block or variables for an existing persona, select the ‘Edit Persona’ icon from the left sidebar dropdown.
  • Make your desired updates and hit ‘Save’

Deleting Test Personas

  • To delete a persona, select the ‘Edit Persona’ icon from the left sidebar dropdown
  • From the management screen, select 'Delete Persona' from the context (...) menu