Triggers
Introduction
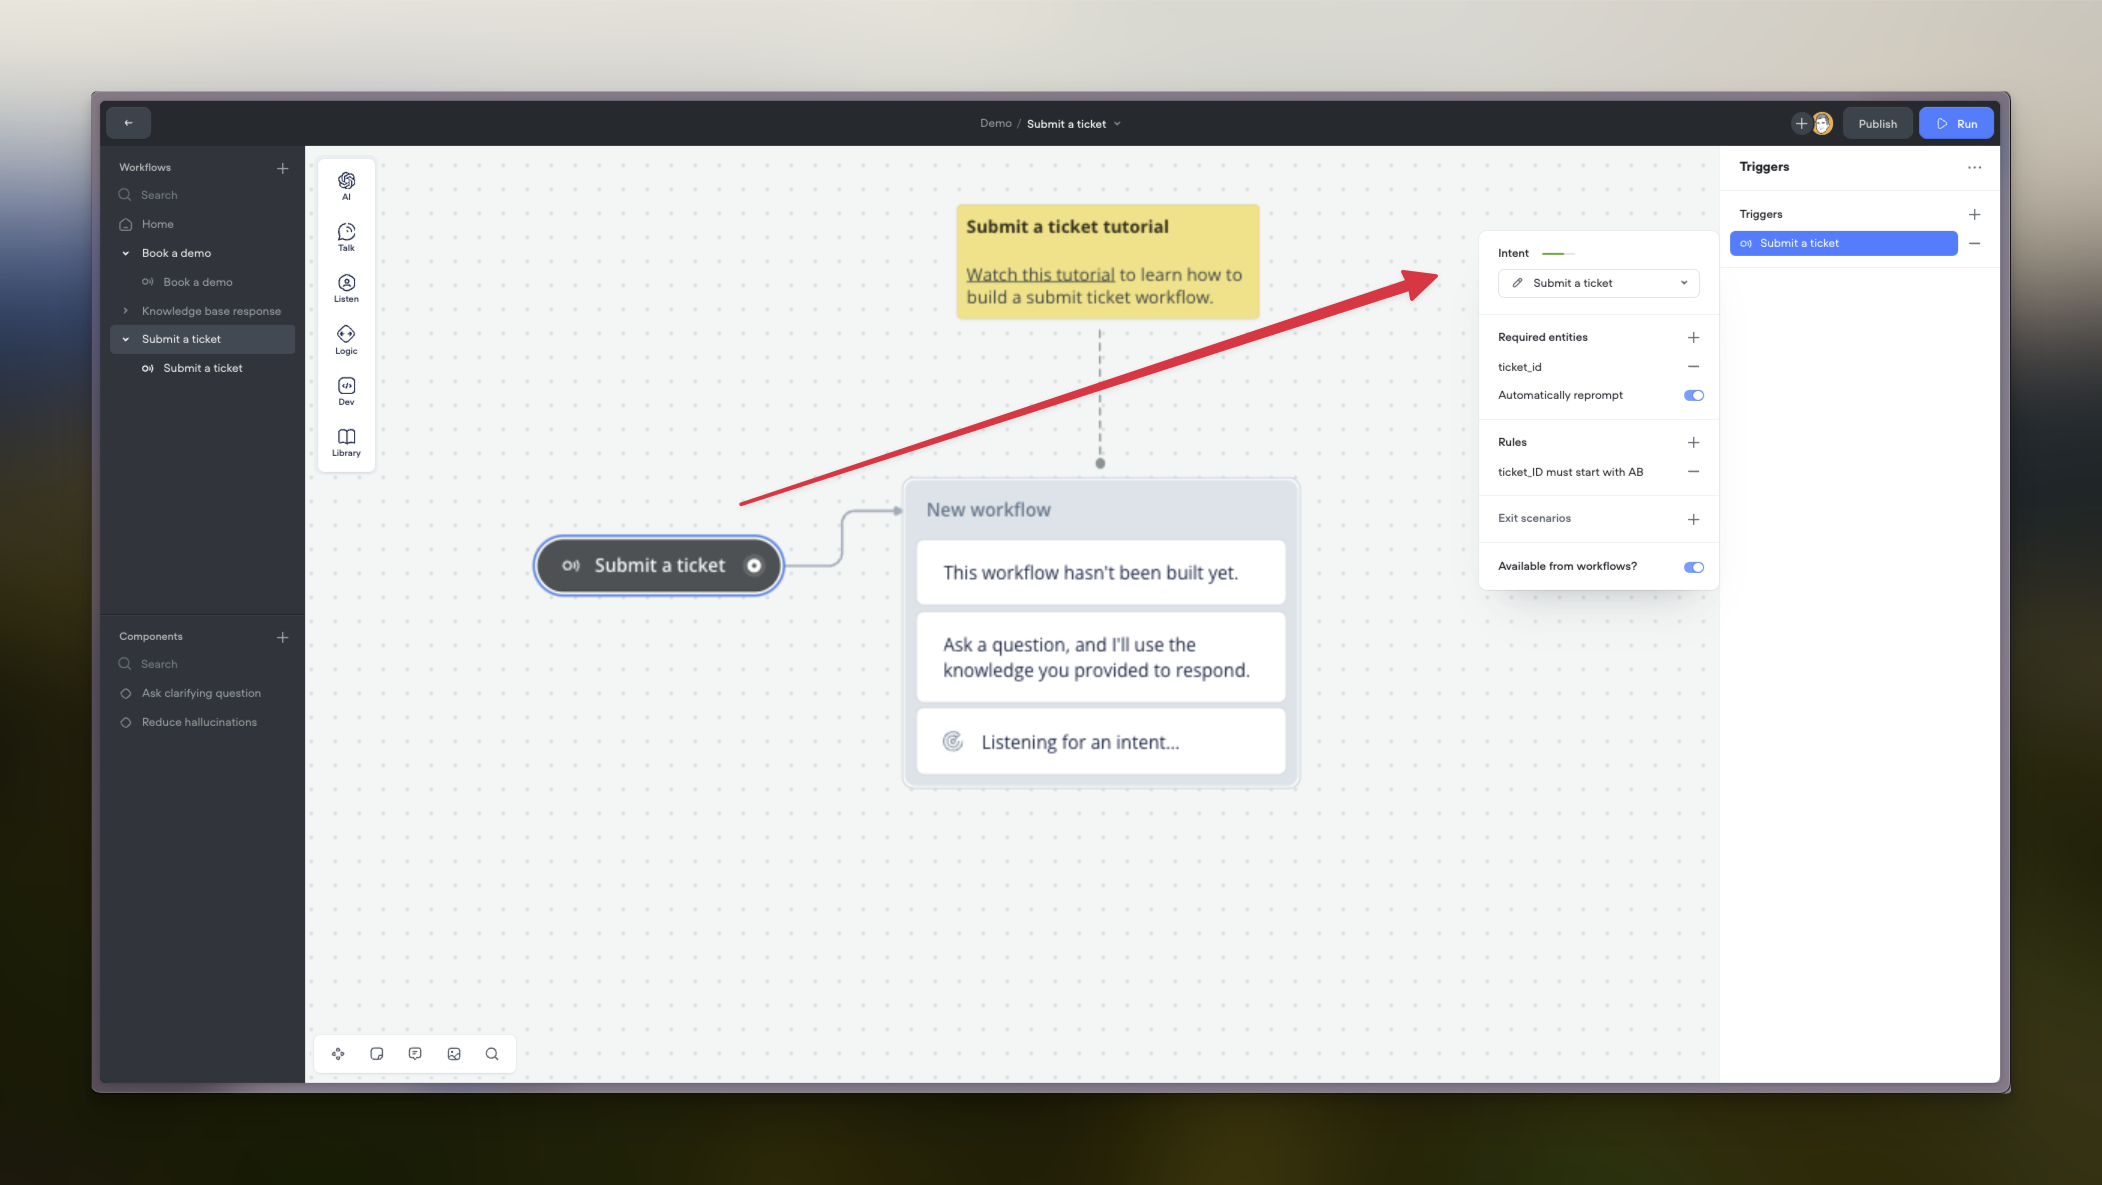
The Trigger Step in Voiceflow is designed to simplify the management of triggers within your agent workflows. Triggers determine how and when your workflow is activated, whether by user input (like an intent) or system events (like the start of a conversation). With the updated Trigger Step, you can now:
- Add multiple triggers within a single step.
- Configure required entities for intents directly from the editor.
- Utilize Rules and Exit Scenarios when a required entity exists on an intent trigger.
This guide will cover adding triggers, understanding trigger types, configuring required entities, and managing the scope of triggers.

Adding Triggers to Workflows
1. Start with a Workflow
- New Workflow Creation:
- When you create a new workflow in Voiceflow, a Trigger Step is automatically included by default.
2. Add Triggers to the Trigger Step
a. Select the Trigger Step
- Click on the existing Trigger Step within your workflow to open the editor.
b. Add and Configure Triggers
-
Add an Intent Trigger:
- Click the "+" button next to the Triggers label.
- A dropdown menu will appear with a list of available intents from your Intents CMS.
- You can:
- Select an Existing Intent: Choose from the list.
- Create a New Intent: Click "Create Intent" at the bottom of the dropdown and follow the prompts.
-
Configure Required Entities (if applicable):
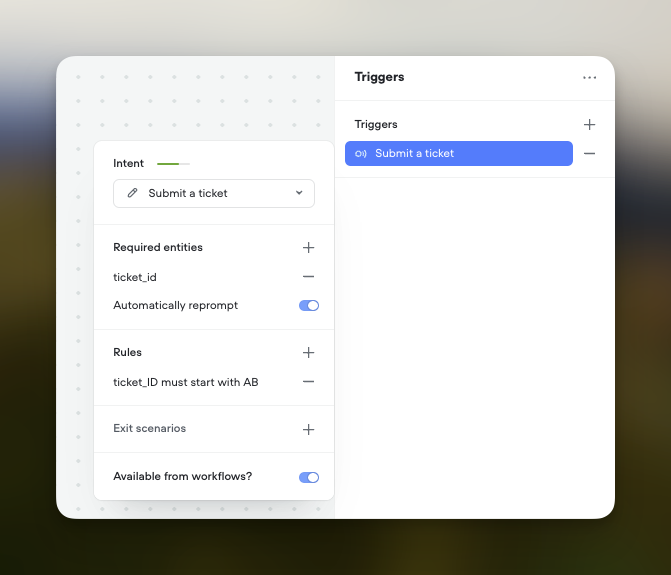
- After selecting an intent, a modal window will appear.
- Required Entities:
- If the intent has required entities, they will be listed.
- You can add required entities by clicking the "+" button.
- For each entity, you can:
- Set Reprompt Text: Messages to prompt the user if the entity is missing.
- Configure Automatic Reprompt:
- Toggle On: Enables automatic reprompting for missing entities.
- Customize AI Settings: Adjust tokens, temperature, and other settings for generating reprompts using LLM.
-
Utilize Rules and Exit Scenarios:
- Rules:
- Define validation criteria for the entities.
- Click the "+" button in the Rules section.
- Write natural language rules (e.g., "The card number must be 12 numeric digits ").
- Exit Scenarios:
- Specify phrases or conditions where the agent should exit the entity collection process.
- Click the "+" button in the Exit Scenarios section.
- Provide example phrases (e.g., "I don't know", "Skip this").
- Rules:
-
Attach Buttons to Intents (Optional):
- In the Buttons section, click the "+" button to add a button.
- Set the button label (can use variables).
-
Save the Trigger Configuration:
- Click "Save" or "Apply" to confirm your settings.
c. Add Multiple Triggers
- Repeat the process to add more triggers to the same Trigger Step.
- Each trigger can have its own configuration, required entities, rules, exit scenarios, and buttons.
3. Add Additional Trigger Steps (Optional)
- If you need more than one Trigger Step in the same workflow:
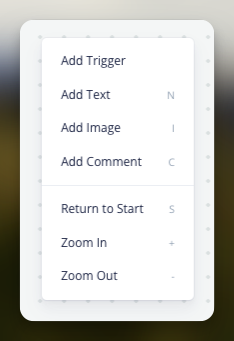
- Right-click on the canvas and select "Add Trigger".
- Configure this new Trigger Step following the same process.

Understanding Trigger Types
Intents
- Definition: Intents represent the actions or goals that users have when interacting with your agent.
- Management: Handled within the Intents CMS.
- Usage:
- Triggers can invoke a workflow when a user's input matches an intent.
- Intent matching uses your NLU or LLM intent classification settings.
- Configuring Intents in Triggers:
- Add intents to your Trigger Step as described above.
- Configure required entities, rules, exit scenarios, and buttons as needed.
Default Start Event
- Description: The Start Step in your Home workflow includes a non-editable Default Start Event.
- Function: This event triggers whenever the conversation is launched.
- Note: The Default Start Event cannot be modified but serves as the entry point for your agent.
Utilizing Rules and Exit Scenarios
Rules
- Purpose: Ensure that collected entities meet certain criteria.
- Configuration:
- Add rules within the intent configuration modal in the Trigger Step.
- Write natural language expressions to define validation (e.g., "The age must be over 18").
- Effect:
- The agent will validate user inputs against these rules.
- If the input doesn't meet the criteria, the agent can reprompt the user.
Exit Scenarios
- Purpose: Define conditions under which the agent should stop trying to collect a required entity.
- Configuration:
- Add exit scenarios within the intent configuration modal.
- Provide phrases or conditions indicating the user cannot provide the entity (e.g., "Exit if user asks to skip").
- Effect:
- When an exit scenario is detected, the agent exits the entity collection phase and moves down the designated path, allowing for graceful handling of these situations.
Available From Workflows Setting

You can define the scope of your triggers directly in the Trigger Step editor using the "Available from workflows" toggle.
When Enabled (Default)
- Global Scope:
- Triggers are accessible from any workflow within the project.
- Use Case:
- Ideal for common intents or actions that can occur at any point in the conversation.
- Allows for consistent behavior across multiple workflows.
When Disabled
- Local Scope:
- Triggers are only active within the workflow where they are defined.
- Use Case:
- Suitable for specific intents or actions relevant only to a particular part of the conversation.
- Helps prevent unintended triggering of workflows.
Example Scenario: User Registration Workflow
Imagine you have an intent called RegisterUser with required entities:
- Username
- Password
You want to ensure that:
- The email is valid.
- The password meets certain criteria.
- Users can opt to skip registration.
Setting Up the Trigger Step
-
Add the RegisterUser Intent:
- In the Trigger Step, add RegisterUser as a trigger.
-
Configure Required Entities:
- Add Username, Email, and Password as required entities.
- Set up reprompts for each entity.
-
Define Rules:
- For Email:
- Rule: "The email must be in a valid email format."
- For Password:
- Rule: "The password must be at least 8 characters and include a number."
- For Email:
-
Set Up Exit Scenarios:
- Phrases like "Exit if user does not want to register".
-
Connect Port:
- Main Port: Leads to the first step of your workflow.
Best Practices
-
Thoughtful Use of Rules:
- Define rules that are essential for your application's logic.
- Be cautious not to overcomplicate validation unless necessary.
-
Graceful Exit Scenarios:
- Anticipate situations where users may not provide required information.
-
Testing:
- Simulate various conversation paths to ensure triggers, entities, rules, and exit scenarios function as intended.
-
Consistent Scope Configuration:
- Be mindful of the Available from workflows setting to control where triggers are active.
- Use global scope for widely applicable triggers and local scope for specific ones.
Updated 9 months ago
