
Web chat widget
Add your agent to your website in minutes.
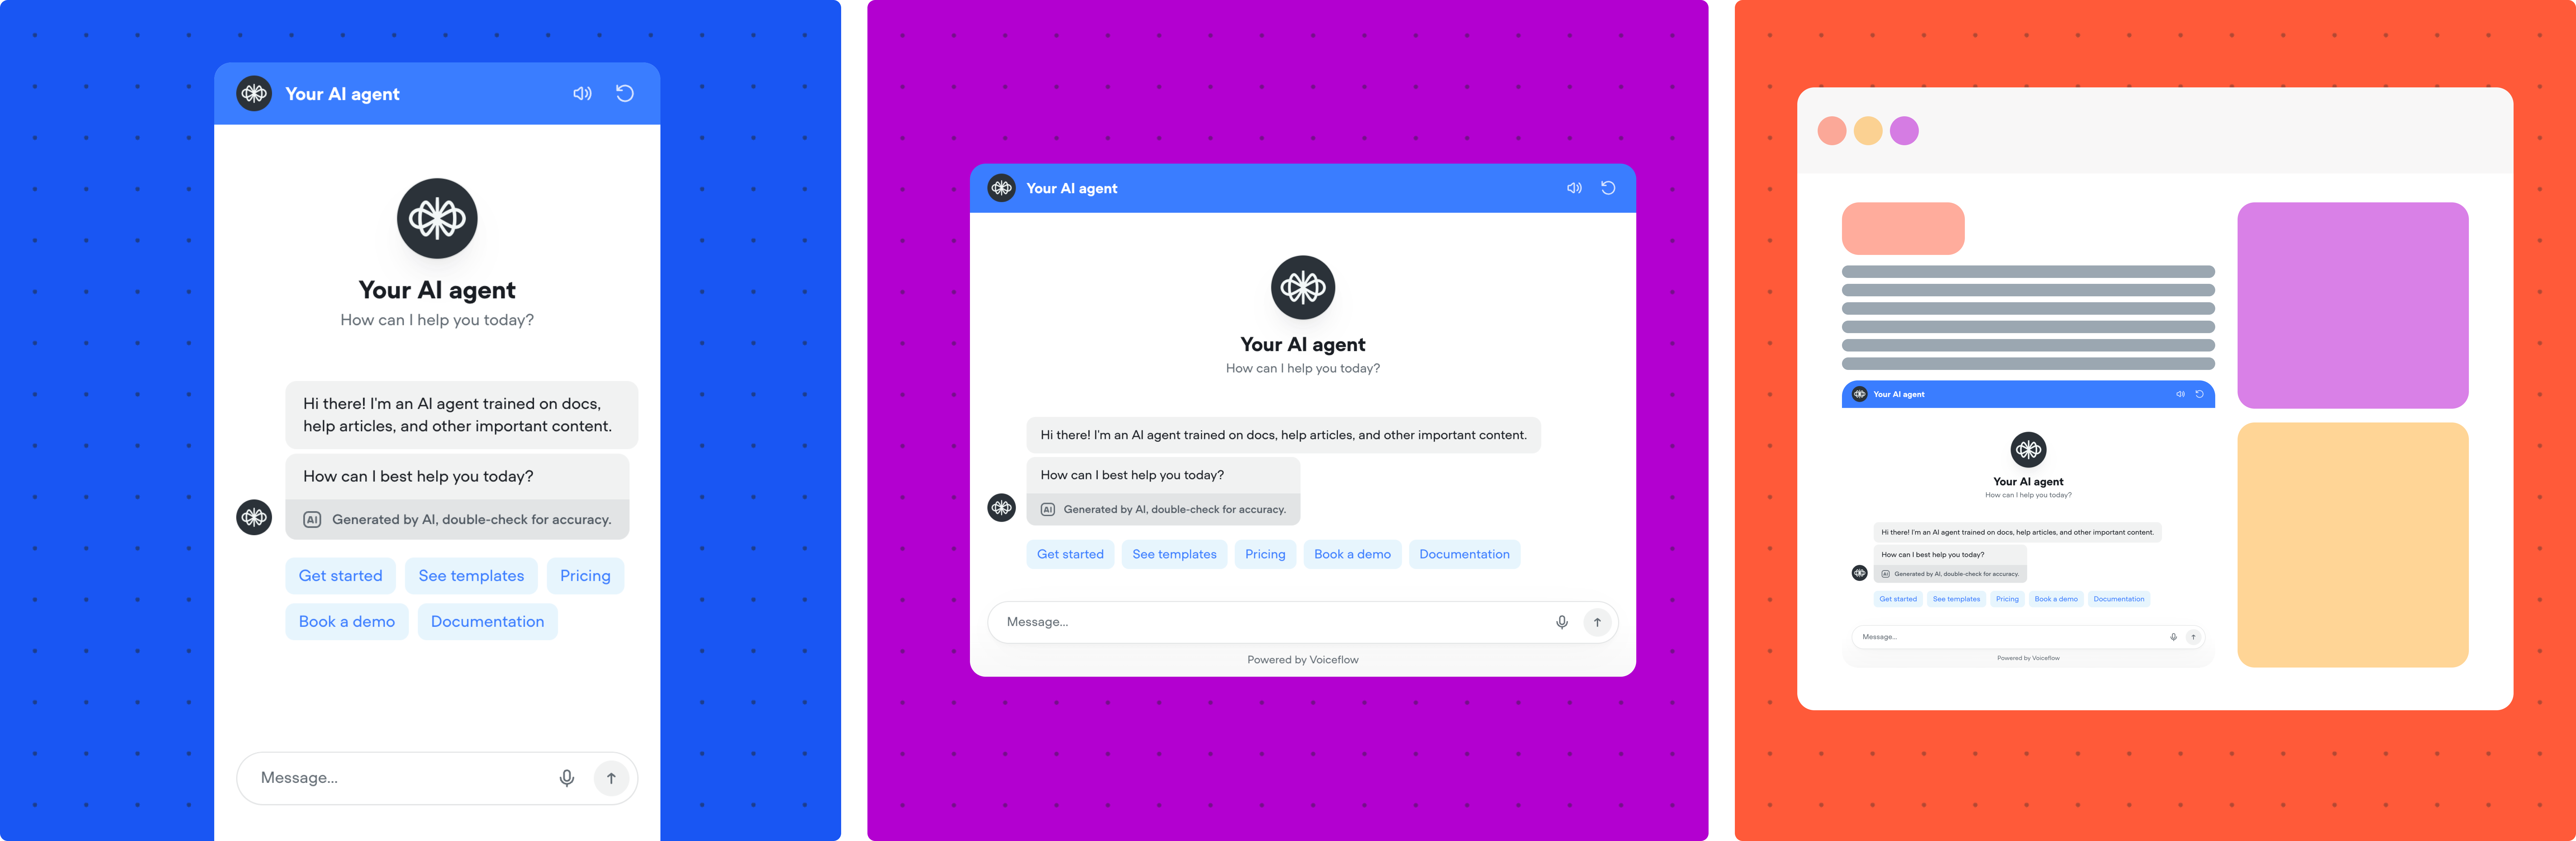
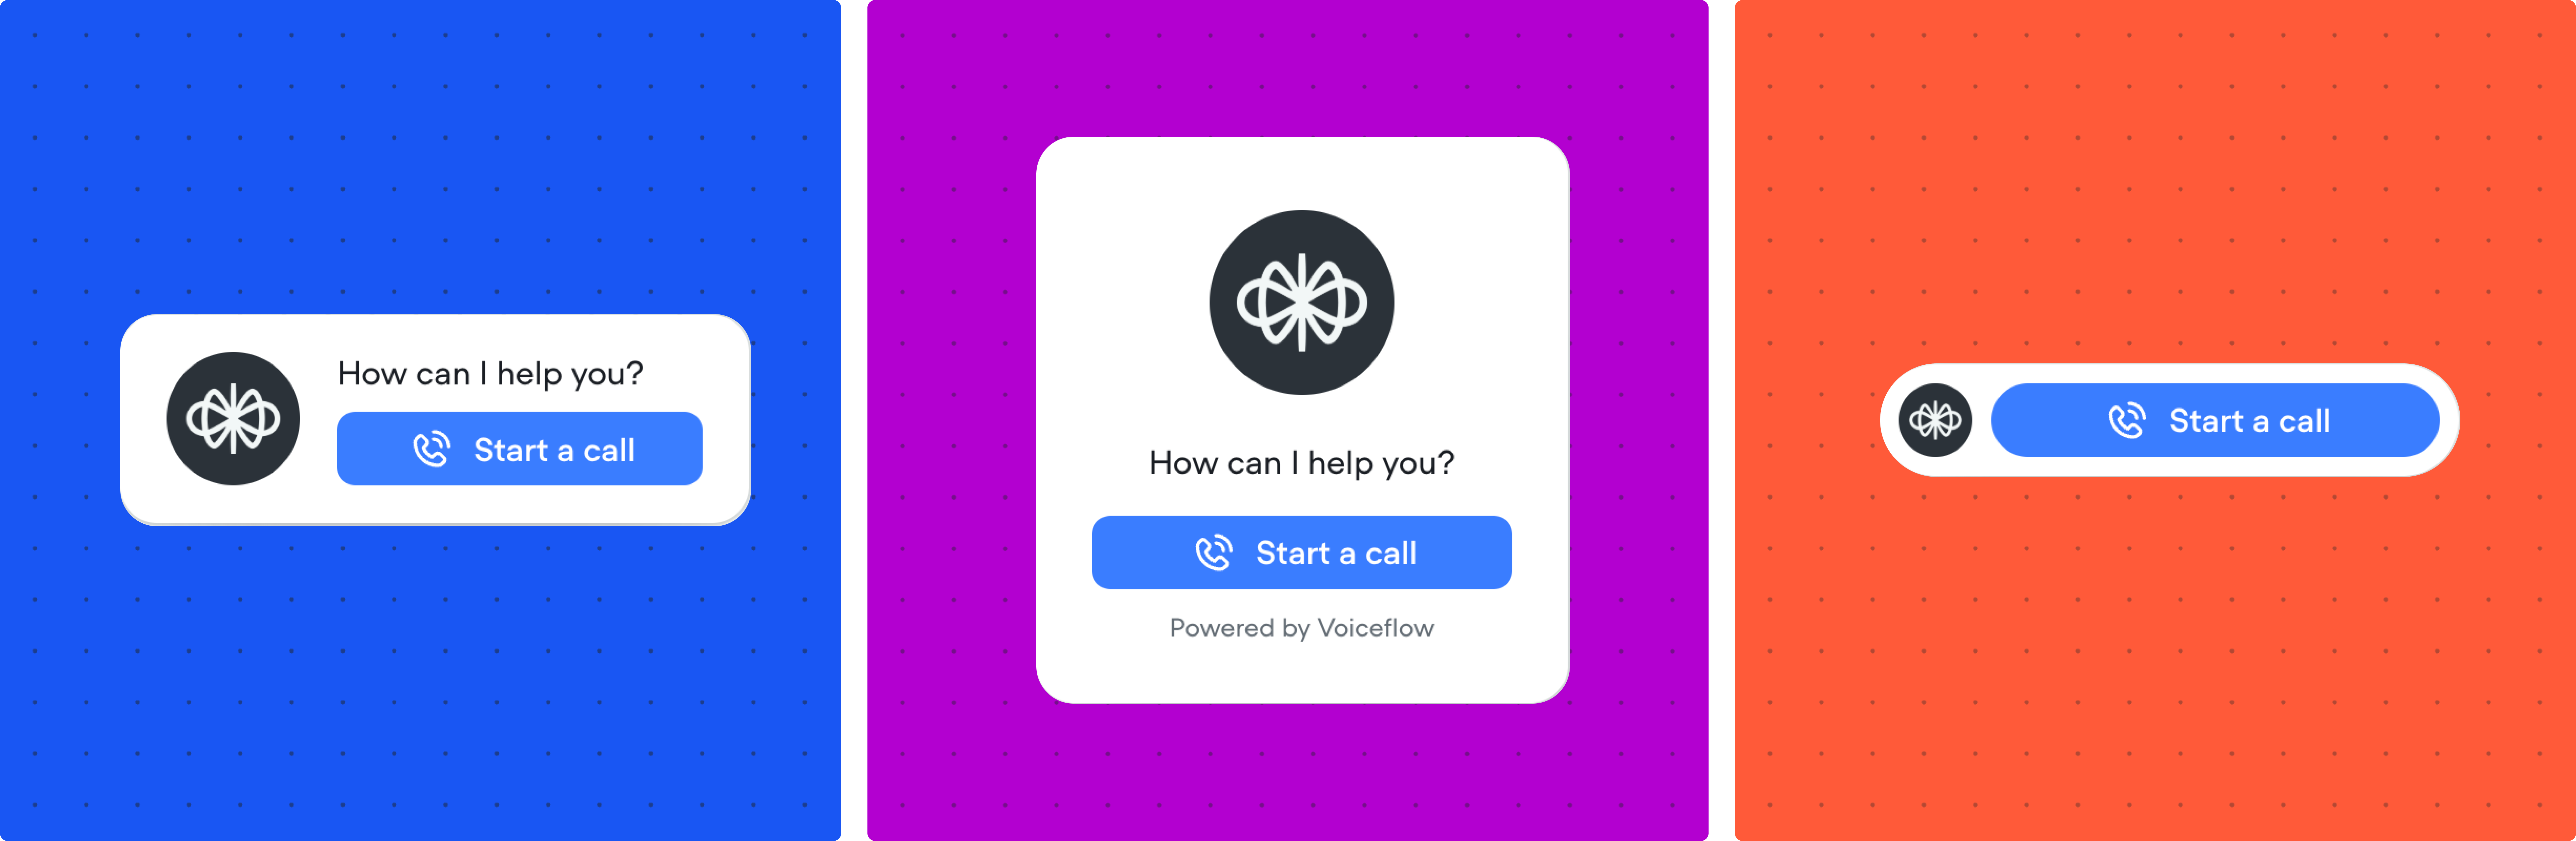
The quickest way to launch your agent is using our web chat widget. Web chat can be deployed to production in minutes, and is ideal for customer support or lead capture. Web chat supports three different interfaces: widget, popover, and embedded. The web chat widget also supports voice input.
How to add your agent's widget to your website
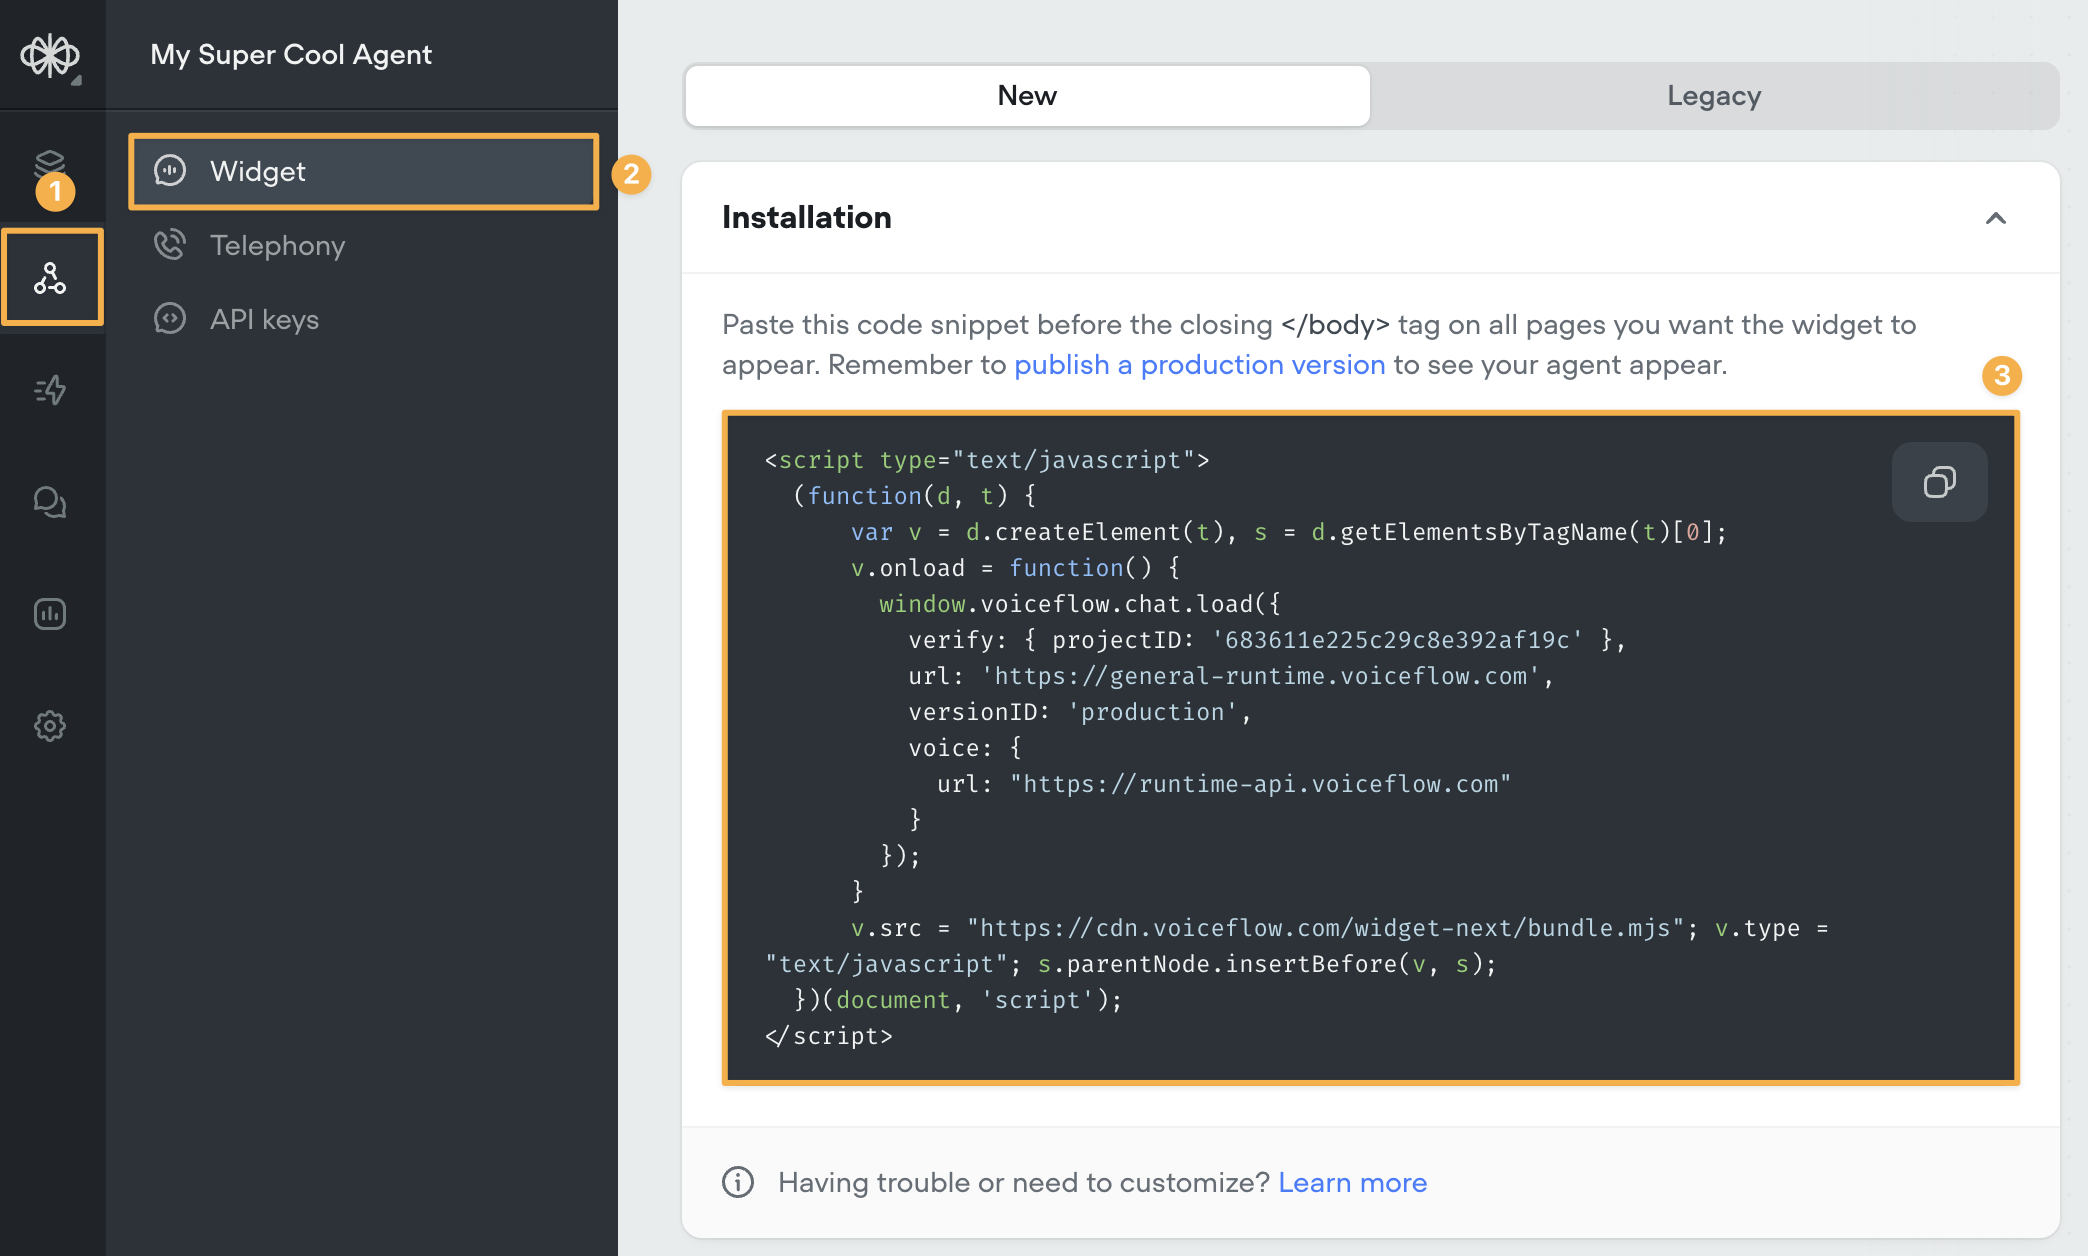
Before you can add your agent to your website, you'll need to publish a production version of it. Once your agent is published, head over to interfaces section of your agent's settings, select widget, then copy-paste the code into your website's codebase. If you're not a developer and aren't sure where to add this code, we recommend asking ChatGPT "How can I add custom JavaScript to a [your website platform here] website?".
Customizing your widget
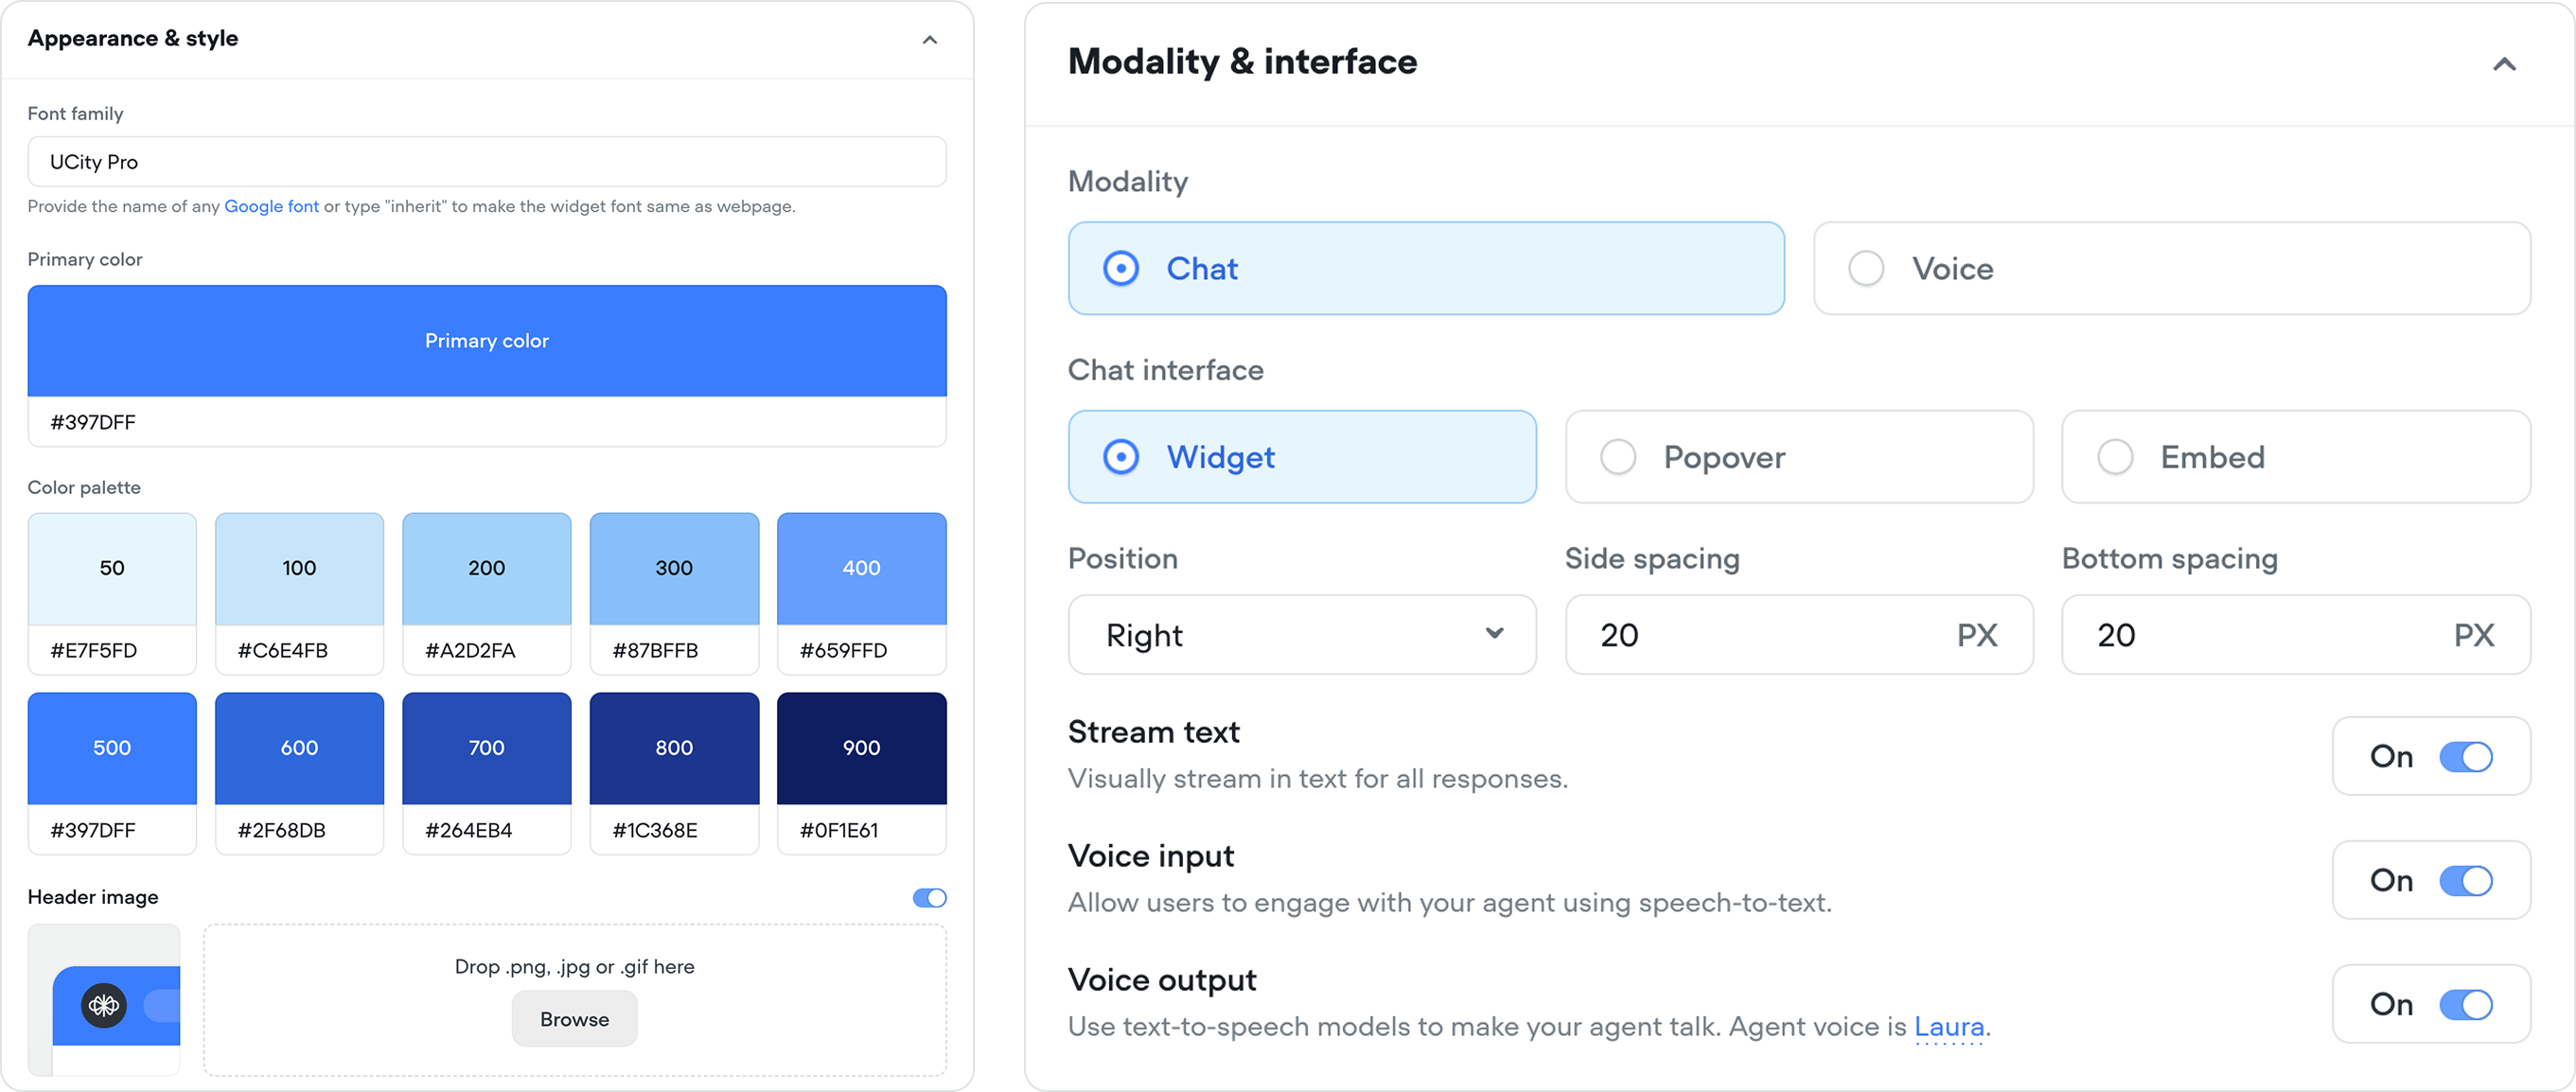
Your agent should fit your brand, so we provide a variety of customization options. From the widget settings page, scroll down and you'll be able to set your agent's brand colours, icons, launcher type, the interface you'd like to use, and more. You can also add placeholder and privacy policy links. Customers with a Teams subscription can optionally disable Voiceflow branding.
Setting your widget's security settings
Three security settings are available at the bottom of the widget settings page. These are:
- Approved domains - if you'd like to restrict your widget so it only works on specified websites, you can manage the whitelist here.
- Legal disclaimer - certain company policies or local regulations may require a legal disclaimer to be shown and accepted before the agent is used. This can be enabled and customized using this setting.
- Chat transcript saving - if disabled, conversations with the agent via the chat widget won't be saved as a transcript. This can be useful when sensitive information is being processed.
Making changes to the widget after launch
If you'd like to change any of the widget's settings after releasing your agent - for example, modifying its colours, fonts, and icons - you'll need to publish a new version of your agent to production for the changes to take effect.
Additional customizations
If you're a developer, you can hook into the widget through custom actions and extensions. Take a read of the other pages in this section of the docs to learn more.
Updated 7 months ago