Speak
Speak steps are no longer supported in new projects
How do I make my assistant speak / talk? How do I talk to or respond to my user with TTS?
The Speak Step is used to make any voice assistant speak using text-to-speech. This is what your user hears or sees as a response from the voice-based conversation experience. A speak step is important for the assistant to verbally communicate to the user. It can be used to greet the user, ask questions, give instructions, and inform users.
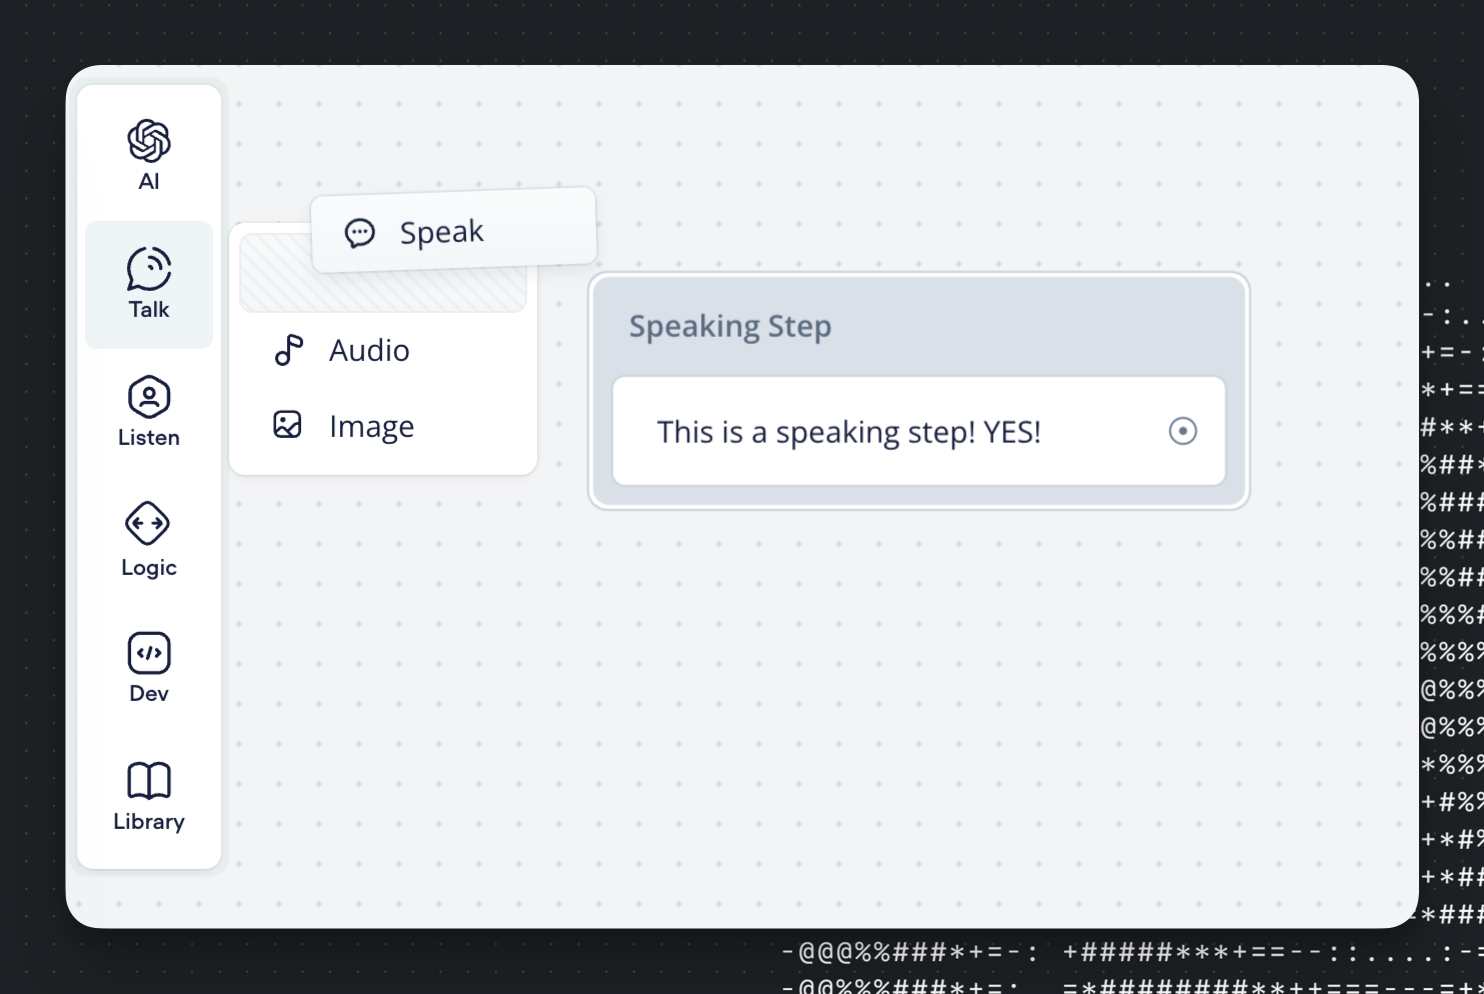
To configure your Speak Step, you can type what you want your assistant to say in the text input field. In the canvas:
Previewing your Speak Step
You can preview how your Speak Step will sound by clicking the Play button in the bottom-left corner of the text input field.
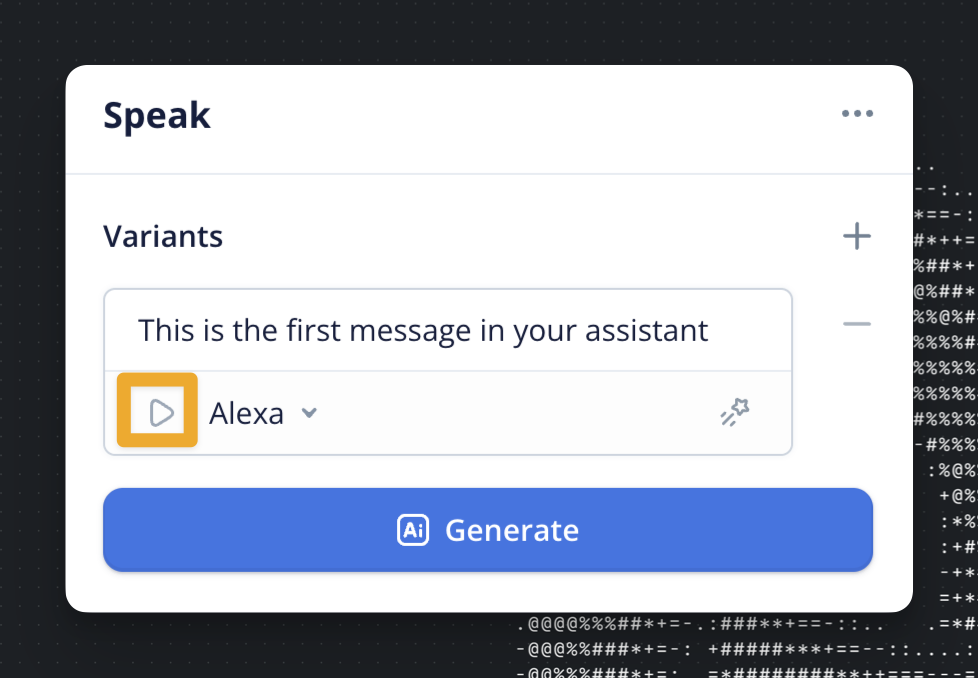
The audio will play from your default audio output device. On first play, it may take a few seconds to render.
You can stop the playback at any time by navigating and clicking your cursor to the previous area as the Play button that has now changed to a Stop button during Speak step preview playback.
Selecting a Text to Speech (TTS) Voice
You can select and configure which TTS (Text to Speech) voice you want to use (Alexa, Google, and Microsoft TTS voices are currently supported). You can set the default voice for your assistant by clicking the Star (★) icon next to that voice, or by selecting it on your Settings page.
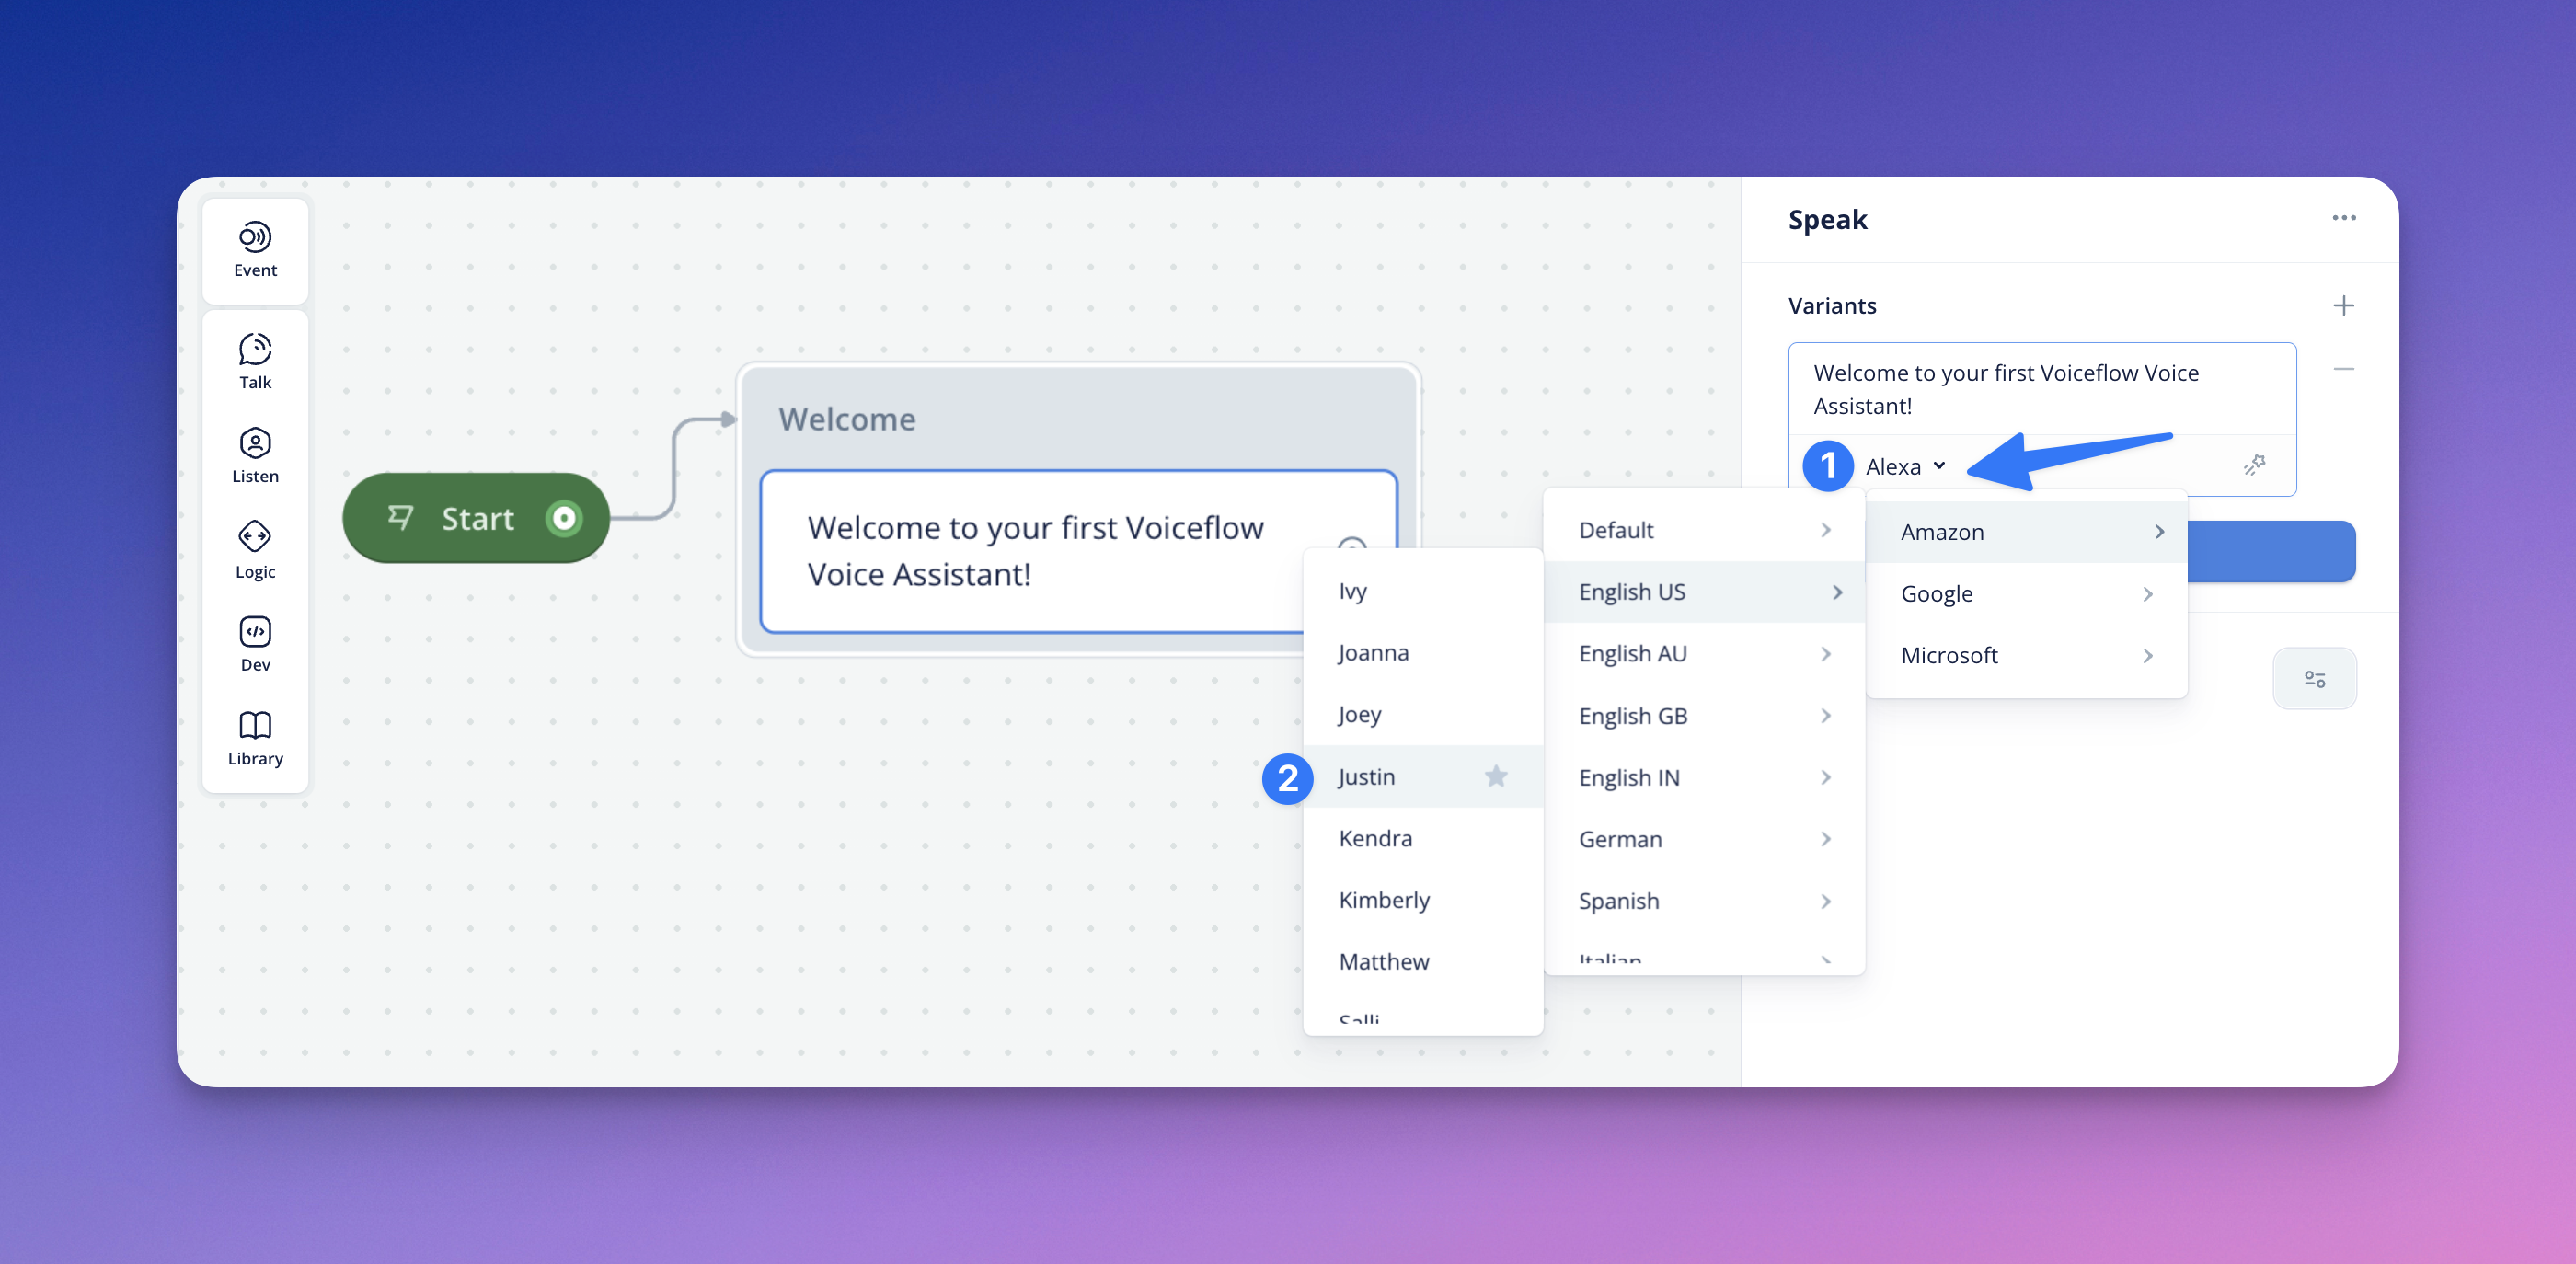
Setting a default voice will not retroactively change selected voices, only change the default setting for future speak steps. You can have multiple voices within an assistant alongside a default voice. Depending on your assistant type, you may have a limited selection of TTS voices available for that assistant.
Applying Speech Effects or SSML (Speech Synthesis Markup Language)
In Conversation Design, SSML (Speech Synthesis Markup Language) is commonly referenced as ways to alter speech and speech synthesis.
You can apply and add the SSML effects available on your desired Speech step(s) by typing in text (in appropriate SSML Syntax) by typing it in-line, or highlighting text and applying it using the Add Effect icon & dropdown.
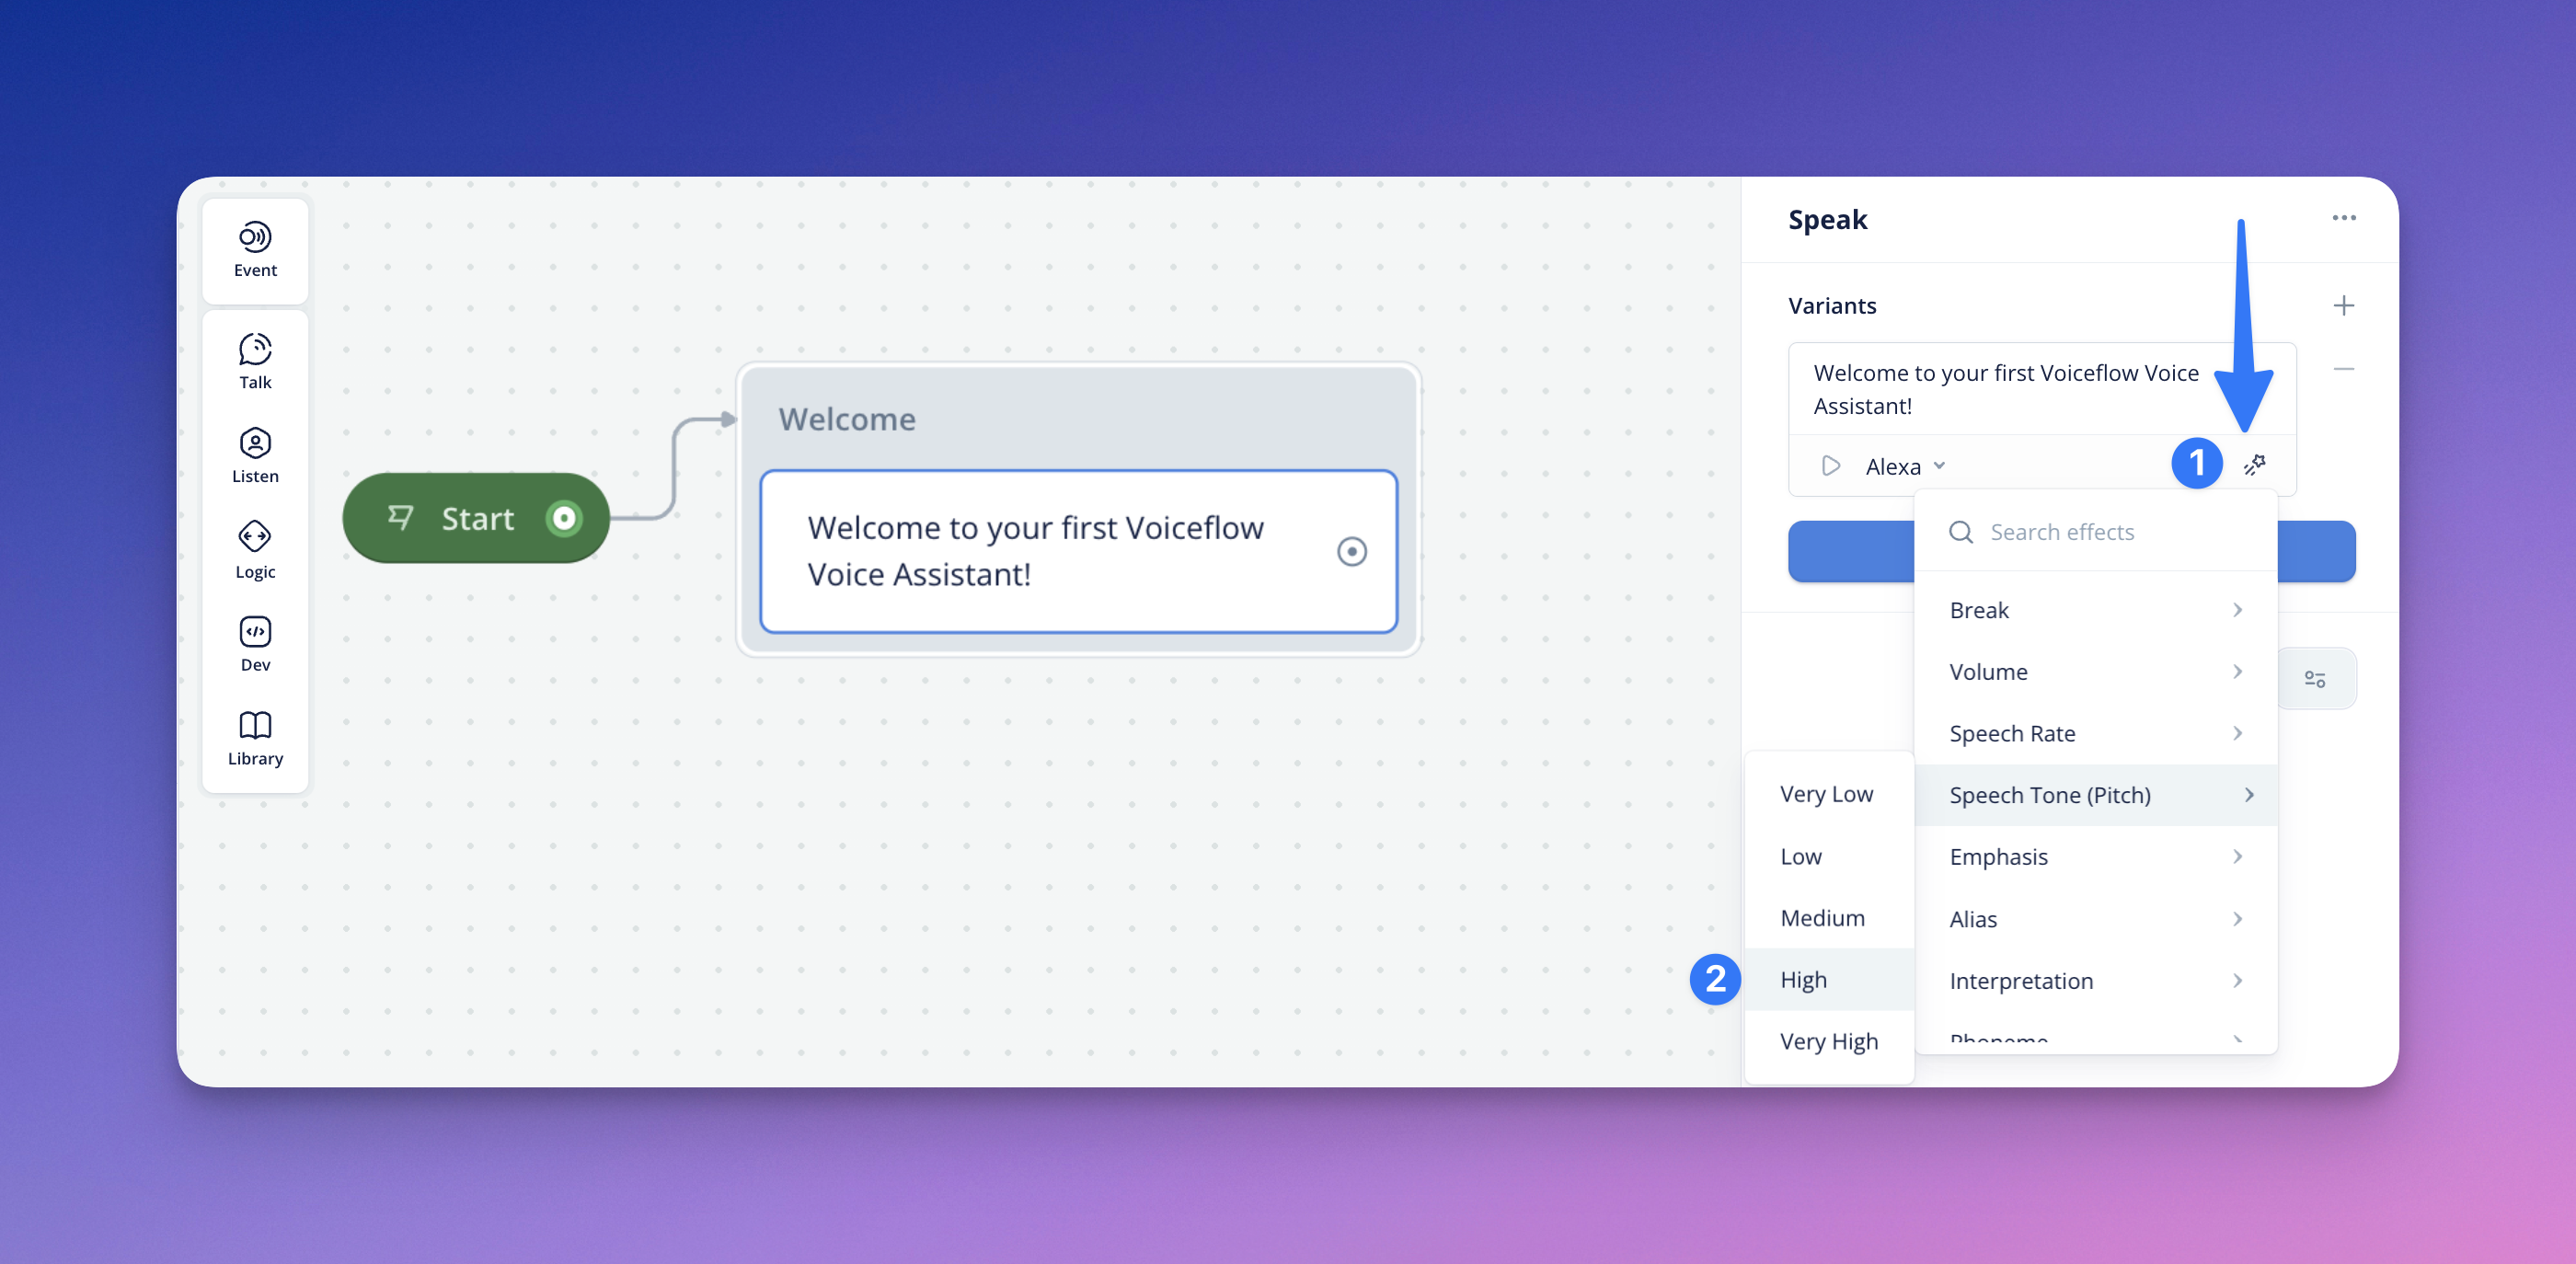
There are many components of SSML & properties you can add to your speech as effects such as Break, Volume, Speed/Rate, Emphasis and even whispers! You can use the 'Search effects' bar in this menu to find your desired speech effect.
Adding Variants
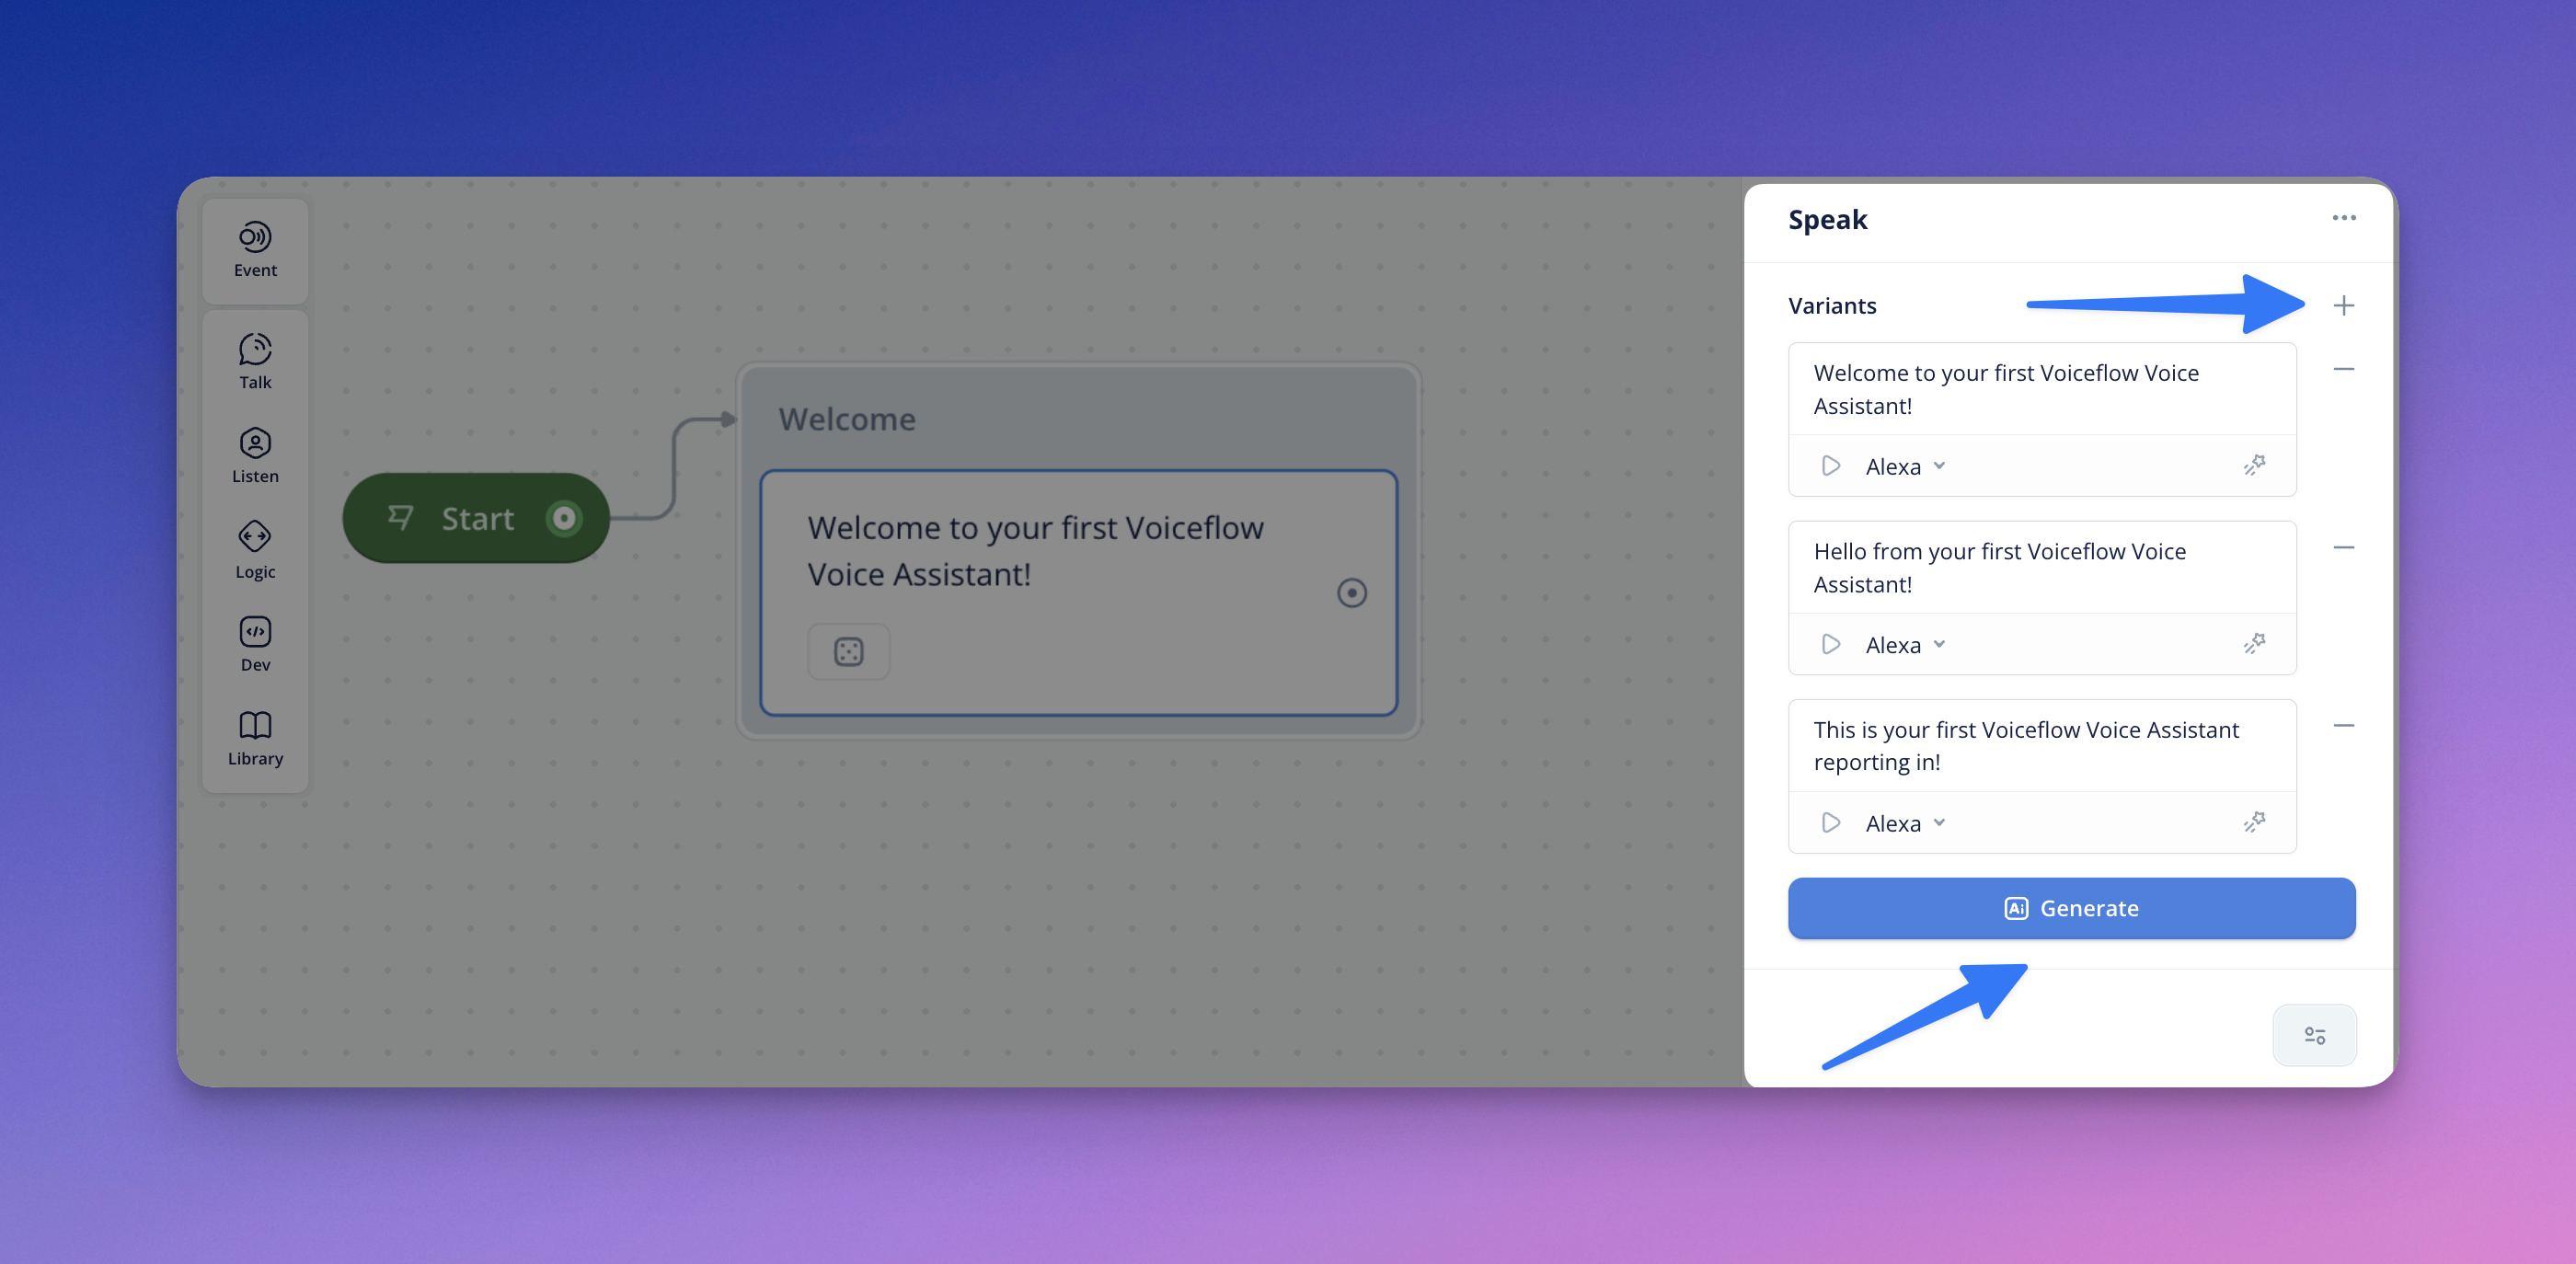
Often, designers want to add a pleasant and user experience, and may want to use Variants. Variants are variations of the greeting/response steps that the user expects to receive in the specific section of your conversation experience.
If you have variants added to your Speak Step, one of the variants will be played at random when the step is hit in your assistant.
You can add a variant to the Speak Step by clicking the Add Variant button in the editor's footer. This way, you can enable and have your assistant randomly select and say one of your created Variants within the Speak step. Clicking on Generate will automatically create more variants inspired by the existing text.
Visual-View of Variants on Canvas
Once your variants are confirmed, you will notice that you can also visually preview them from the Canvas-level. By default, your variants will nest under a preview modal, with the dice icon appearing in the Speak step. In this modal, you can quickly edit or copy those responses.
To instead display all the variants (as opposed to the preview view), you can change your Canvas Visibility setting under the settings icon located to the left of the Add Variant section in the Speak Step menu.
You can toggle between show preview and show all variants, while also setting which option you desire as the default for all your speak steps on Canvas.
Updated about 1 month ago