Integrating ticket management with Zendesk
Intro
If you're building a complex customer support implementation, using a ticketing system can help you keep track of issues and escalate issues from customers. In this use case walkthrough we show how to integrate Voiceflow with Zendesk.
Voiceflow has a number of capabilities to integrate with Zendesk, in this guide we'll cover how to:
- Ingest documents
- Create tickets
Add documents via Integration Zendesk Help Center
- On the KB CMS page, click on the 'Add Data Source' button, then select 'Integration'.

-
Select Zendesk Help Center: From the list of integrations, choose 'Zendesk Help Center’
-
Awaiting Authorization: After selecting Zendesk, you will be prompted to authorize the connection to your Zendesk account.
-
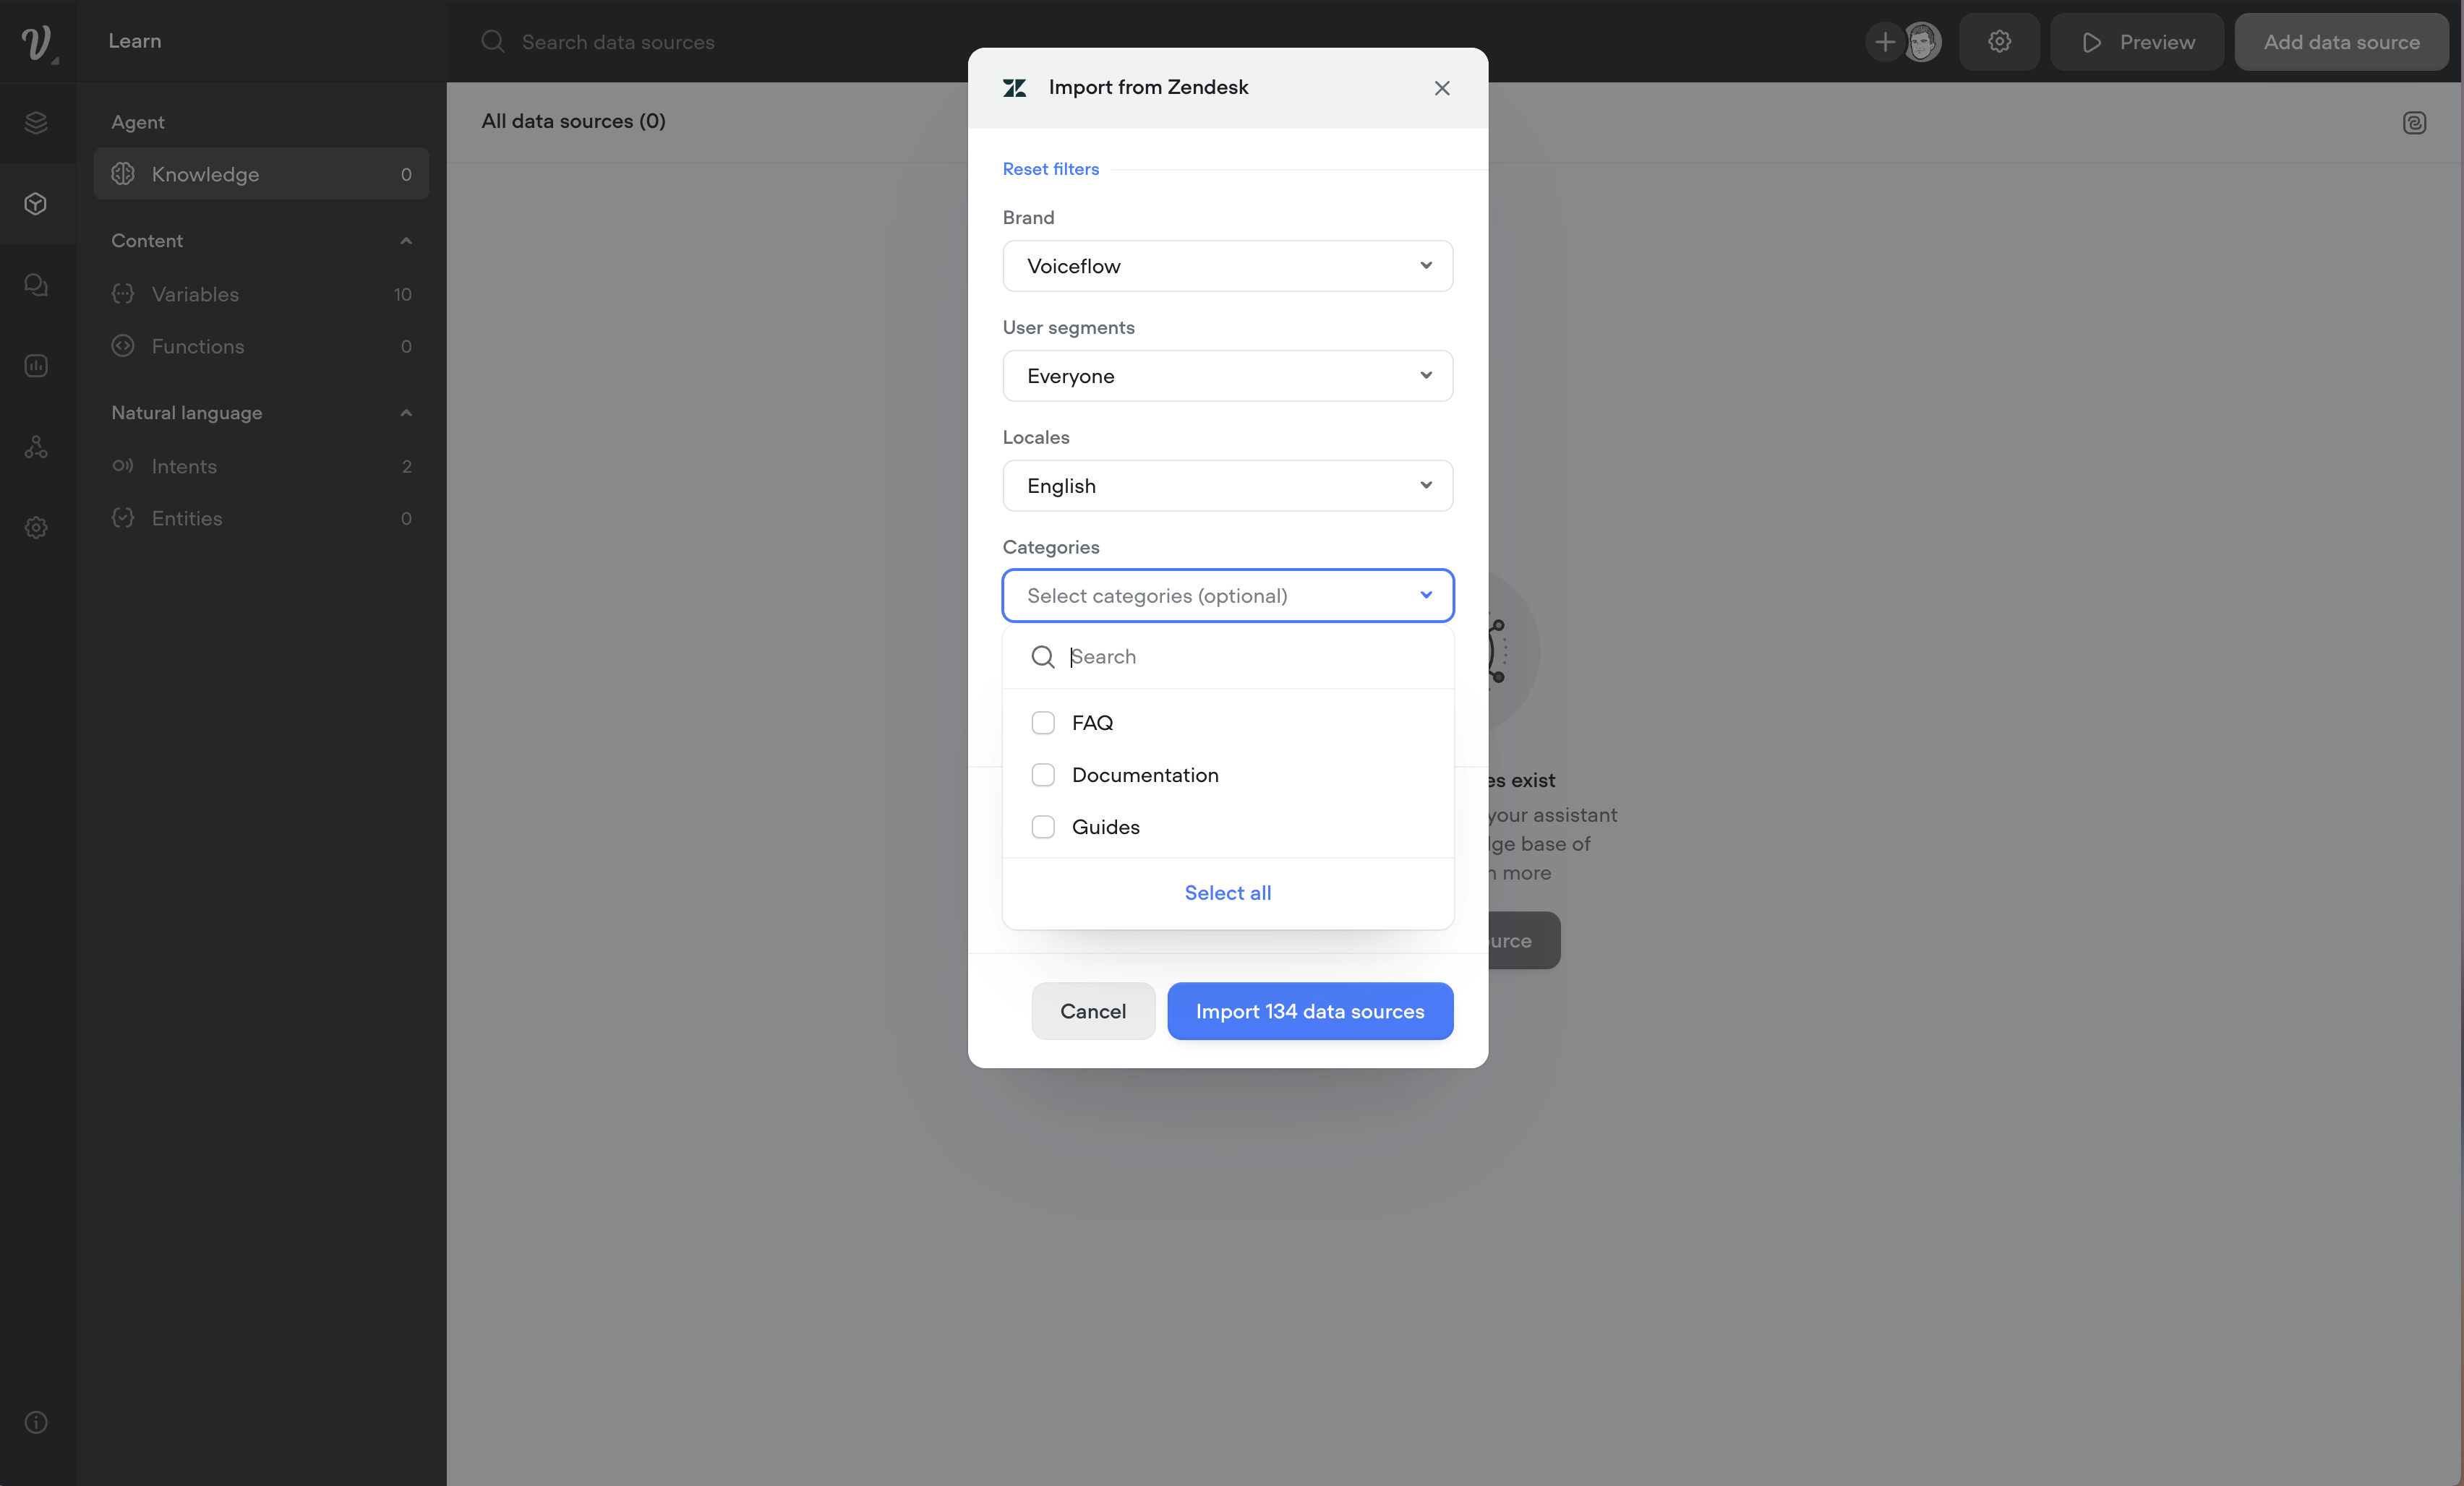
Importing Articles: Post-authorization, the import modal allows you to filter and import only articles that are applicable for your knowledge base. All applicable filter values will be available in the dropdown for selection.
-
NOTE: only Published articles are available for import.
-
Filters include:
- Brand (required): Before importing any articles, you must select the brand which to fetch the articles from.
- NOTE: you can run the import operation as many times as necessary from across various brands if necessary.
- User Segment: This field allows you to filter by user segment.
- Locale: This field allows you to only import articles for a certain language. You can get the locale from the Zendesk Help Center URL after you've selected a specific language.
- Categories: If you have multiple categories then you can optionally filter articles for a specific category.
- Labels: This field allows you to filter by labels applied to your articles.
- Refresh Rate: Decide how often you want the document to sync with Zendesk, ensuring your AI has the latest information.
- Import Confirmation: Once you finalize the import filters, you will be shown the number of articles that will be imported in the Import button.
Integration management

- Brand (required): Before importing any articles, you must select the brand which to fetch the articles from.
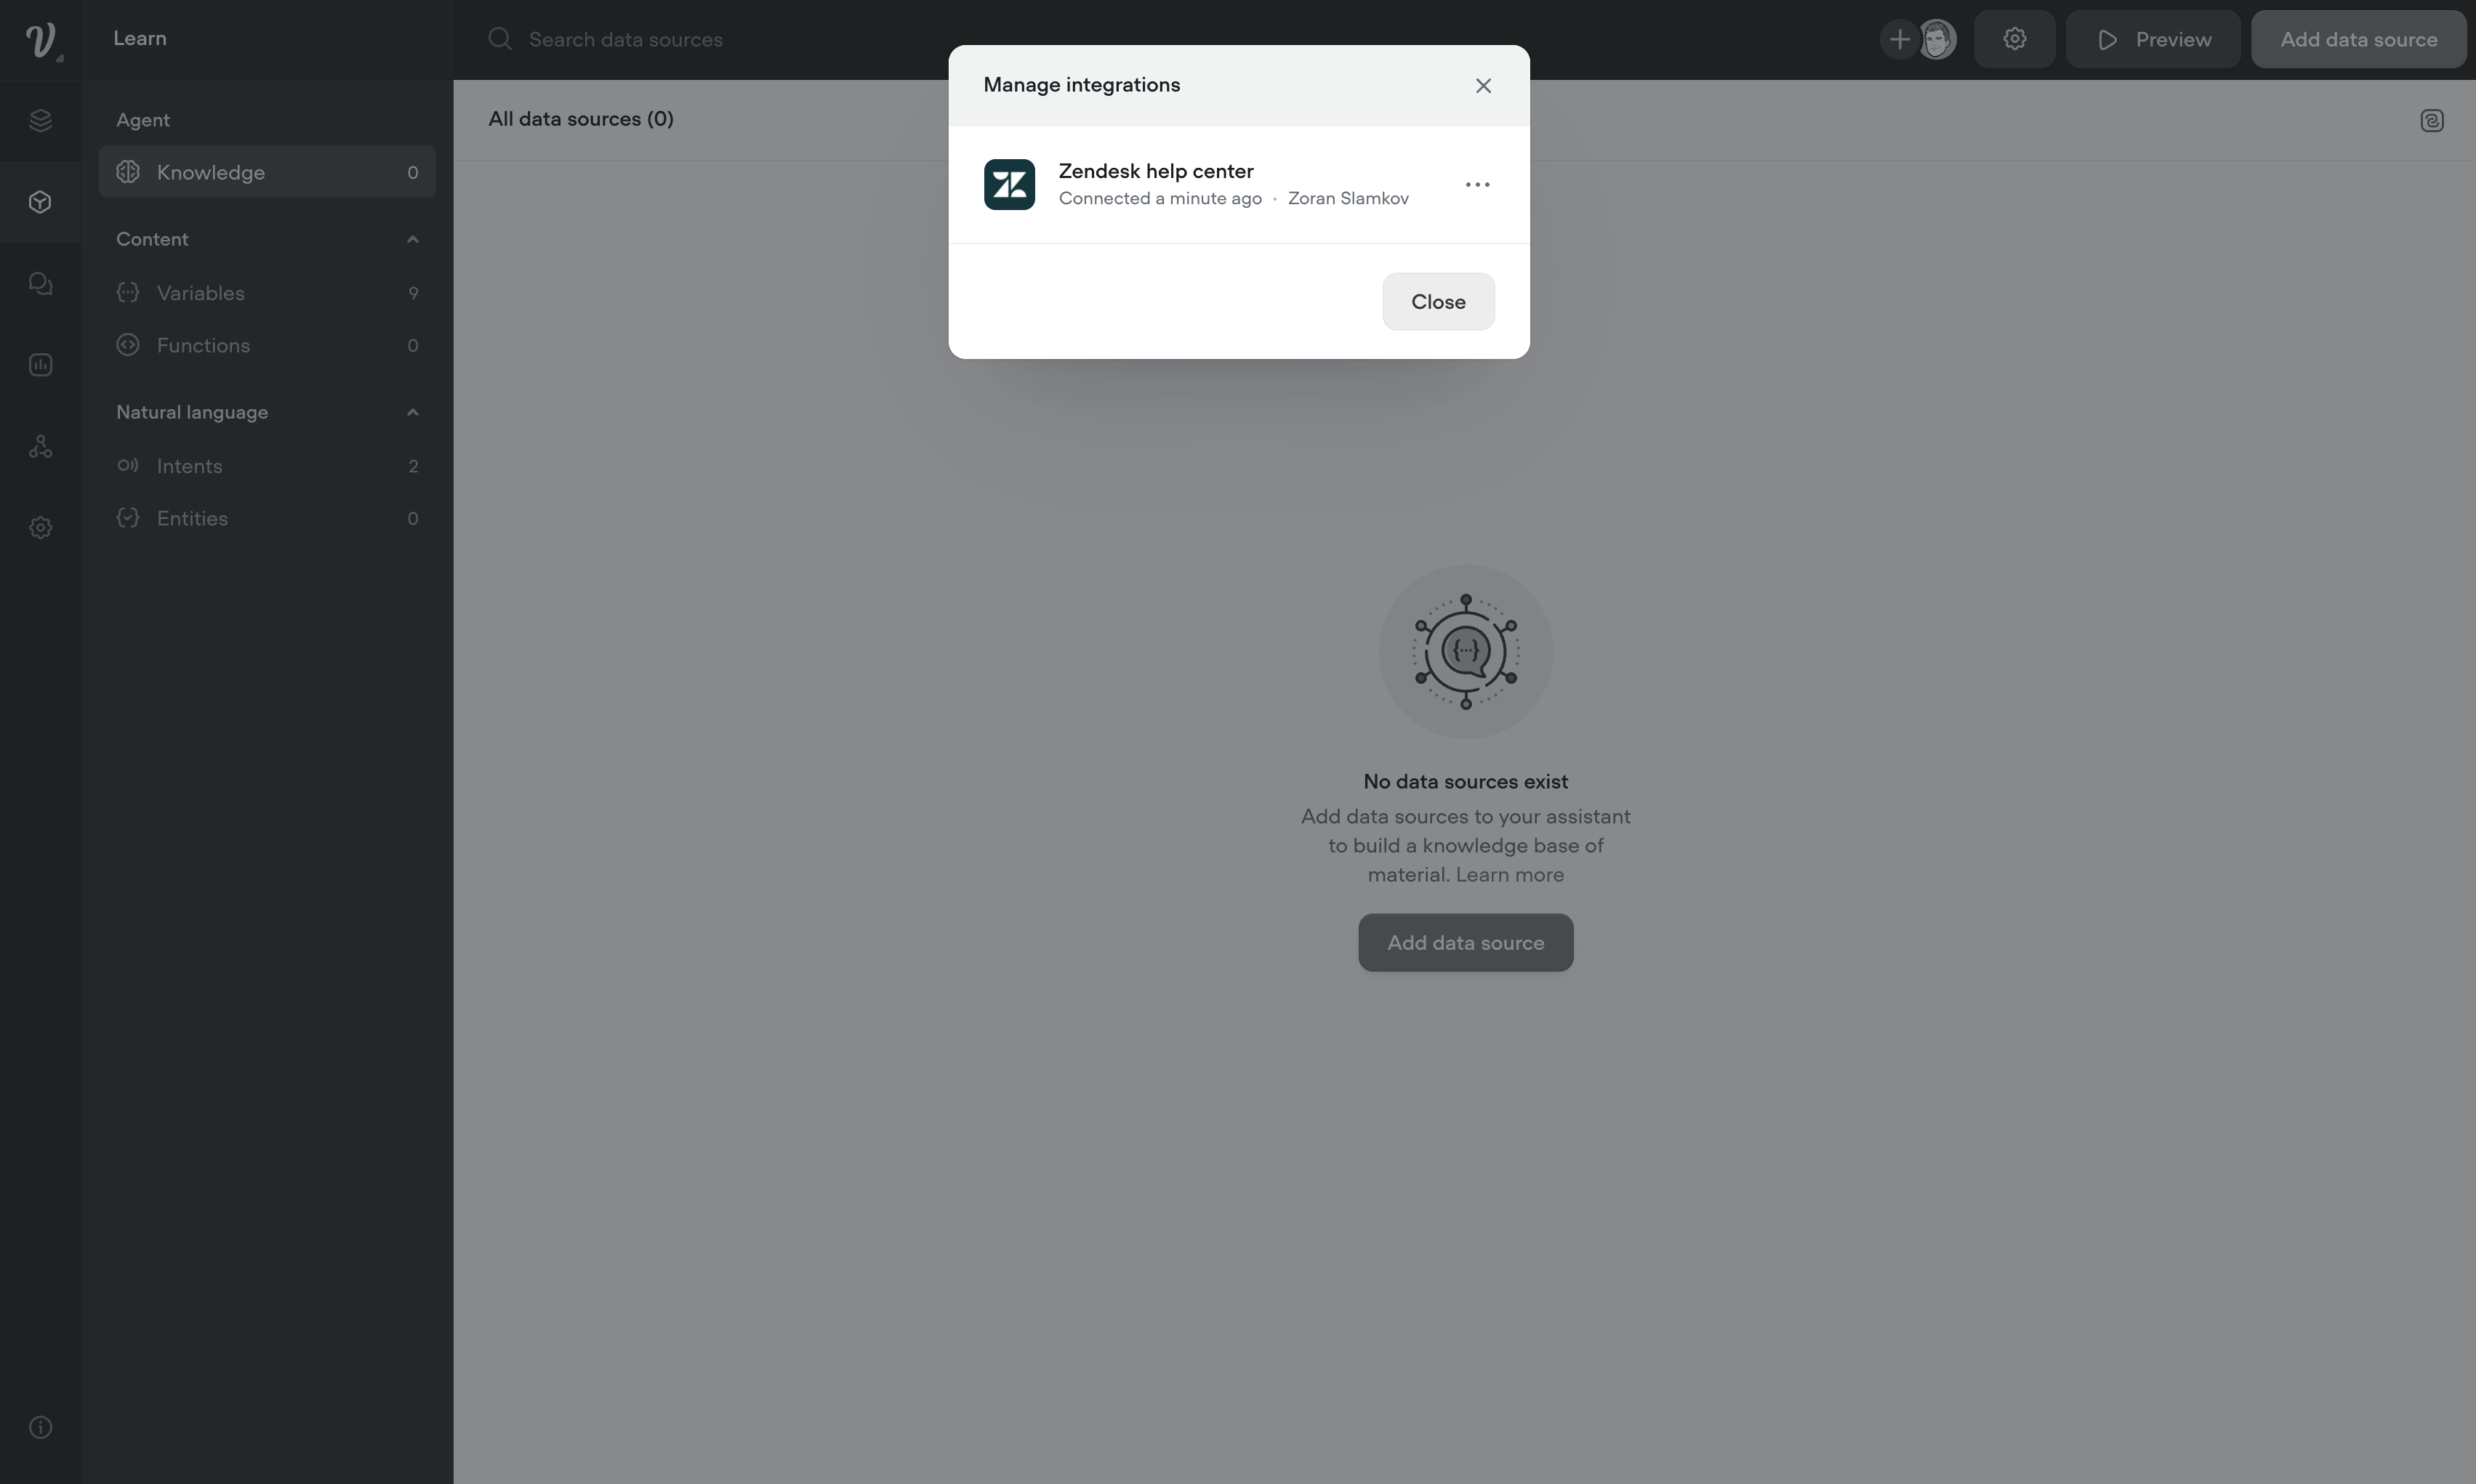
- Open Integrations panel: In the Knowledge Base, you can manage your integrations by selecting the Integrations icon in the header of table.
- Update or remove connection: This will show you a list of all your connected integrations (more coming soon), including Zendesk, with the option to reconnect with a different account or to remove them.
- NOTE: if you delete the connection, any refresh rate assigned to the Zendesk articles will fail unless you reconnect with an account that has access to those same articles.
Create tickets
You can also create and store tickets in Zendesk via the Voiceflow API step.
{
  "ticket": {
    "comment": {
      "html_body": "<h3>Action required: Answer customer's question</h3><br><p></p><b>Customer's question:</b> {customerQuestion}</p><p><b>AI's context question to the customer:</b> {additionalQuestion}</p><p><b>Additional context from customer:</b> {customerAdditionalContext}</p><br><p><b>Goal: Solve the ticket in one reply. How?</b></p><ul><li>Gather additional context from customer past tickets.</li><li>Check if customer raised other tickets and merge them.</li></li><li>Anticipate the next question and resolve it in this reply.</li><li>Keep your response clear and concise.</li></ul></p><hr><p><b>System Message:</b> This ticket was generated through our chatbot. If the information isn't displaying correctly, or if you need different information to complete this request, please contact your Team Leader with suggested changes to this template.</p>",
      "public": false
    },
    "tags": ["{ticketCategory}", "{ticketSubcategory}", "chat_feedback"],
    "requester": {"name": "{customerName}", "email": "{customerEmail}"},
    "subject": "Chat Support Ticket: {customerName} has a question",
    "priority": "{ticketPriority}"
  }
}
Key componets
Using the Zendesk API has a few key steps, listed within the template.
-
Review Zendesk Dev Docs on how to Create A New Ticket
-
Replace "example" with your domain, in the URL
-
Generate your Zendesk API Token
-
Review Zendesk Dev Docs on how to authenticate with an API Token
-
Base64 encode your API Token, in the format: {email_address}/token:{api_token}
-
Replace "auth-value" with your Base64 enconded API token
-
Capture "response.ticket.id" to {ticketID}
Voiceflow template walkthrough
Get started with a Voiceflow template to automate ticket submission.
Community partner walkthrough
Checkout the tutorial how a community leader built a Zendesk app in Voiceflow.
Updated 8 months ago