
Choice (legacy)
What is the choice step? How do I use the choice step? How do I create conversation paths?
When inviting your end-user to provide a range (wide or limited) of responses, you will find that many of said responses are likely outside the scope of your bot.
To reduce the amount of unexpected input that users send your conversational assistant, the Choice step allows you to focus on the range of responses your user can easily give. It is ideal for pre-defined paths and choices for linear and choice-based conversations.
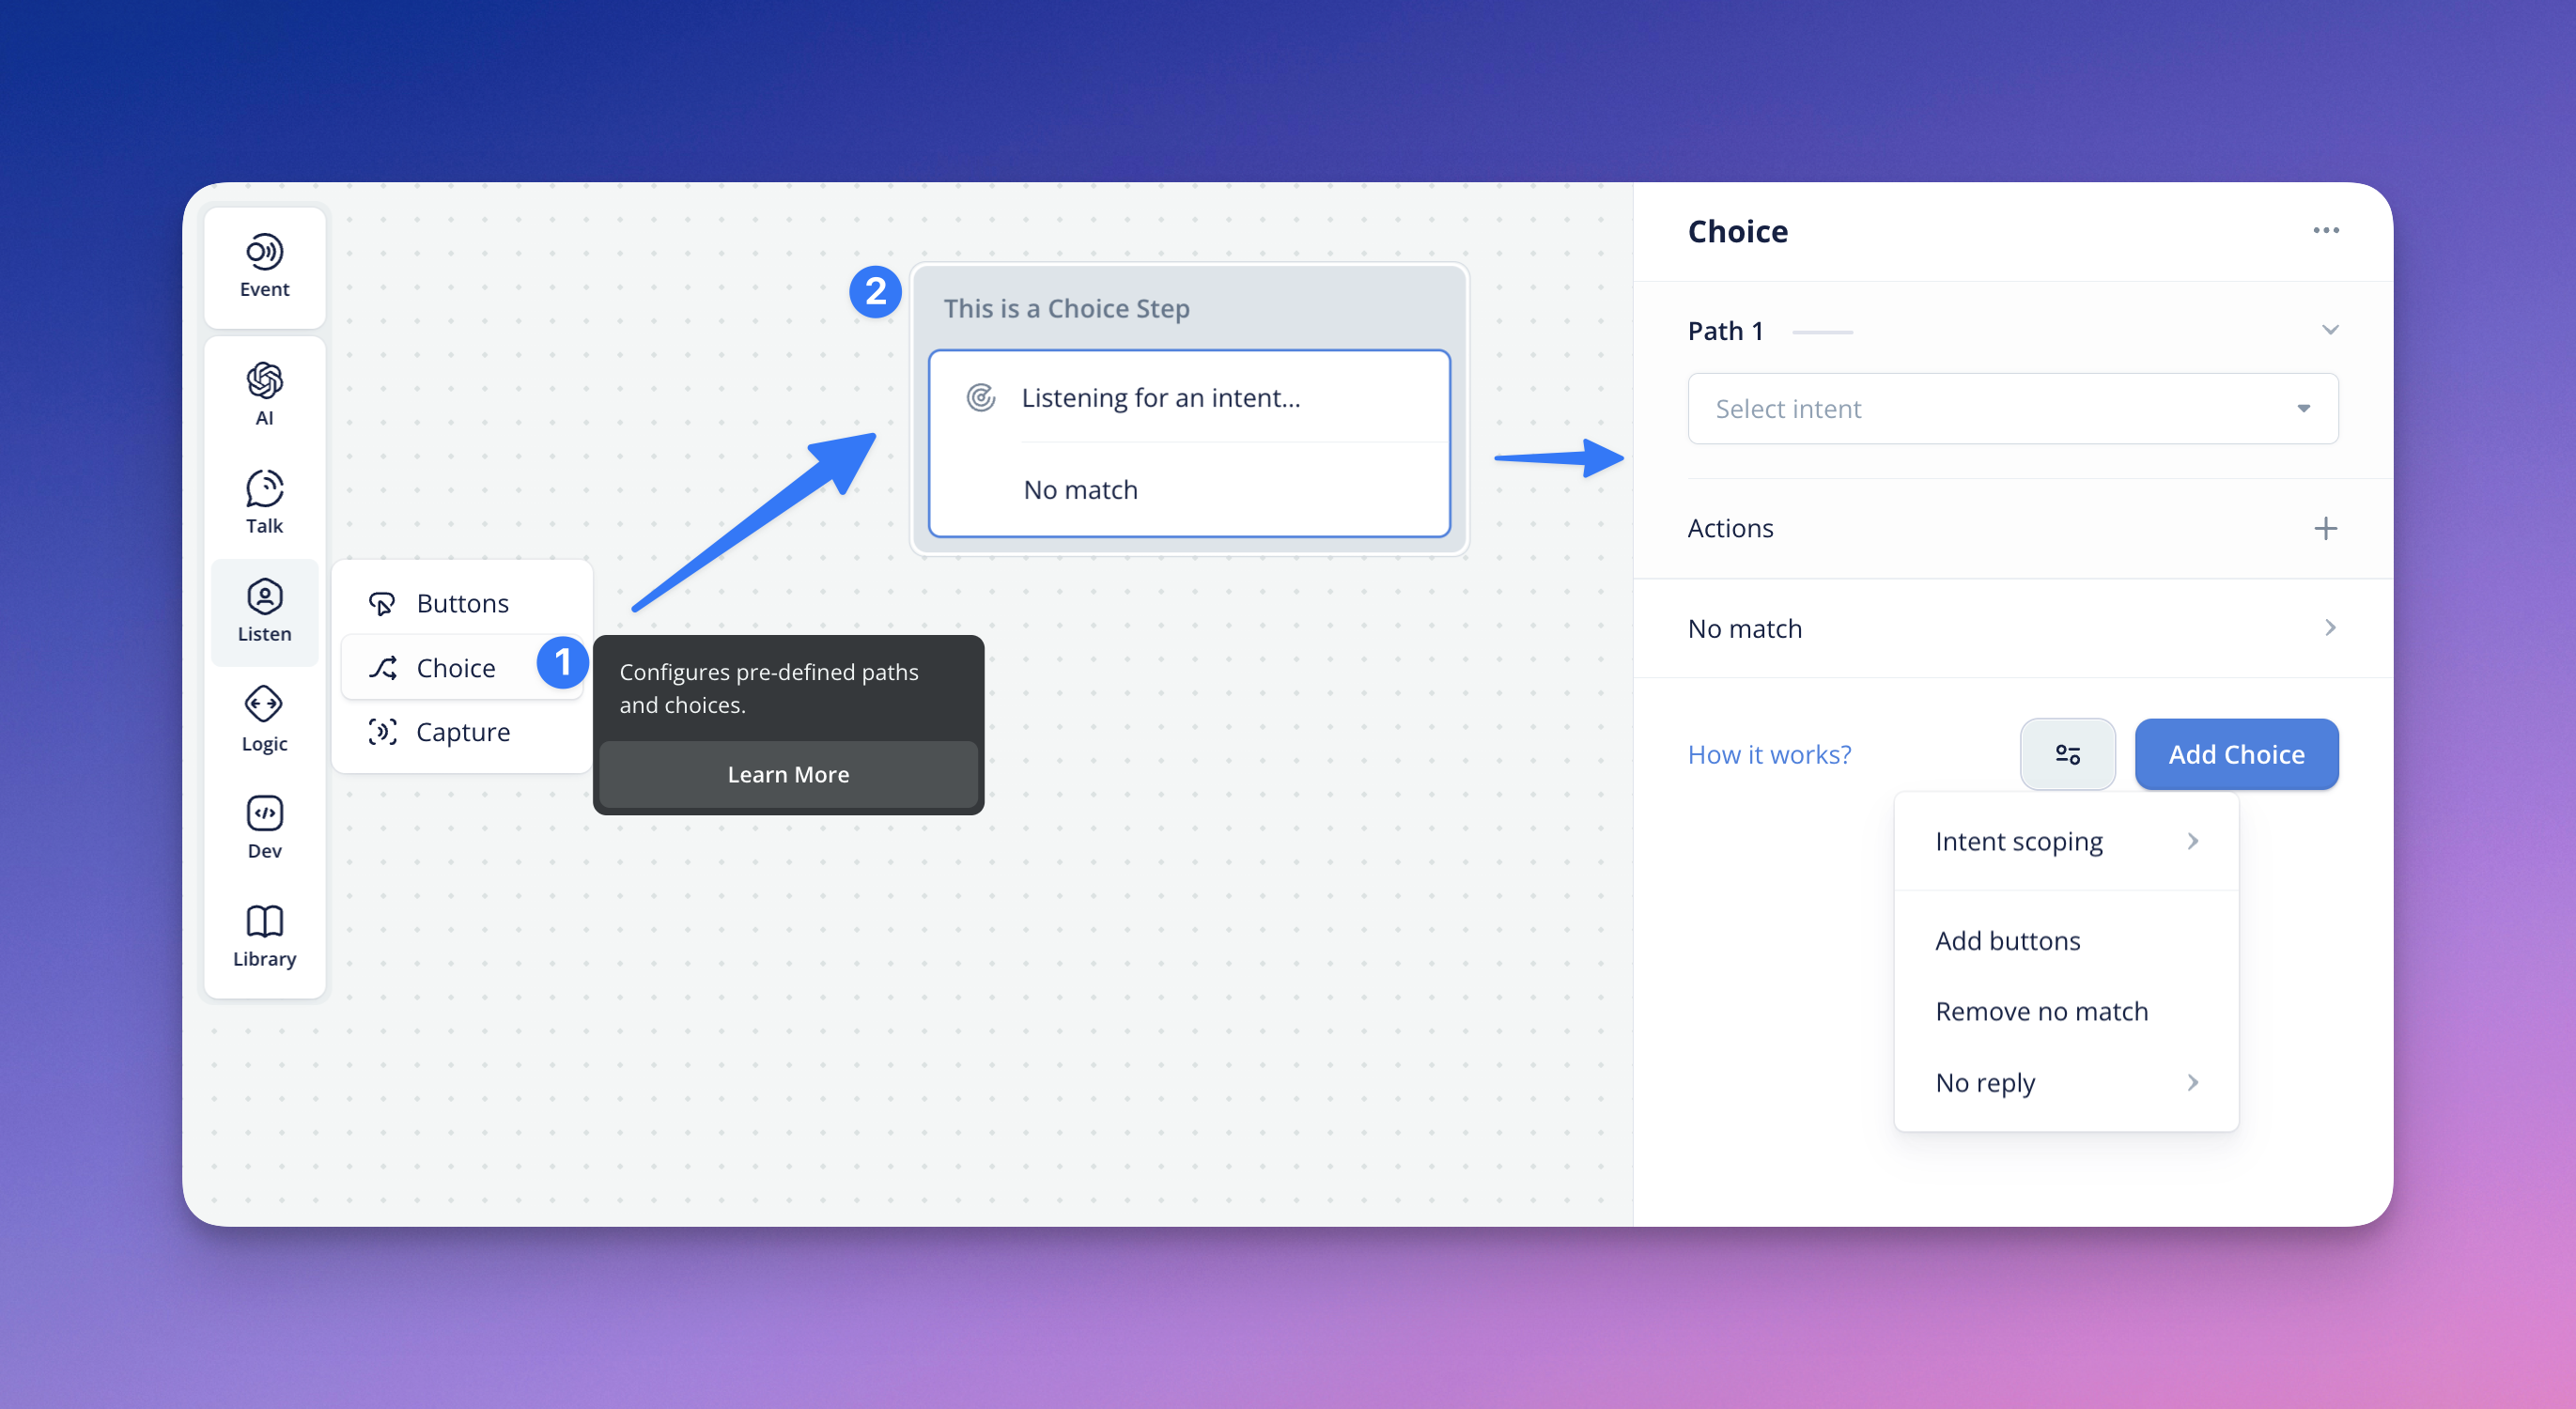
The Choice Step can also be used as an open-ended filed to prompt users with intents as its choices. In its default state, it will be listening for an intent; unless configured.
Tip: In general, anything you can do with a choice step can be done with a button step (including attaching intents to paths), except the button step also has a visual users can click on, so it's often better to just use buttons.
In addition to providing choice-paths or intents to guide your user through, there are a number of other reasons you will want to leverage choice paths in building your conversations.
- Expect users to be informative — Because users are cooperative, they often offer more information or context than is often required or prompted of them.
- Get the dialog back on track — Your conversation won't always be able to handle cooperative responses. In these cases, rely on pre-built choices or paths for existing parts of your conversation or conversational error handling to get the dialog back on track or the intended conversation direction.
- Move the conversation forward — Every path in your conversation should be intentional, Choices (or Buttons) offers the ability to advance the conversation with pre-defined choices/intents.
A choice step allows the user to respond with a free-form reply and enables the assistant to process that reply by matching it to an intent. Once the user reply is matched with an intent, the assistant then proceeds down the corresponding conversation path. The choice step also has a no match option that is triggered when the user reply does not match with any intents.
For example, let's use the case of a Payments and Accounts chatbot. The assistant starts with a simple, "How can I help you?" in a text step, and the user has the ability to respond however they'd like in the following choice step. The user types a free-form response, which is then processed by the choice step to match to an intent. If the response is matched to an intent that has a defined path in the choice step, then the assistant will follow the matching path. If the response is matched to an intent elsewhere on the canvas, then it will jump to wherever the intent exists on the canvas and proceed down its path.
Creating Choice Paths
Choice steps are made up of intent-based and defined "paths" and a fallback path for when a user doesn't reply or doesn't match the available intents.
When the user reaches a Choice step in the conversation, the assistant will listen for the user’s intent. Depending on the user’s intent, the assistant will take them down different paths or intents defined in the conversation.
Note: In its default state (ie. when you drag a Choice step from the sidebar) it will appear and function as to 'Listening for an intent' ; if you click Add Choice and click the settings configuration you can limit this function.
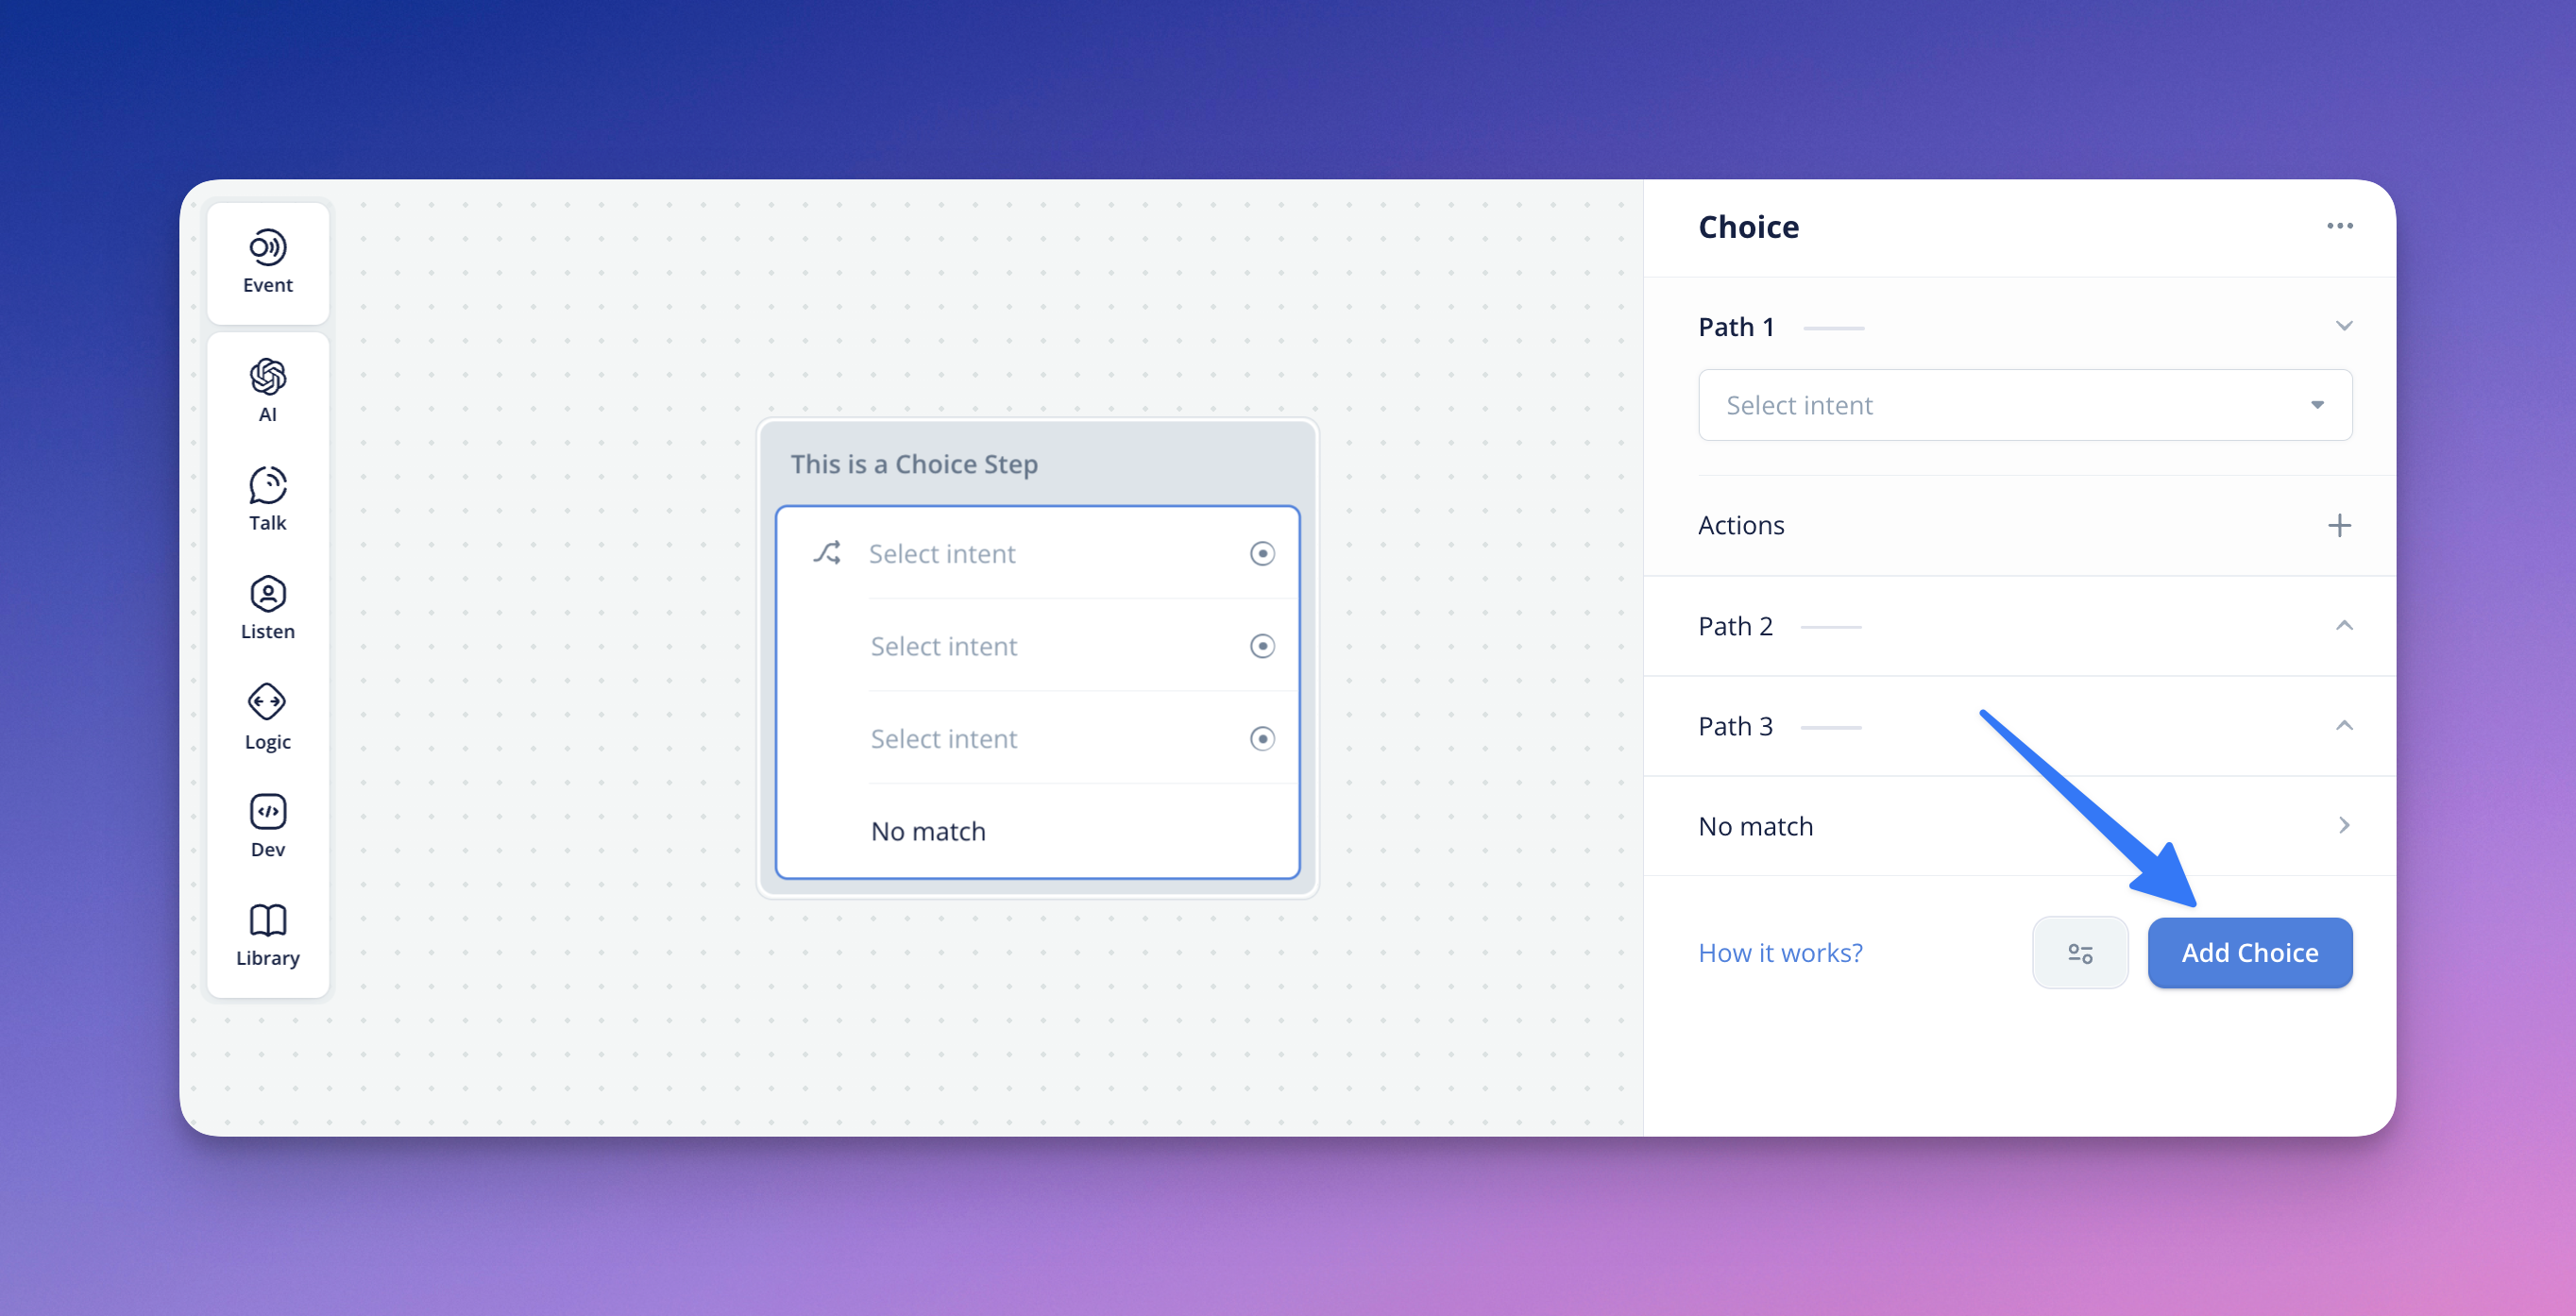
You can add additional paths to your Choice step by clicking 'Add Choice', each time you want to add a new Choice. When selected, the choice path will have a 'port' attached to it on the canvas - allowing it to be linked to another block or step.
Adding Intents to Choice Paths
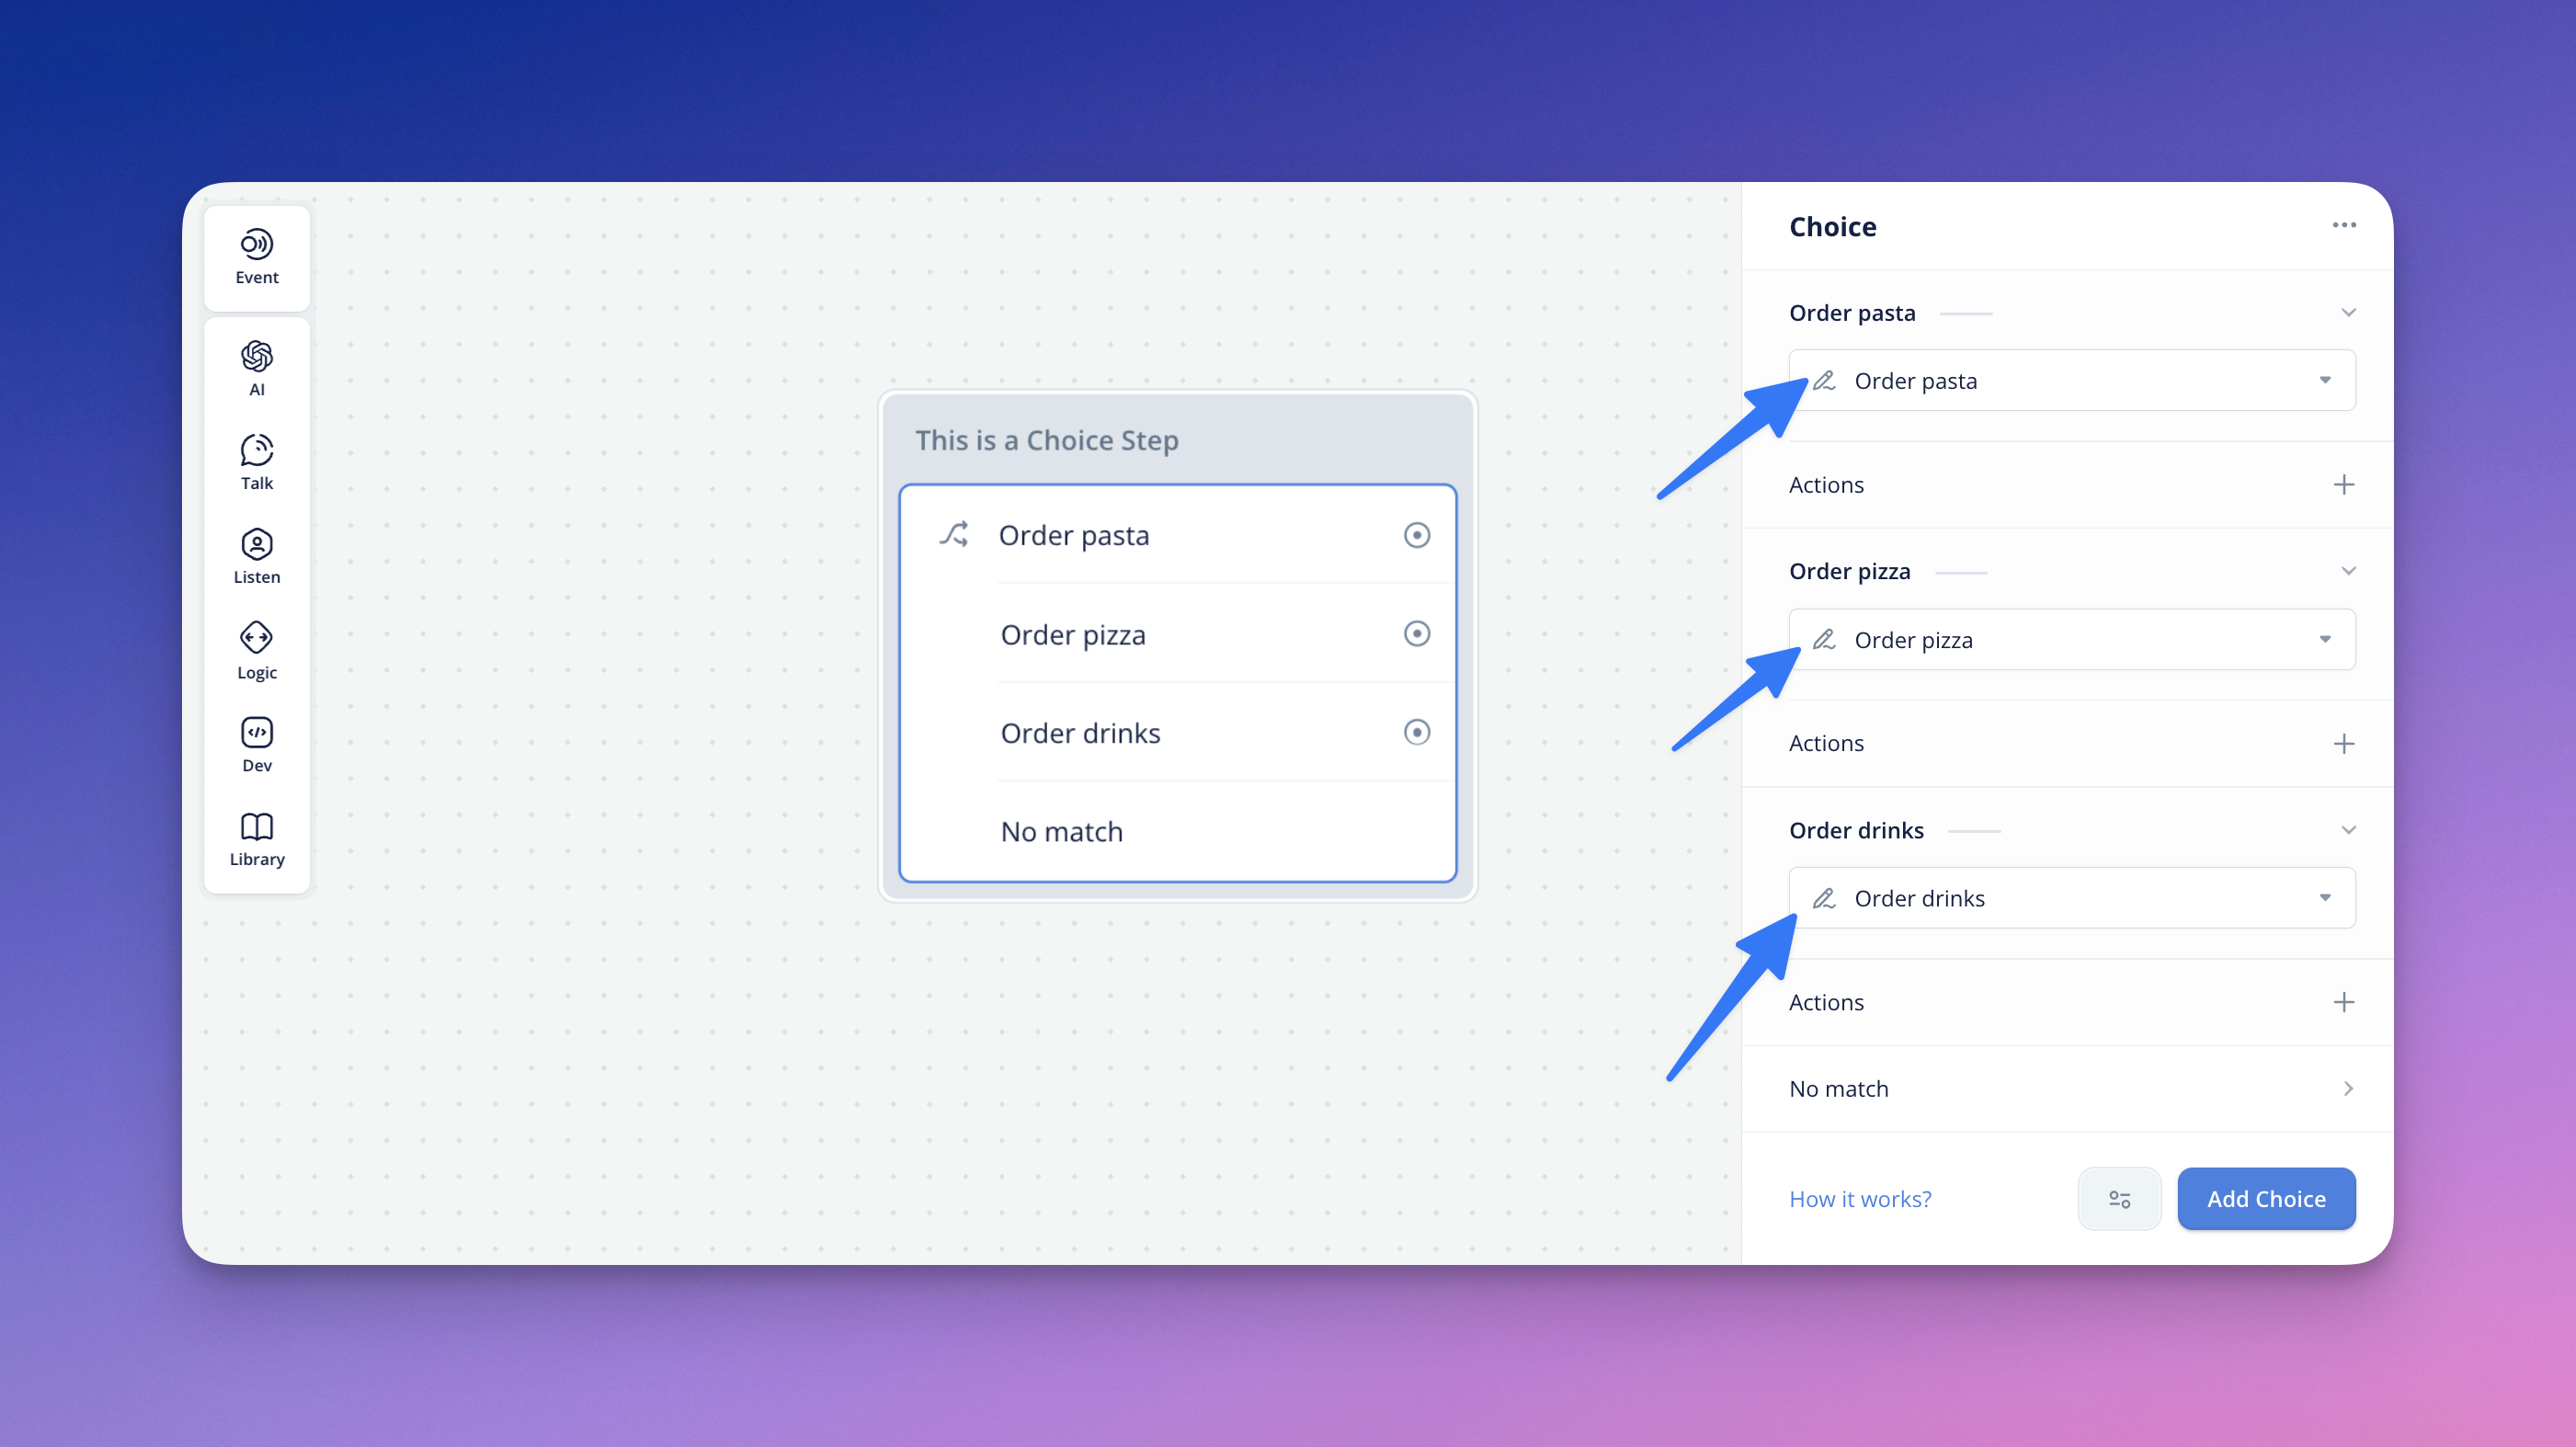
Once you've created a Choice path, you can choose its linked intent. Conceptually, this lets you direct users down conversation paths most relevant to their needs. Essentially, you are defining how your assistant should route users depending on their chosen intent or 'choice'.
For example, if you have an intent of "order pizza" for path 2 and the user activates the order pizza intent, the user will follow path 2.
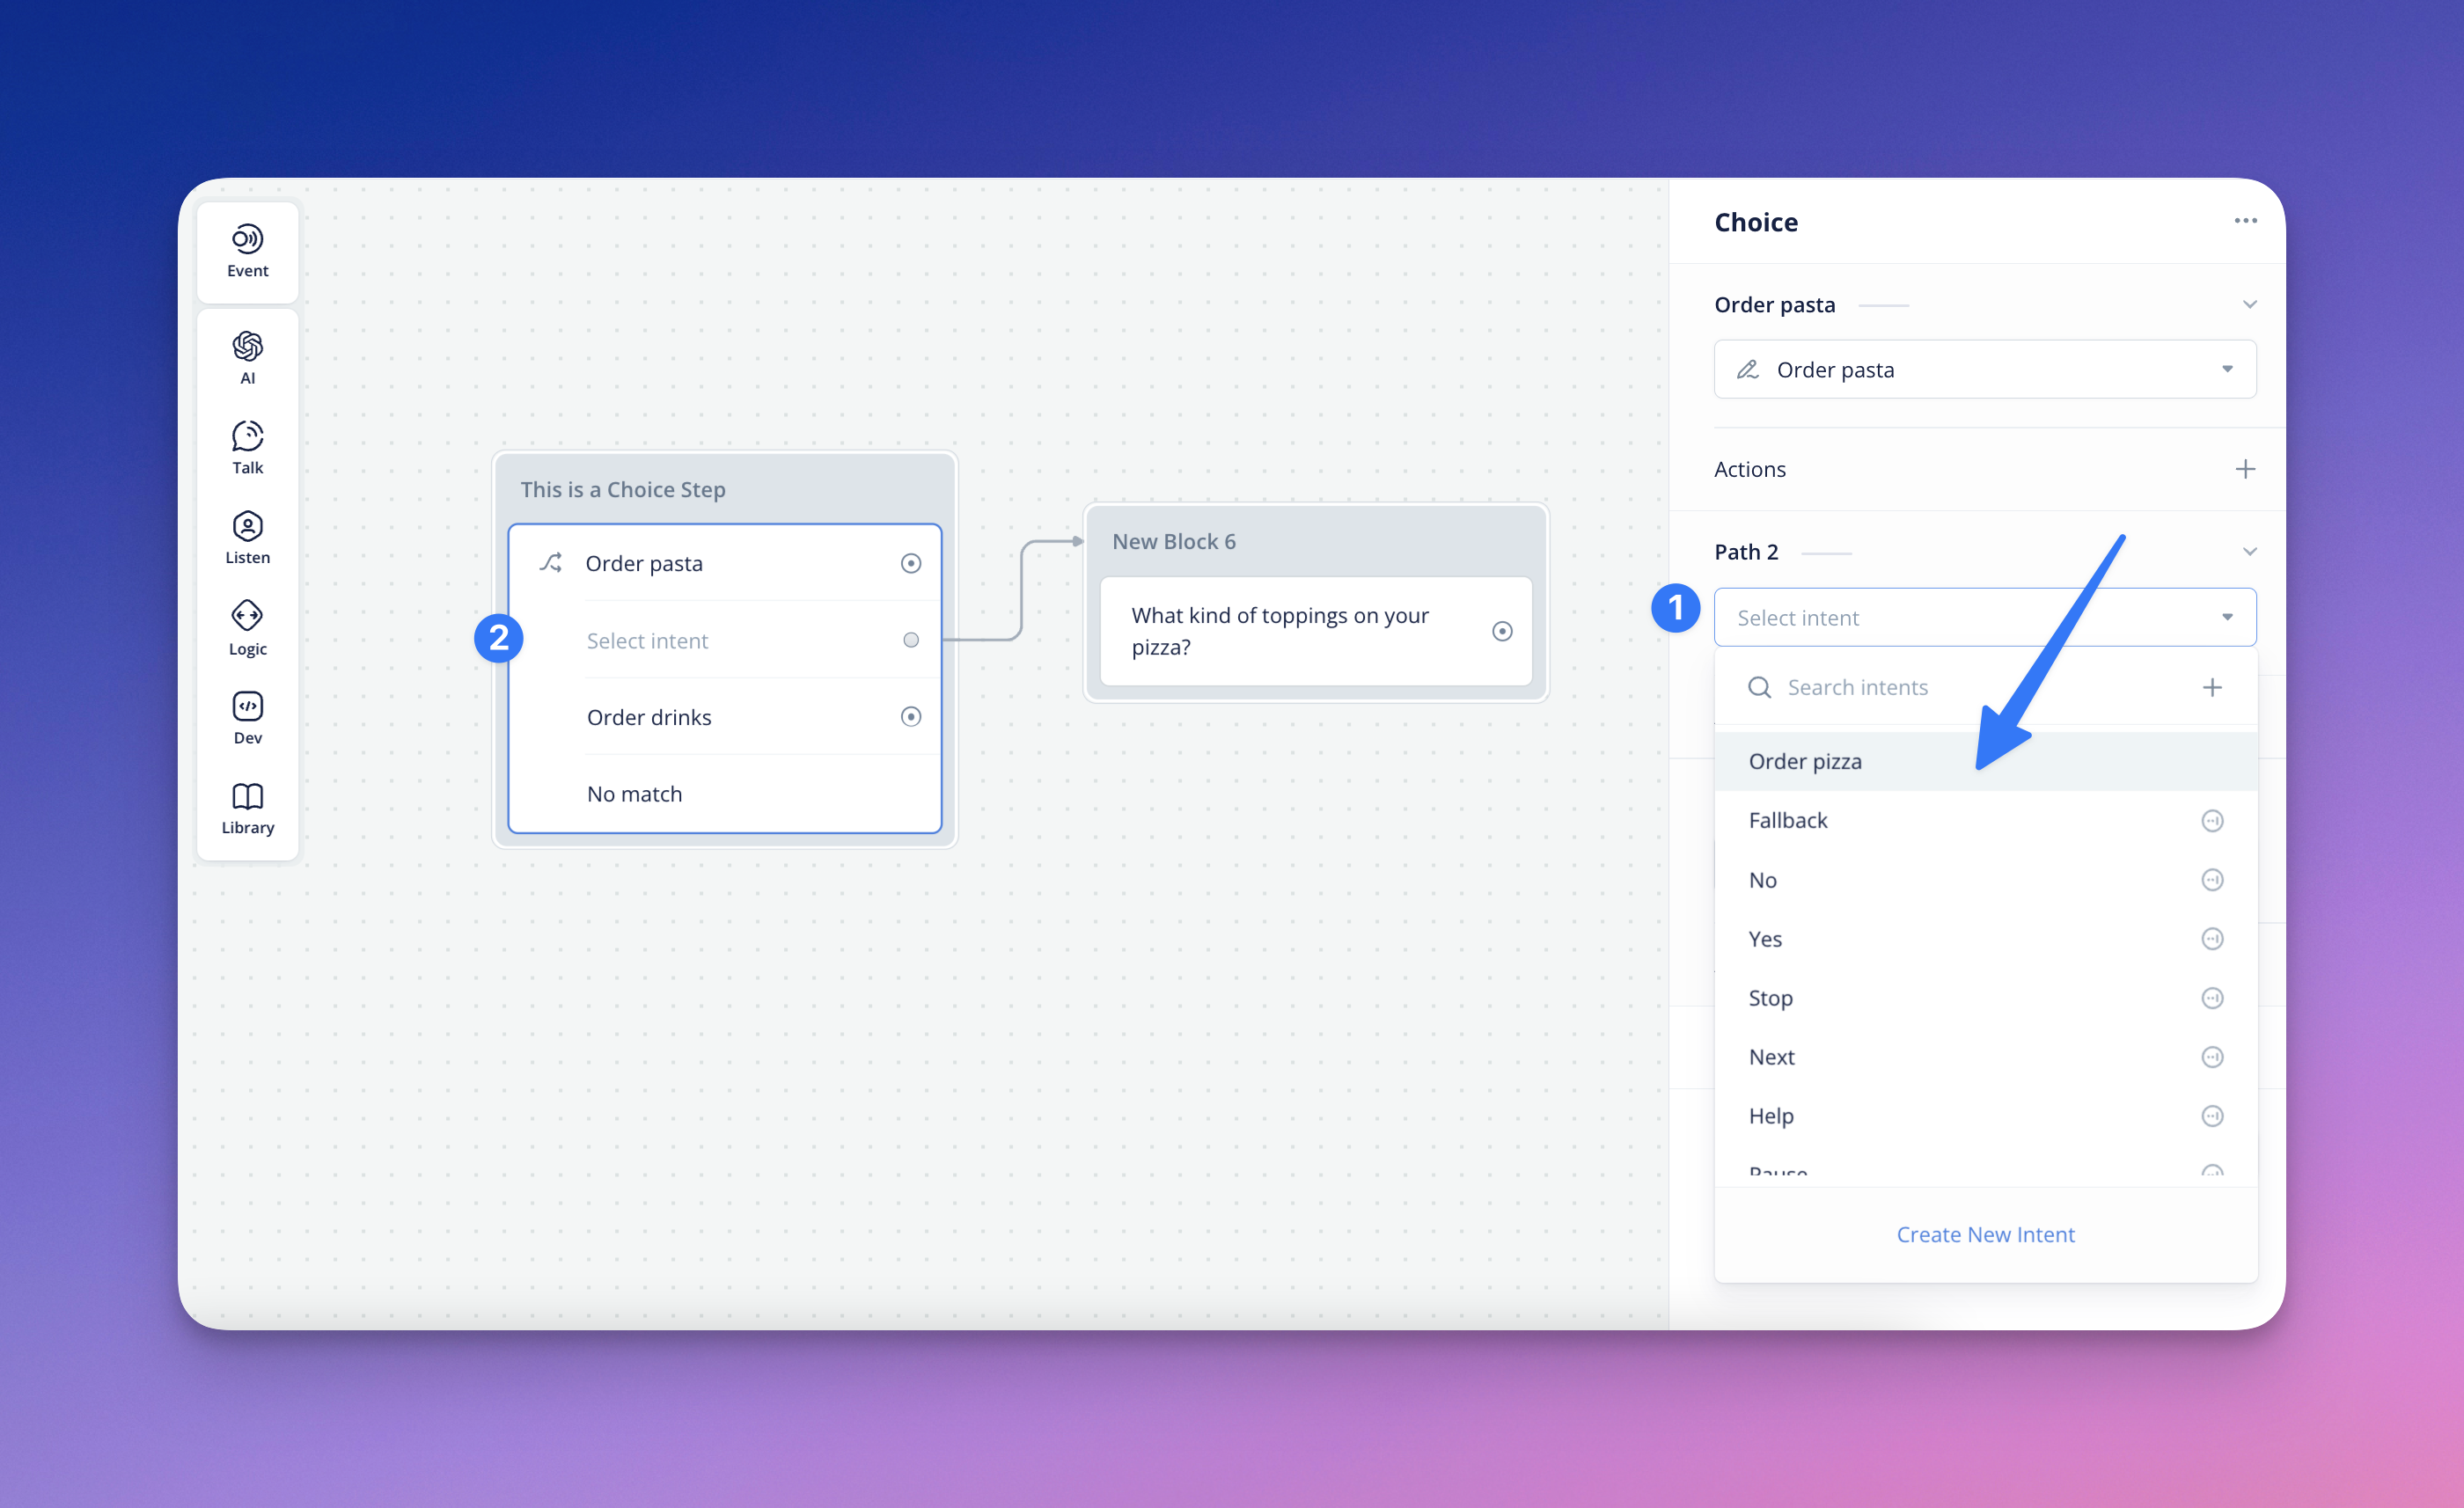
You can choose an existing intent configured in your conversation and/or model, or create a new one within the Choice step. To link an existing intent, click into the path's input, as indicated in the steps above. You can then choose from a list of your assistant's existing intents in the dropdown menu.
To create a new intent from this step, type a new intent name in the path's input and hit enter or select the Create New Intent button located at the bottom of the sub-menu.
Note: You can modify a path's linked intent without deleting the path's connection point.
Choice Step - Connecting a path (Follow Path)
Now that you've configured your Choice step, you can connect it to a conversation path on canvas.
To link a Choice path, navigate back and click the port of your selected path, drag and click the connector to the block you want to link to. You can modify connections by clicking the port of your selected path.
Choice Actions - Intent Actions
In addition to porting a connection in your Choice step, you can use Actions(3) to nest navigation and backend logic in a single Choice within the step. This can be configured under the Actions menu, following intent selection.
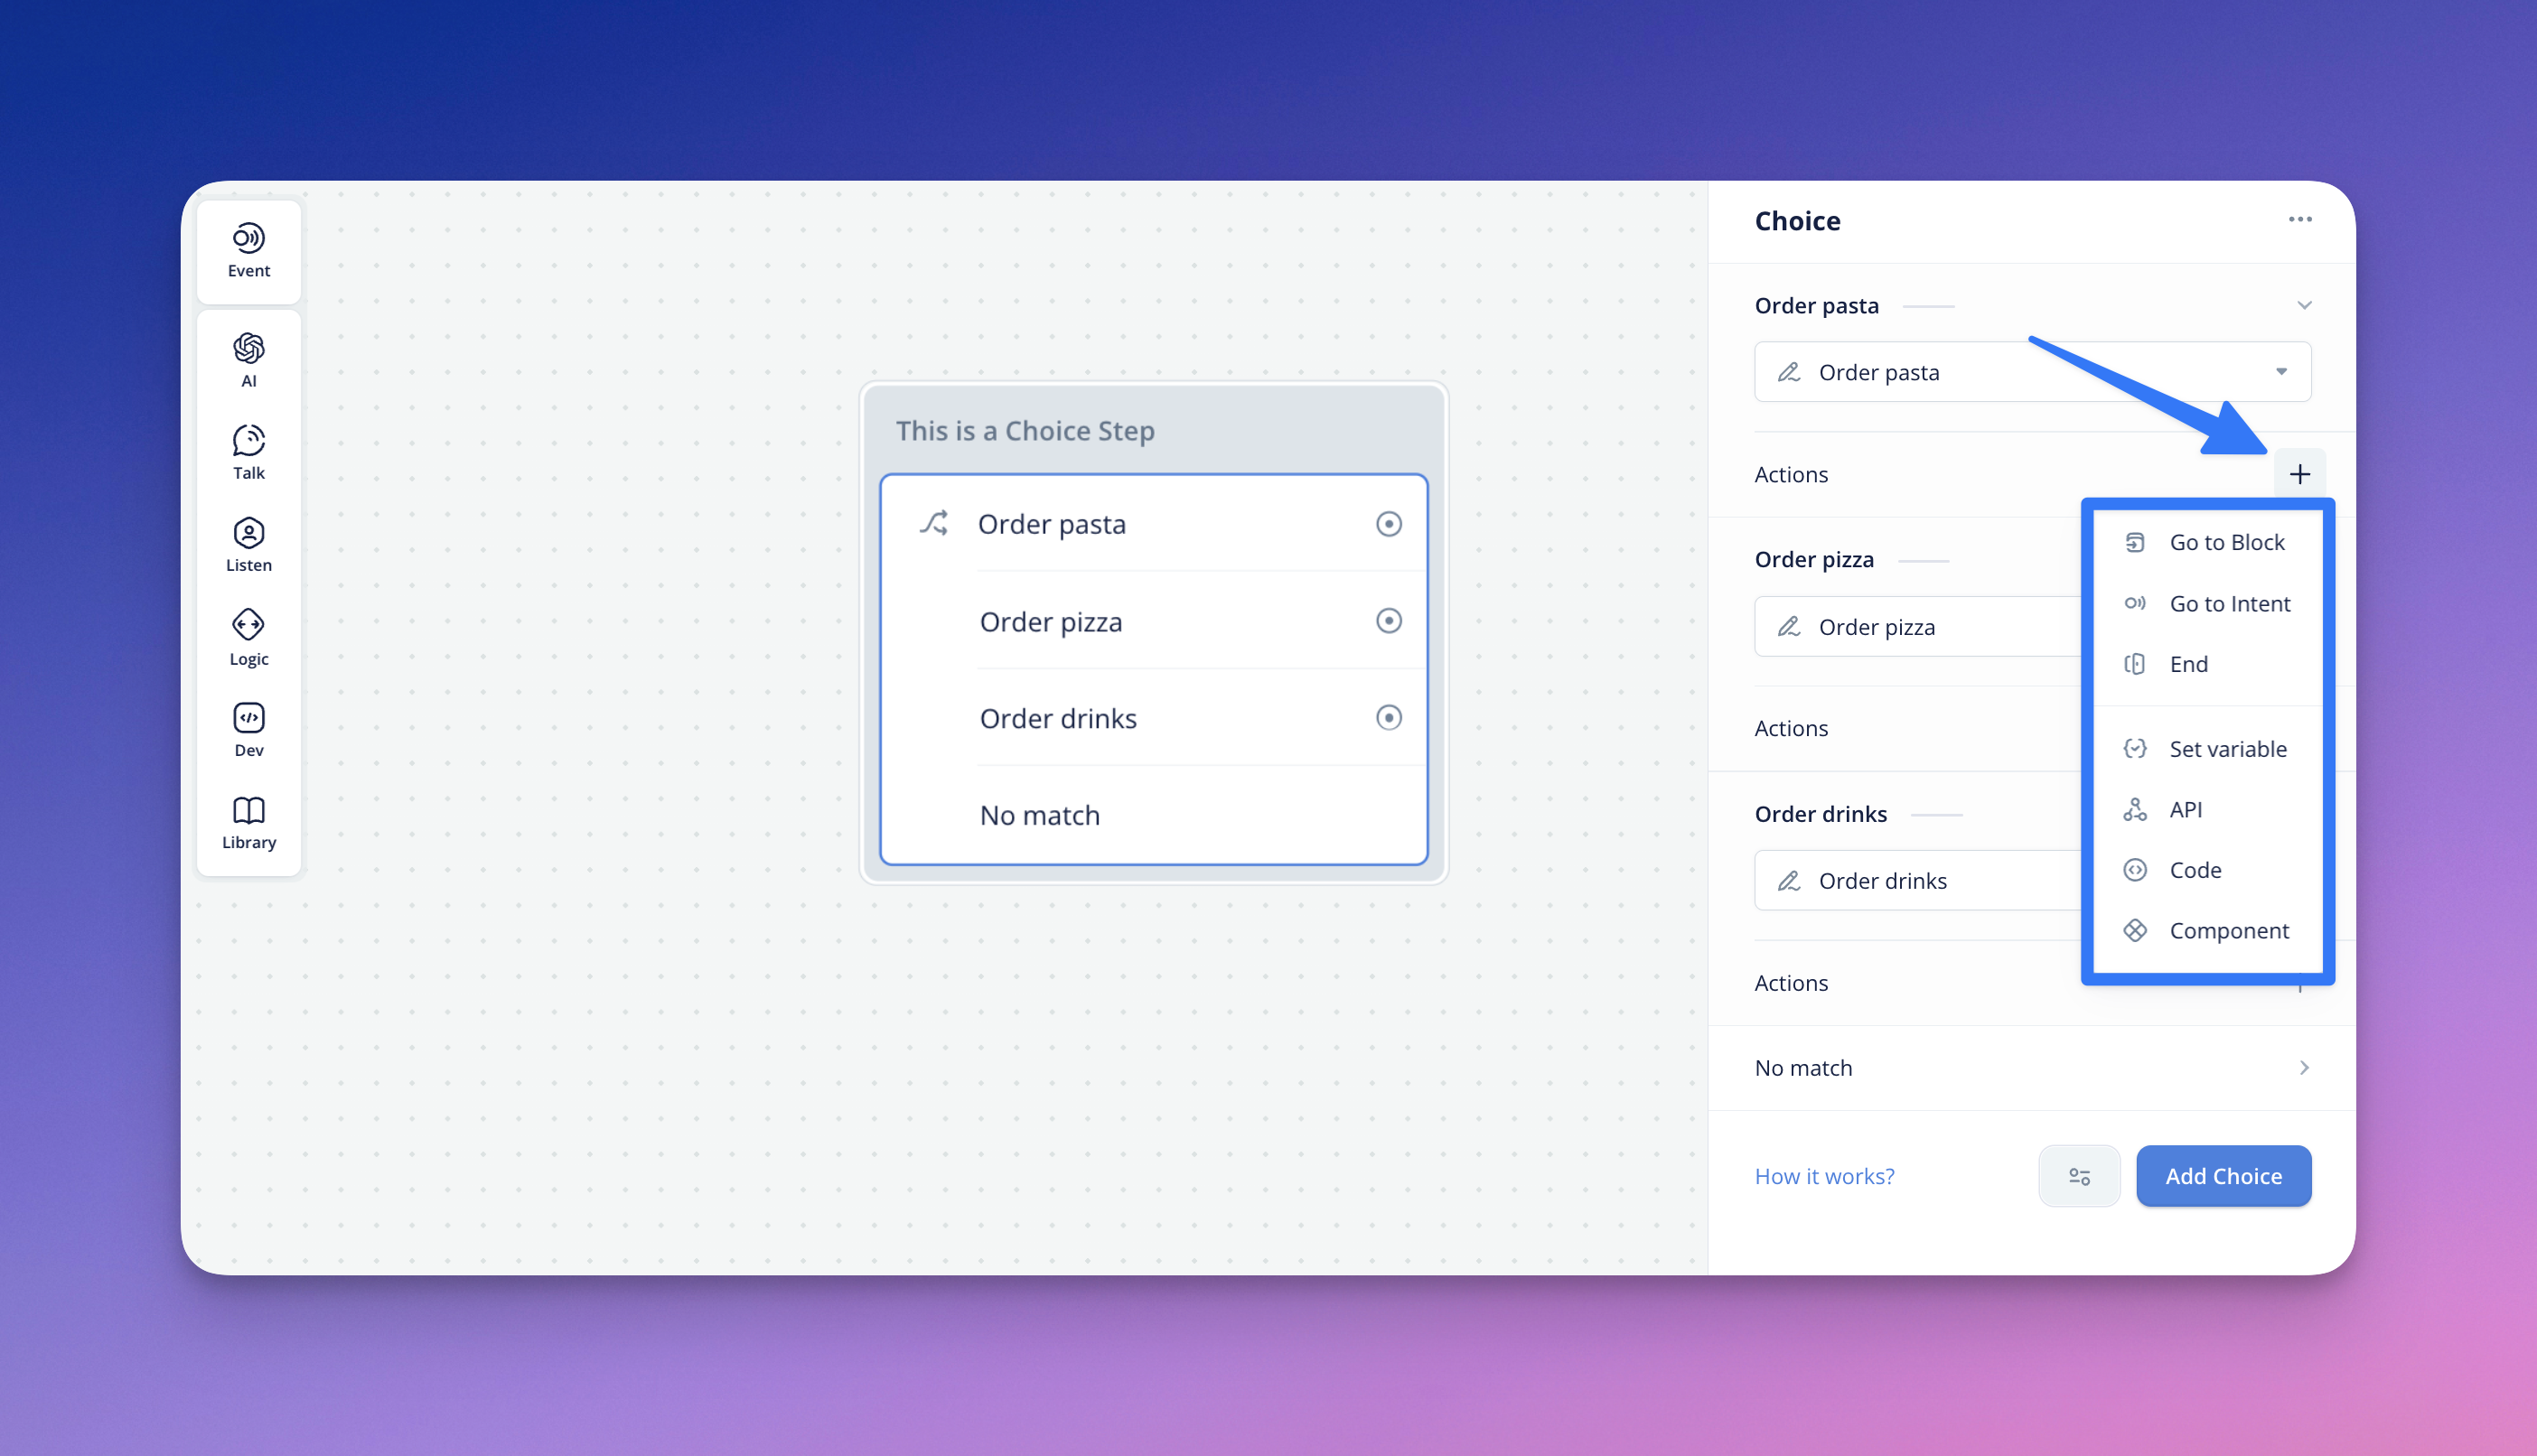
Under the Choice step, you can perform these nested actions per Choice:
- Go to Block - Goes to a specific block referenced within the assistant
- Go to Intent - Goes to an existing intent contained in the assistant
- End - Ends the conversation at its current state
- Set variable - Allows you to set and change the value of variables
- API - Allows you to set up, configure and execute API calls & functions
- Code - Allows you to set up and code custom JavaScript functions & commands
- Component - Goes to a specific user-defined component
Tip: Learn more about Actions in-depth and in detail here.
Choice Step - Intent Scoping
By default, your Choice step will be listening for all intents, waiting for the user to prompt and guide the conversation.
If you want to limit the scope or access from the Choice step to the intents contained in solely the step, you can click the settings icon located to the left of the Add Choice button, and select Intent scoping.
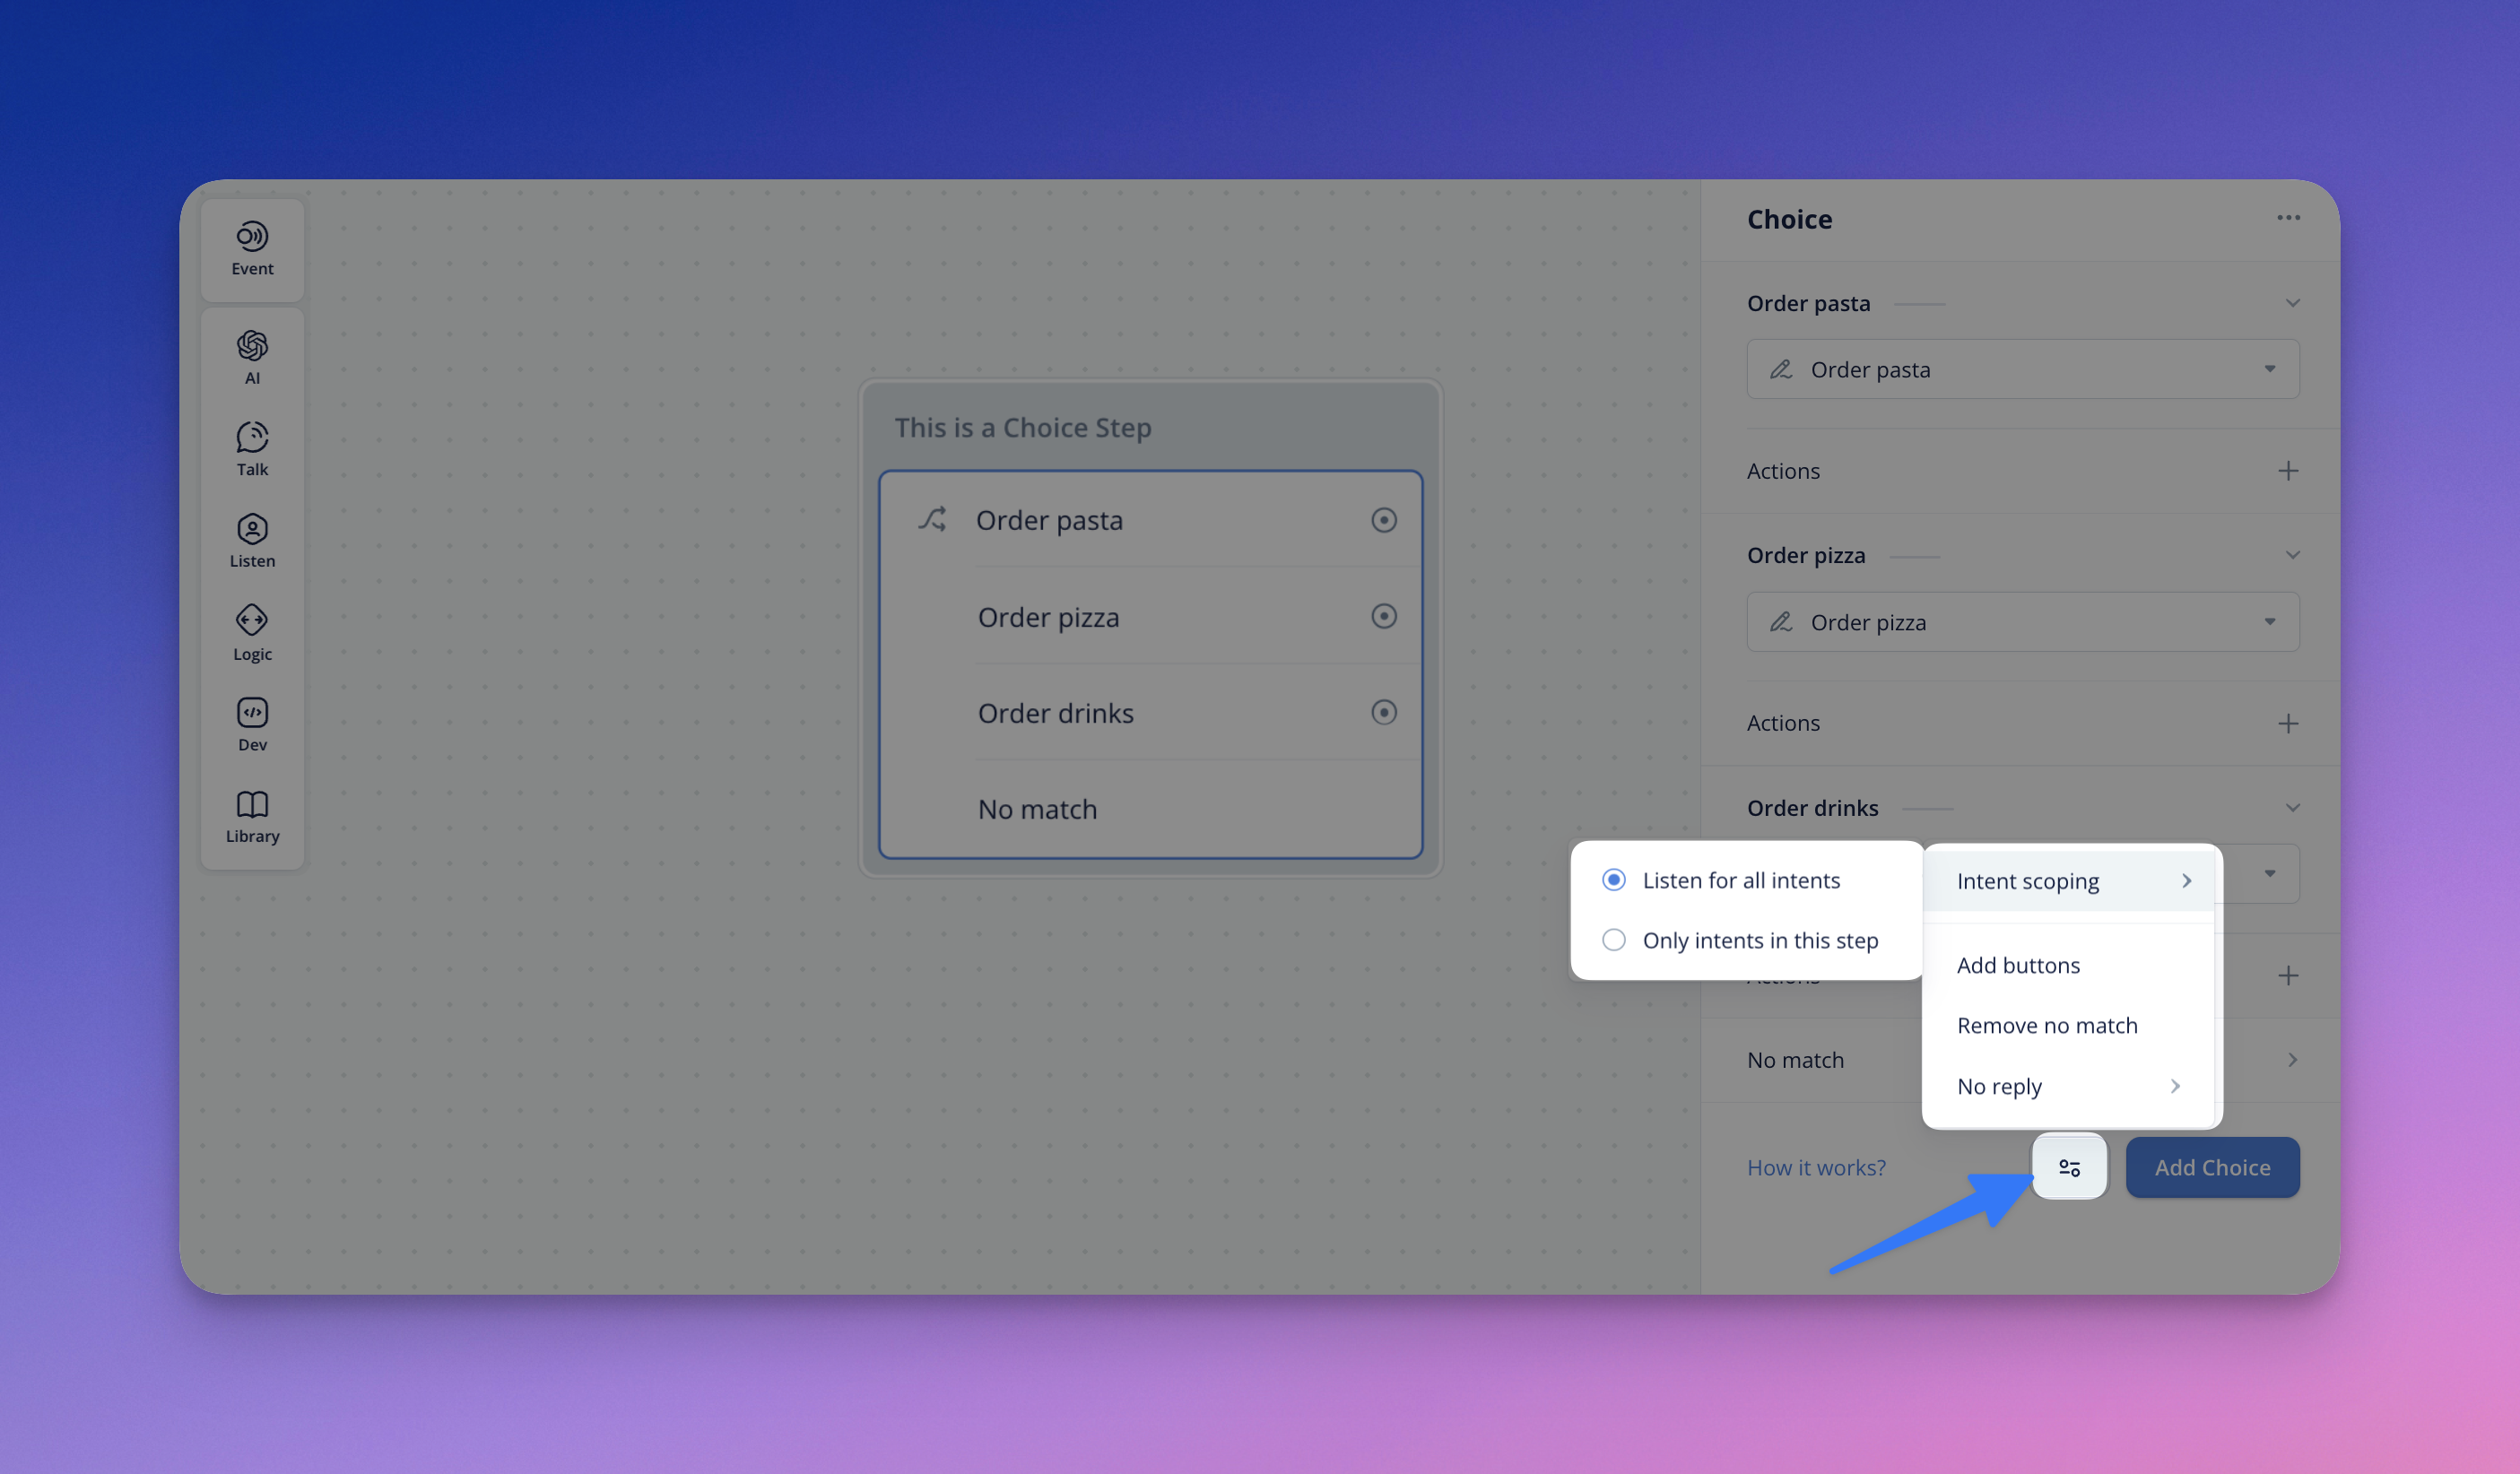
From there, you are able to limit the scope of the ability for the Choice step to match the intents in your conversation at the global-level or at the designated step-level.
Configuring for No Match for Choice Steps
There may be instances where your user's input doesn't match the intents in your Choice step. For these cases, you can define what happens when the assistant detects a 'No Match'.
In the 'No Match' section of the Choice path, you can choose whether you want to reprompt your users and/or configure a fallback path. You can configure the options below to utilize both features.
- To add reprompt options, input the intended No Match response in the text input field. You can add additional reprompts by hitting the (+) button or remove with (-)
- To connect your No Match to a conversation or fallback path, select 'Path' and hit the (+). This will let you select the conversation path for your fallback.
Should you configure a fallback path, you also have the option to add Actions. You also can rename the No Match path, for your reference on the Canvas. You can also remove paths with (-).
Configuring No Reply for Choice Steps
If the assistant does not hear your user's response, or the user's response is unintelligible, the No Reply Response occurs. To define your No Reply response, access the more options menu by clicking the ellipsis (...) button in the Choice step, and select 'Add no reply'.
You can configure your No Reply response message, the time delay, and connect it to a conversation path.
Should you configure a fallback path, you also have the option to add Actions. You also can rename the No Match path, for your reference on the Canvas. You can also remove paths with (-).
Tip: No Reply Responses only occur twice and will exit the app if the assistant still doesn't understand after a third attempt.
Choice Intent Creation & Editing
You can now enter the workflow for Intent creation, editing, and NLU configurations (ie. entities/utterances) right inside the Choice Step!
To enter this workflow, select your desired Intent in the respective Choice option in the Choice step.
Tip: You will notice you can also preview the required entities associated with the Intent and its utterances.
Then, select the pencil icon located to the left of the Intent name in this selector menu.
- Intent Editing - you can configure the name, utterances, and configure the required entities
- Configuring Entity Reprompts - clicking your desired entity under the Required entities section in the Editor allows you to configure the entity reprompt messages and configurations. Once you configure an Entity Reprompt, it will appear as a preview in the main-step view on Canvas.
Tip: Under the Required entities section, this can also suggest entities populated from your utterances to include the option as quick-buttons, to serve as a function to add it to your required entities.
- Description- you can use this field to pass any notes/comments/metadata that you think is relevant for stakeholders or designers for this intent, or use it as a forum to tag/mention your teammate for collaboration.
Why Use Choice Paths in Conversations?
Here's a sample of how we might use a Choice path to direct a conversation:
Let's say we want to provide the user with options to go left or right. To create a path for 'right' we would create an intent called "goes_right" and provide some sample utterances for what the user might say to signify their intention is to go right. Some sample utterances for our "go_right" intent could be:
- "go right"
- "I want to go right"
- "right"
- "please go right"
Now, if the user says any of the sample utterances within the go_right intent, that intent will be triggered and the conversation will follow whatever path has the go_right intent linked.
Tip: In general, anything you can do with a choice step can be done with a button step (including attaching intents to paths), except the button step also has a visual users can click on, so it's often better to just use buttons.
Updated about 1 month ago