
Capture (legacy)
How do I capture and store a user response? What is Capture?
In order to create a seamless, user-friendly conversations, chat agents and voice assistants need to be able to capture information in the ways that humans talk.
The Capture Step lets you build dynamic conversations by capturing and recording all or part of a user's utterance within a selected variable. This can be used to collect a specific piece of information from your user, such as their name or an email address.
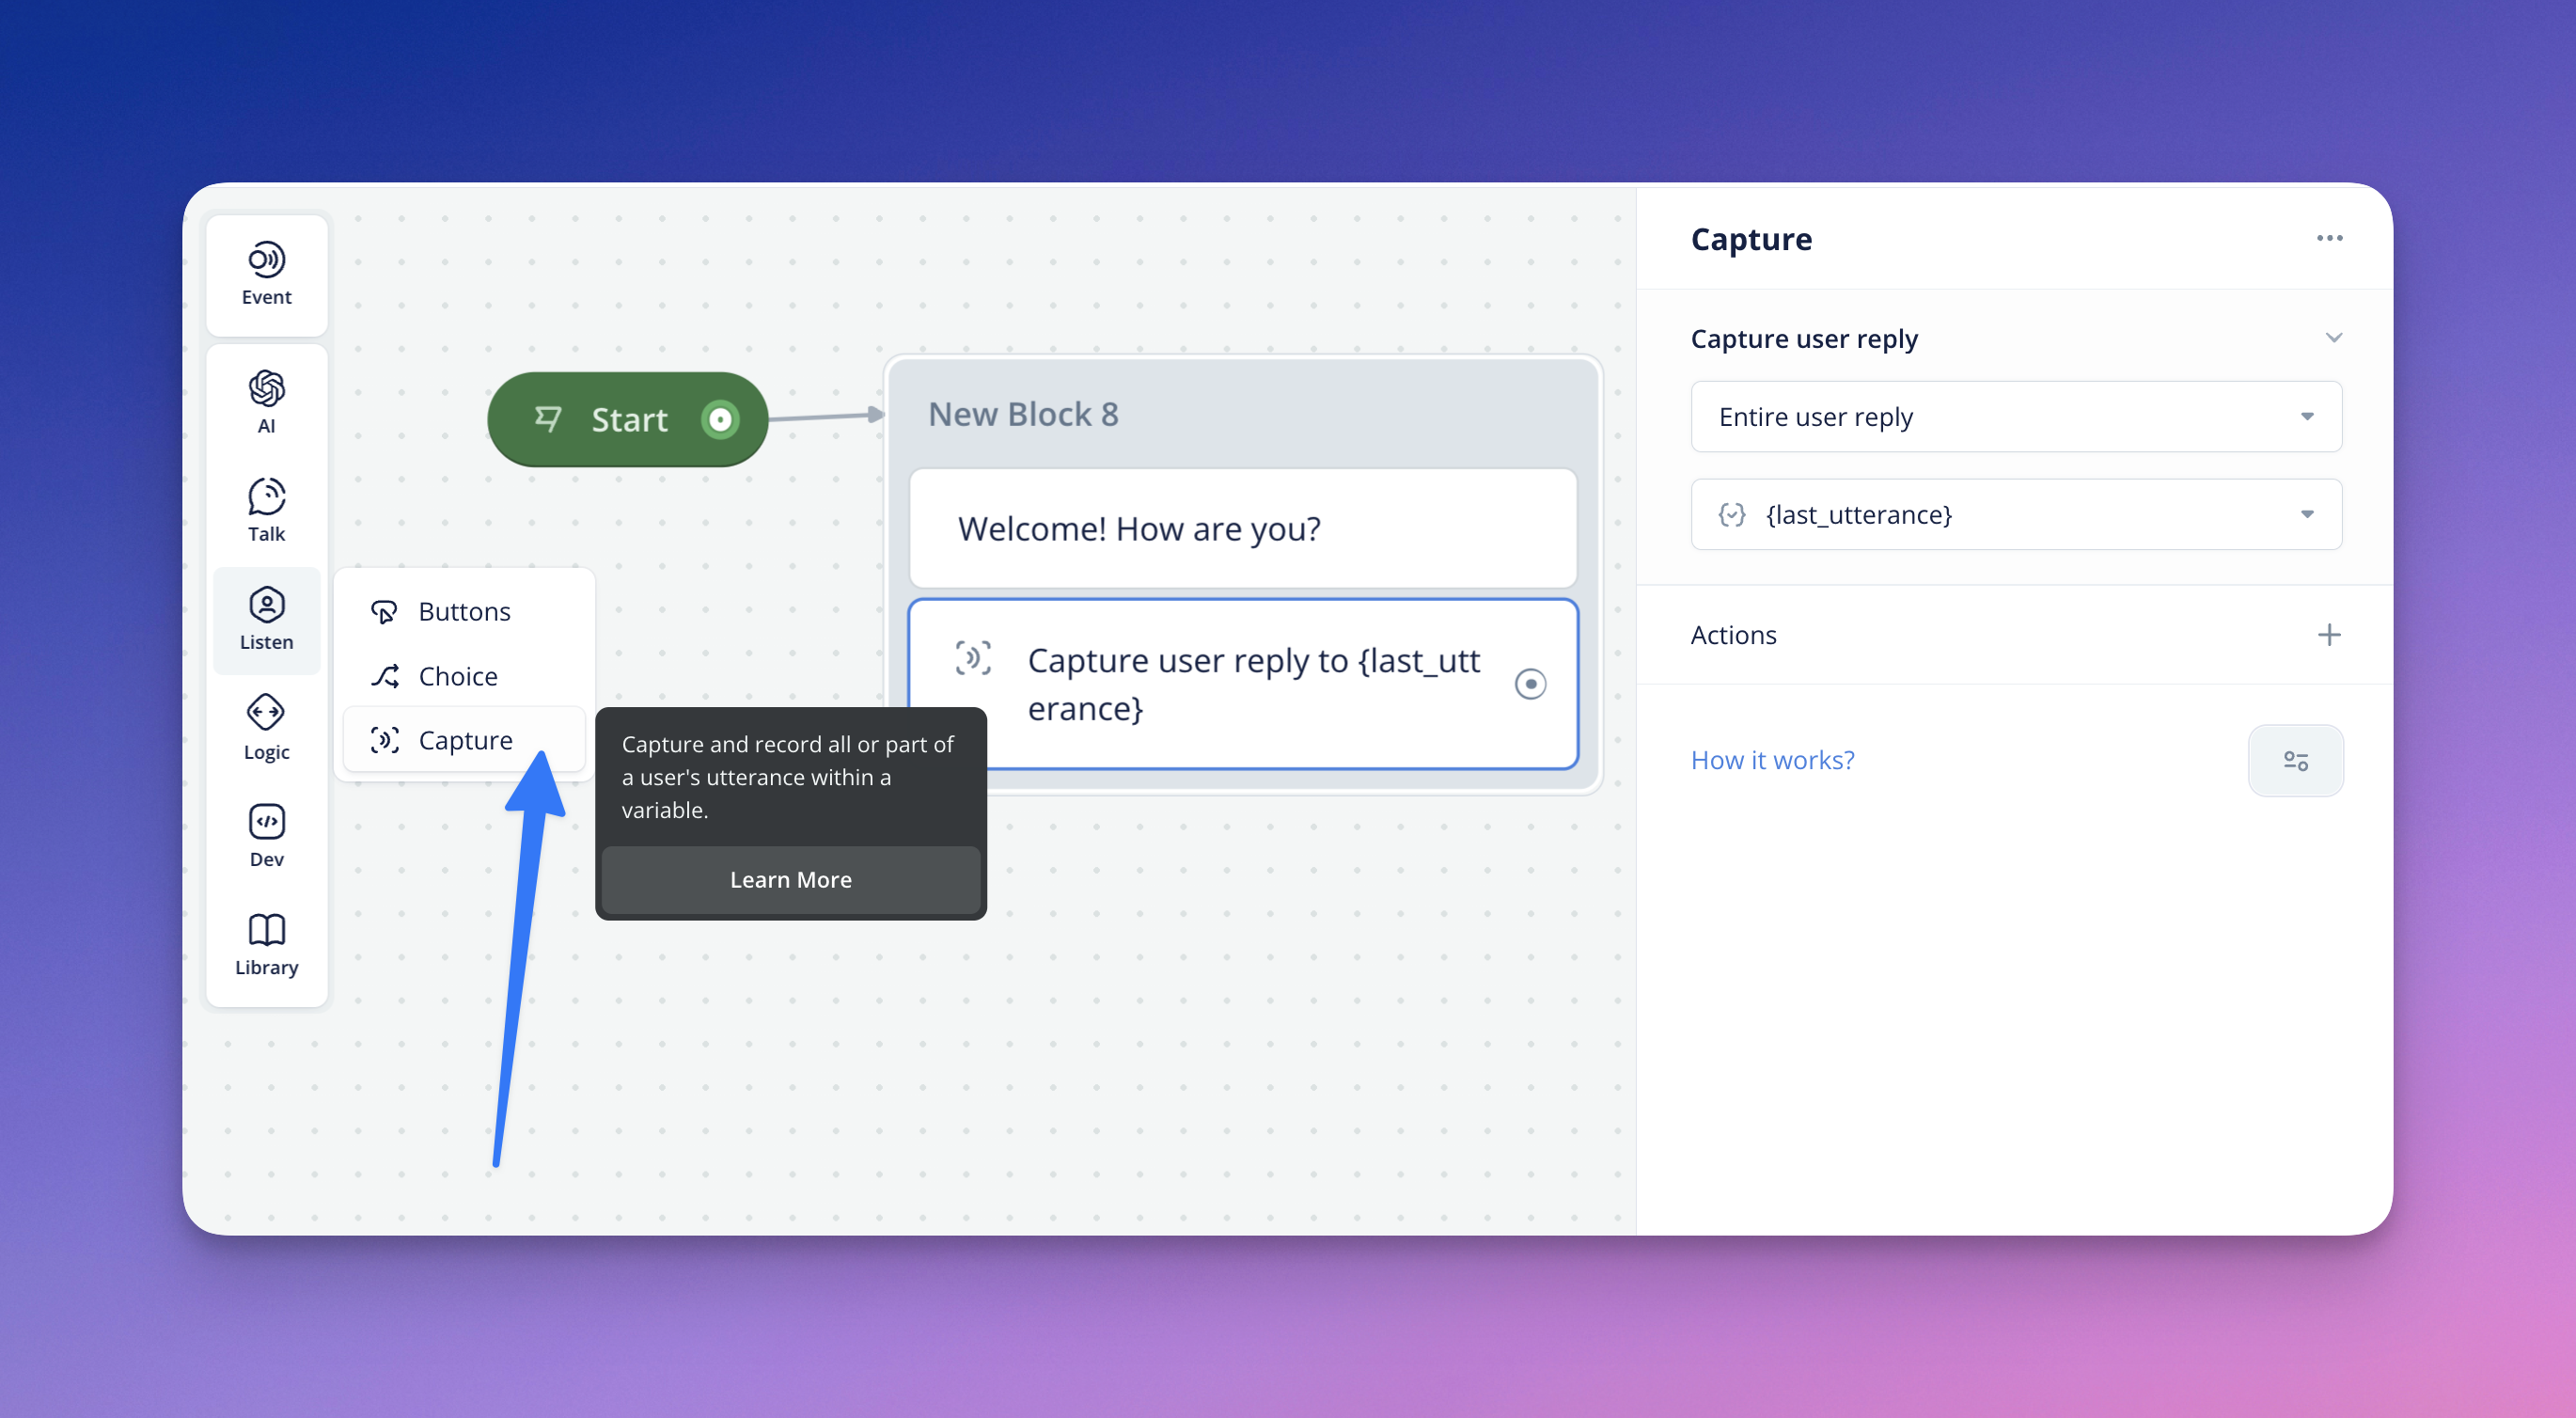
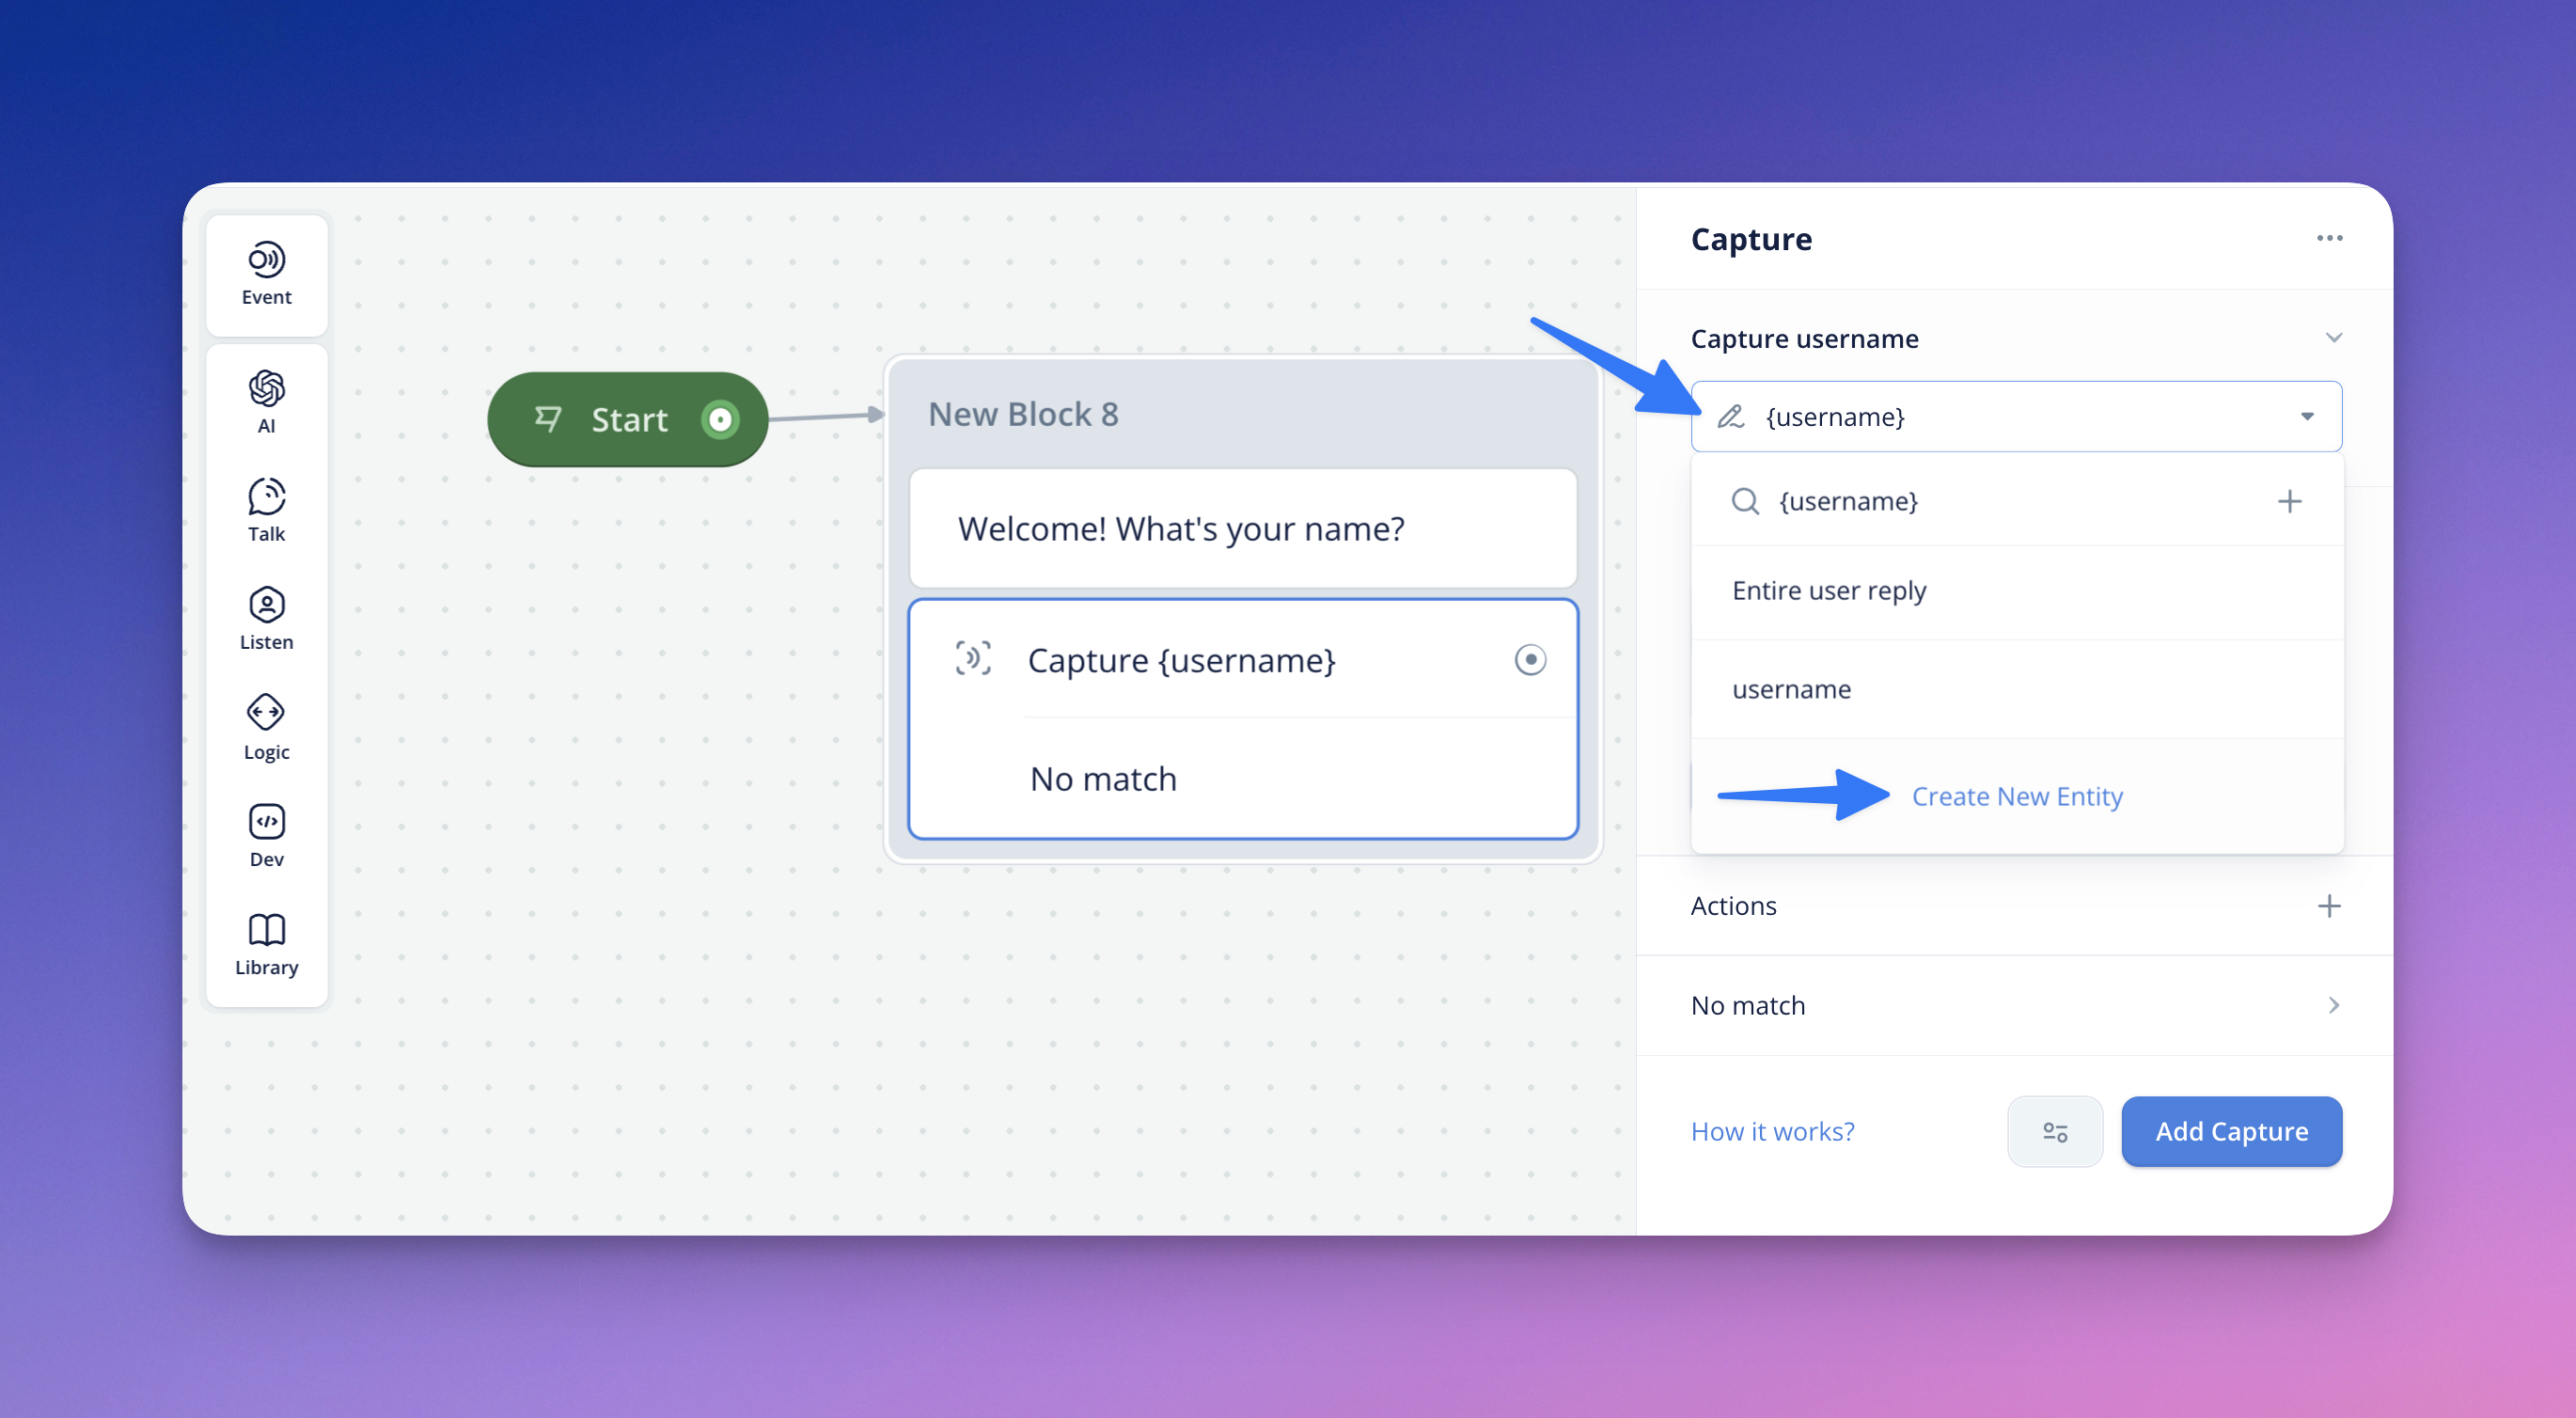
After adding a Capture step to your assistant, we can see that we have the option of capturing the “Entire user reply”, or capturing and categorizing the user response to specific entities in the user's utterance.
You also have the option of adding Actions, No Match, No Reply and can add/configure additional Captures.
Note that in conversation design, the Capture is ultimately waiting on user input. This means you're not able to add steps behind capture within a block - the step should end a “turn” in the conversation you’re designing.
The power of the Capture step is leveraging it to personalize conversations by applying captured variables in your responses.
All in all, capture steps are useful in capturing an entire user reply and applying it to a variable, or specific entities in a user response.
Tip: On Voiceflow, there are now multiple ways in order to save user information. The Capture step is for saving user input to variables, and Choice or Button steps are to guide the conversation with exact matches or intents.
Capture is different to a choice step, as capture only record values and do not correspond to intents or pathway decision-making. If the user response does not match the capture step's expected entity type (such as the user typing a word instead of an expected number), or the user does not respond in a given time, the capture step can be configured to ask for the value again using a reprompt.
When designing your chat assistant, you will want to consider using a capture step when you want to record specific data types, like an email address for a support assistant or a payment dollar amount for a banking assistant.
Capturing the Entire User Reply
The Capture Step is powerful to capture and record a user's entire utterance (user reply) and store it within a selected variable.
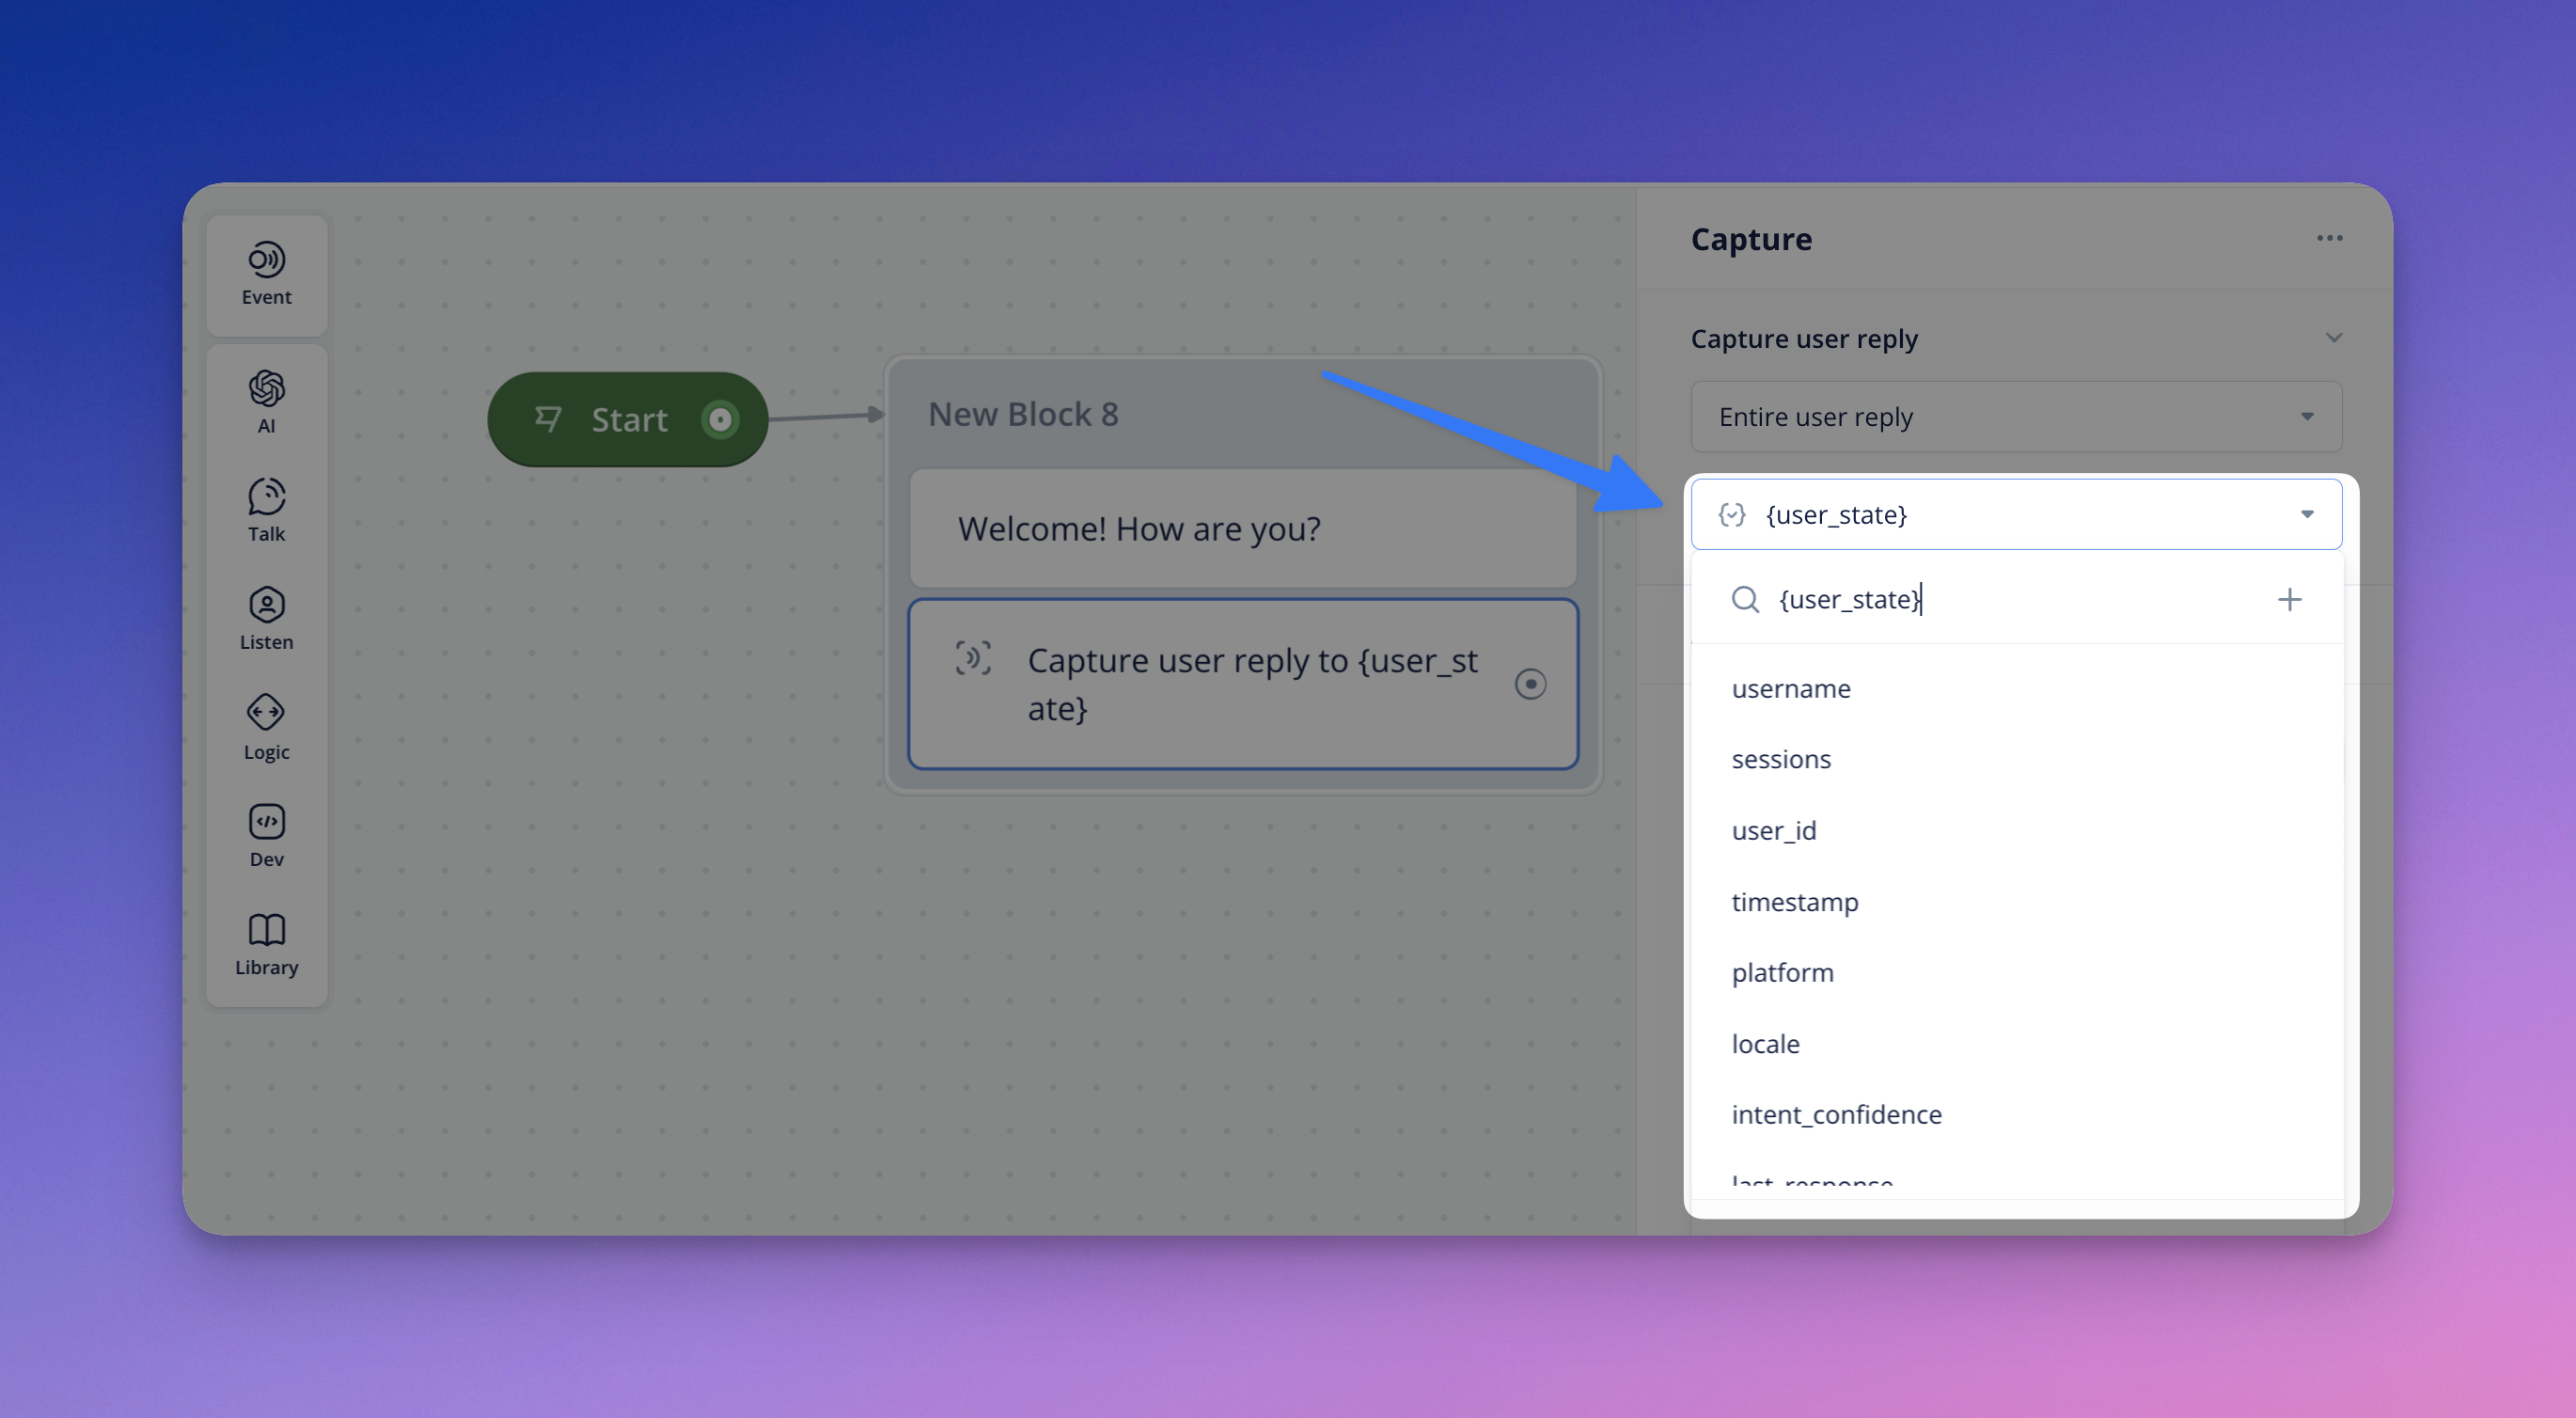
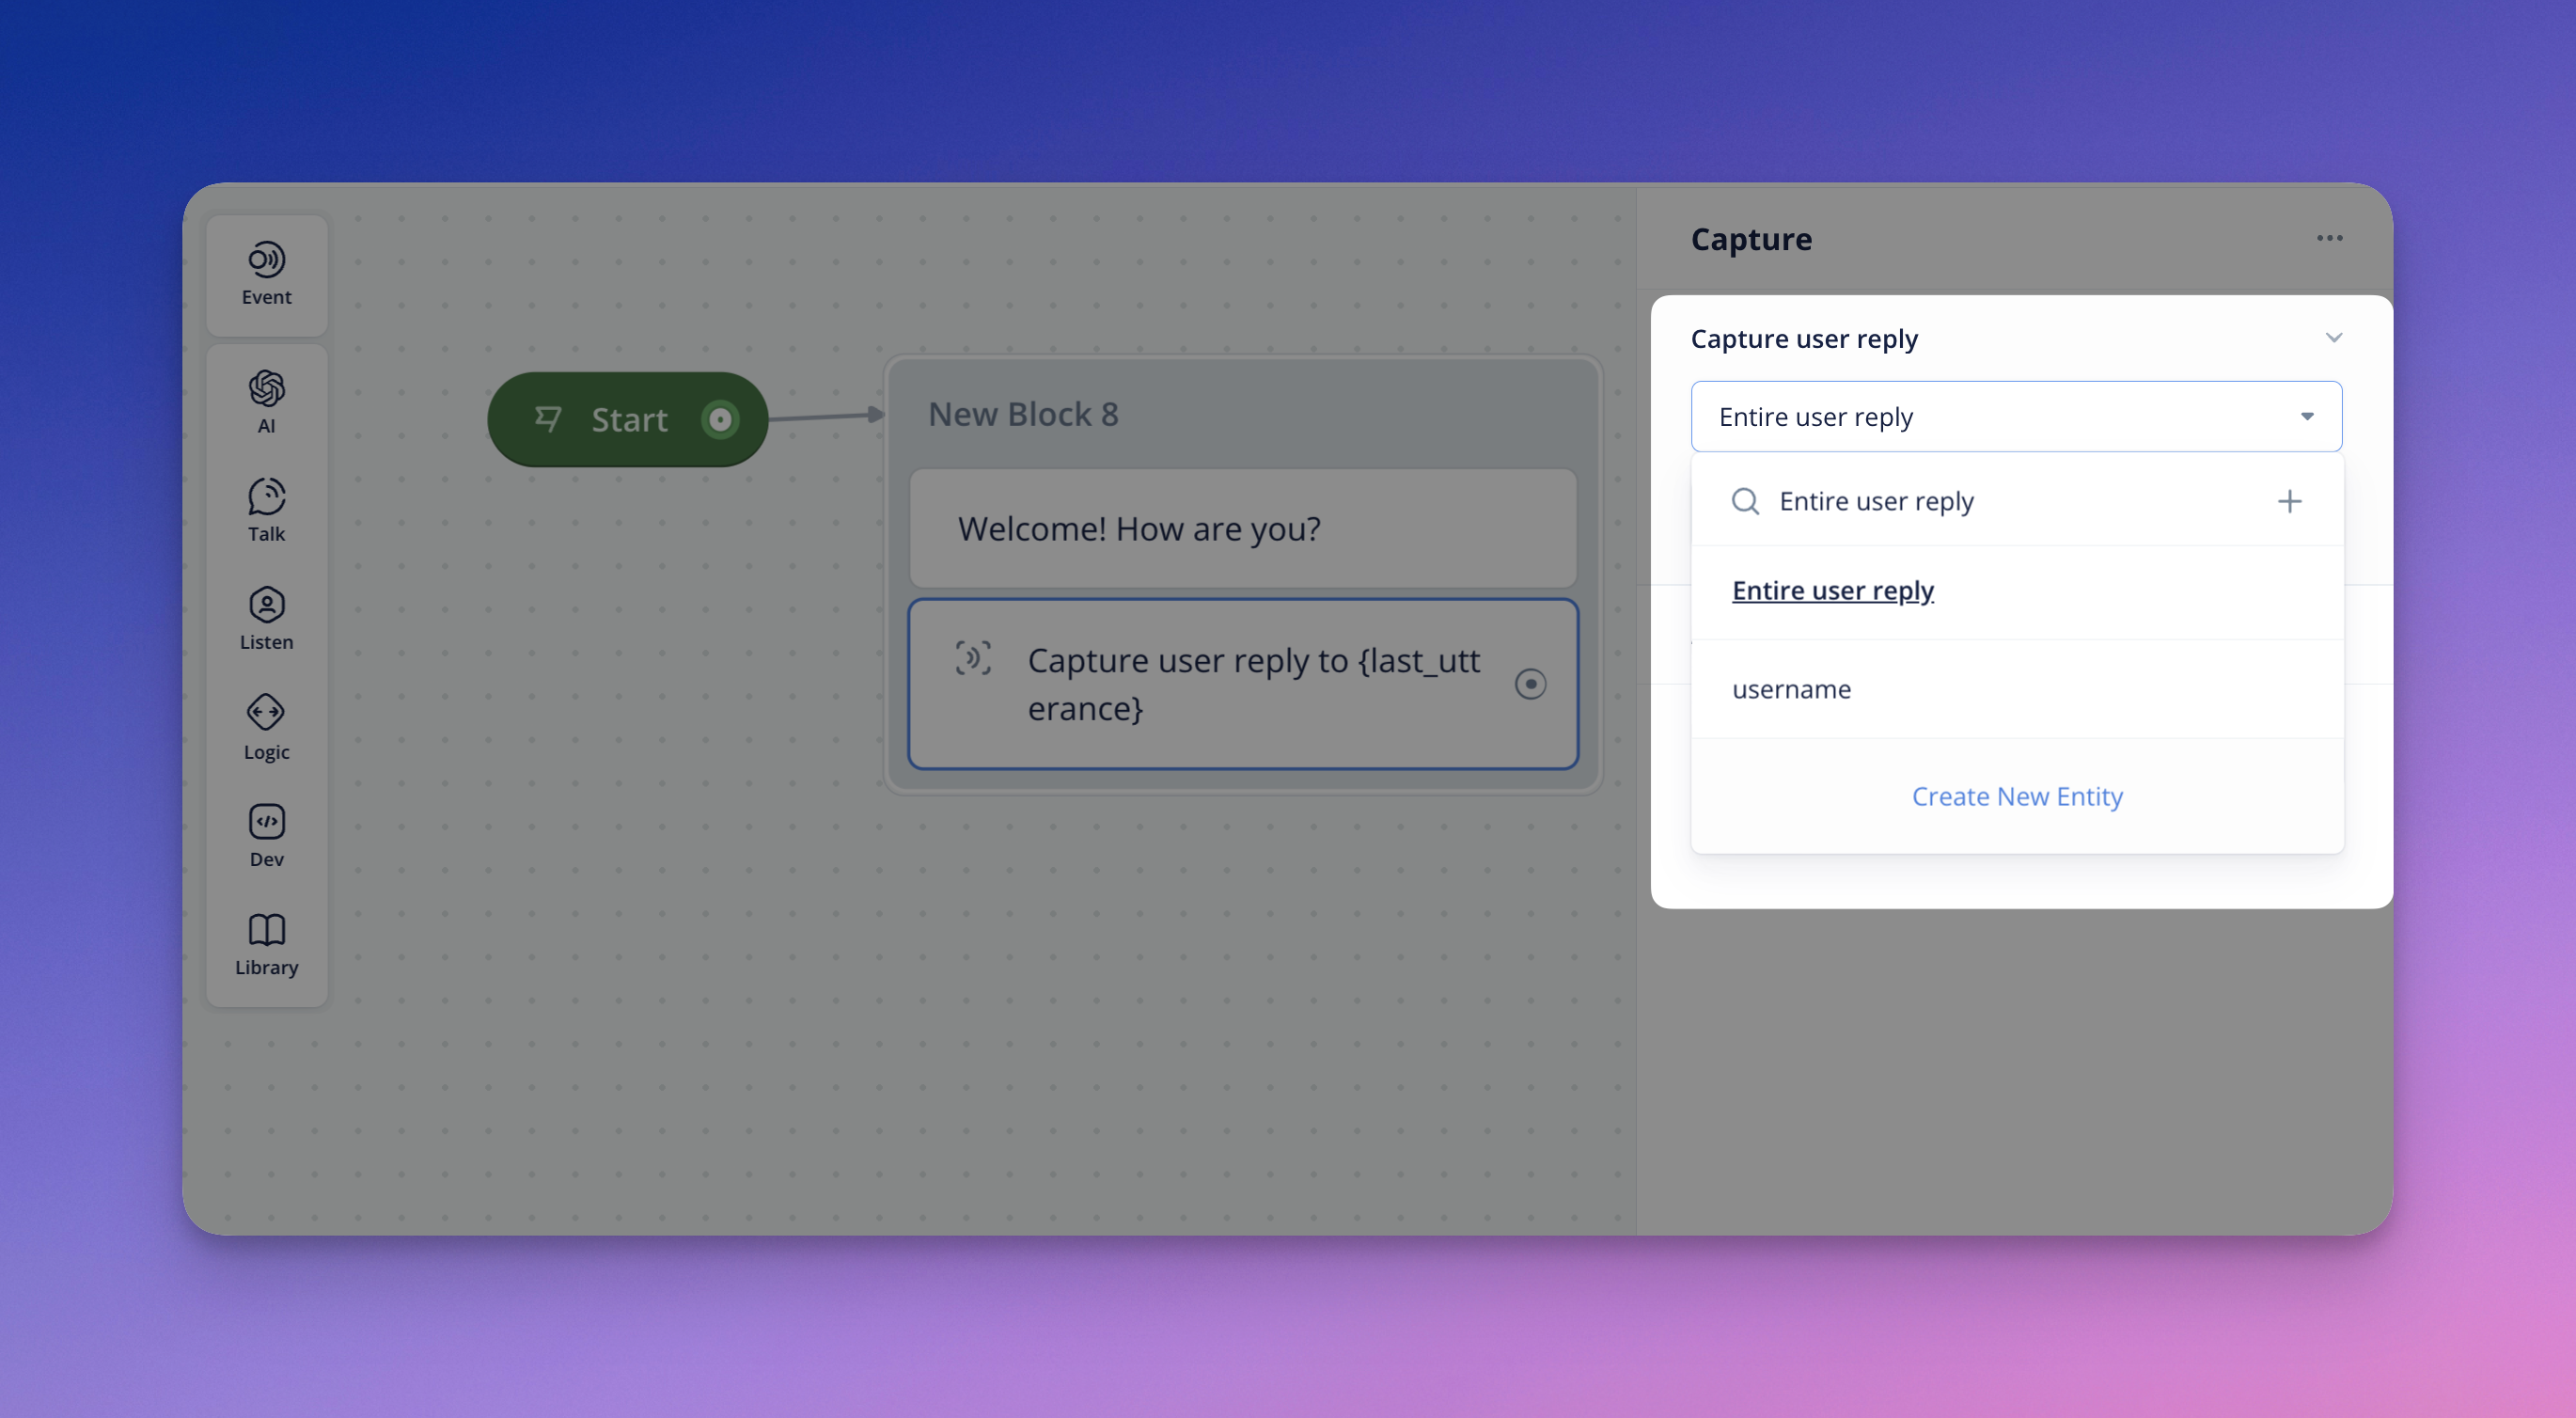
Once you’ve selected “Entire User Reply”, choose the variable you want to use to store the user’s reply response.
You can select from your existing variables or create a new one. This lets you use the capture information throughout your assistant.
Capturing Specific Entities
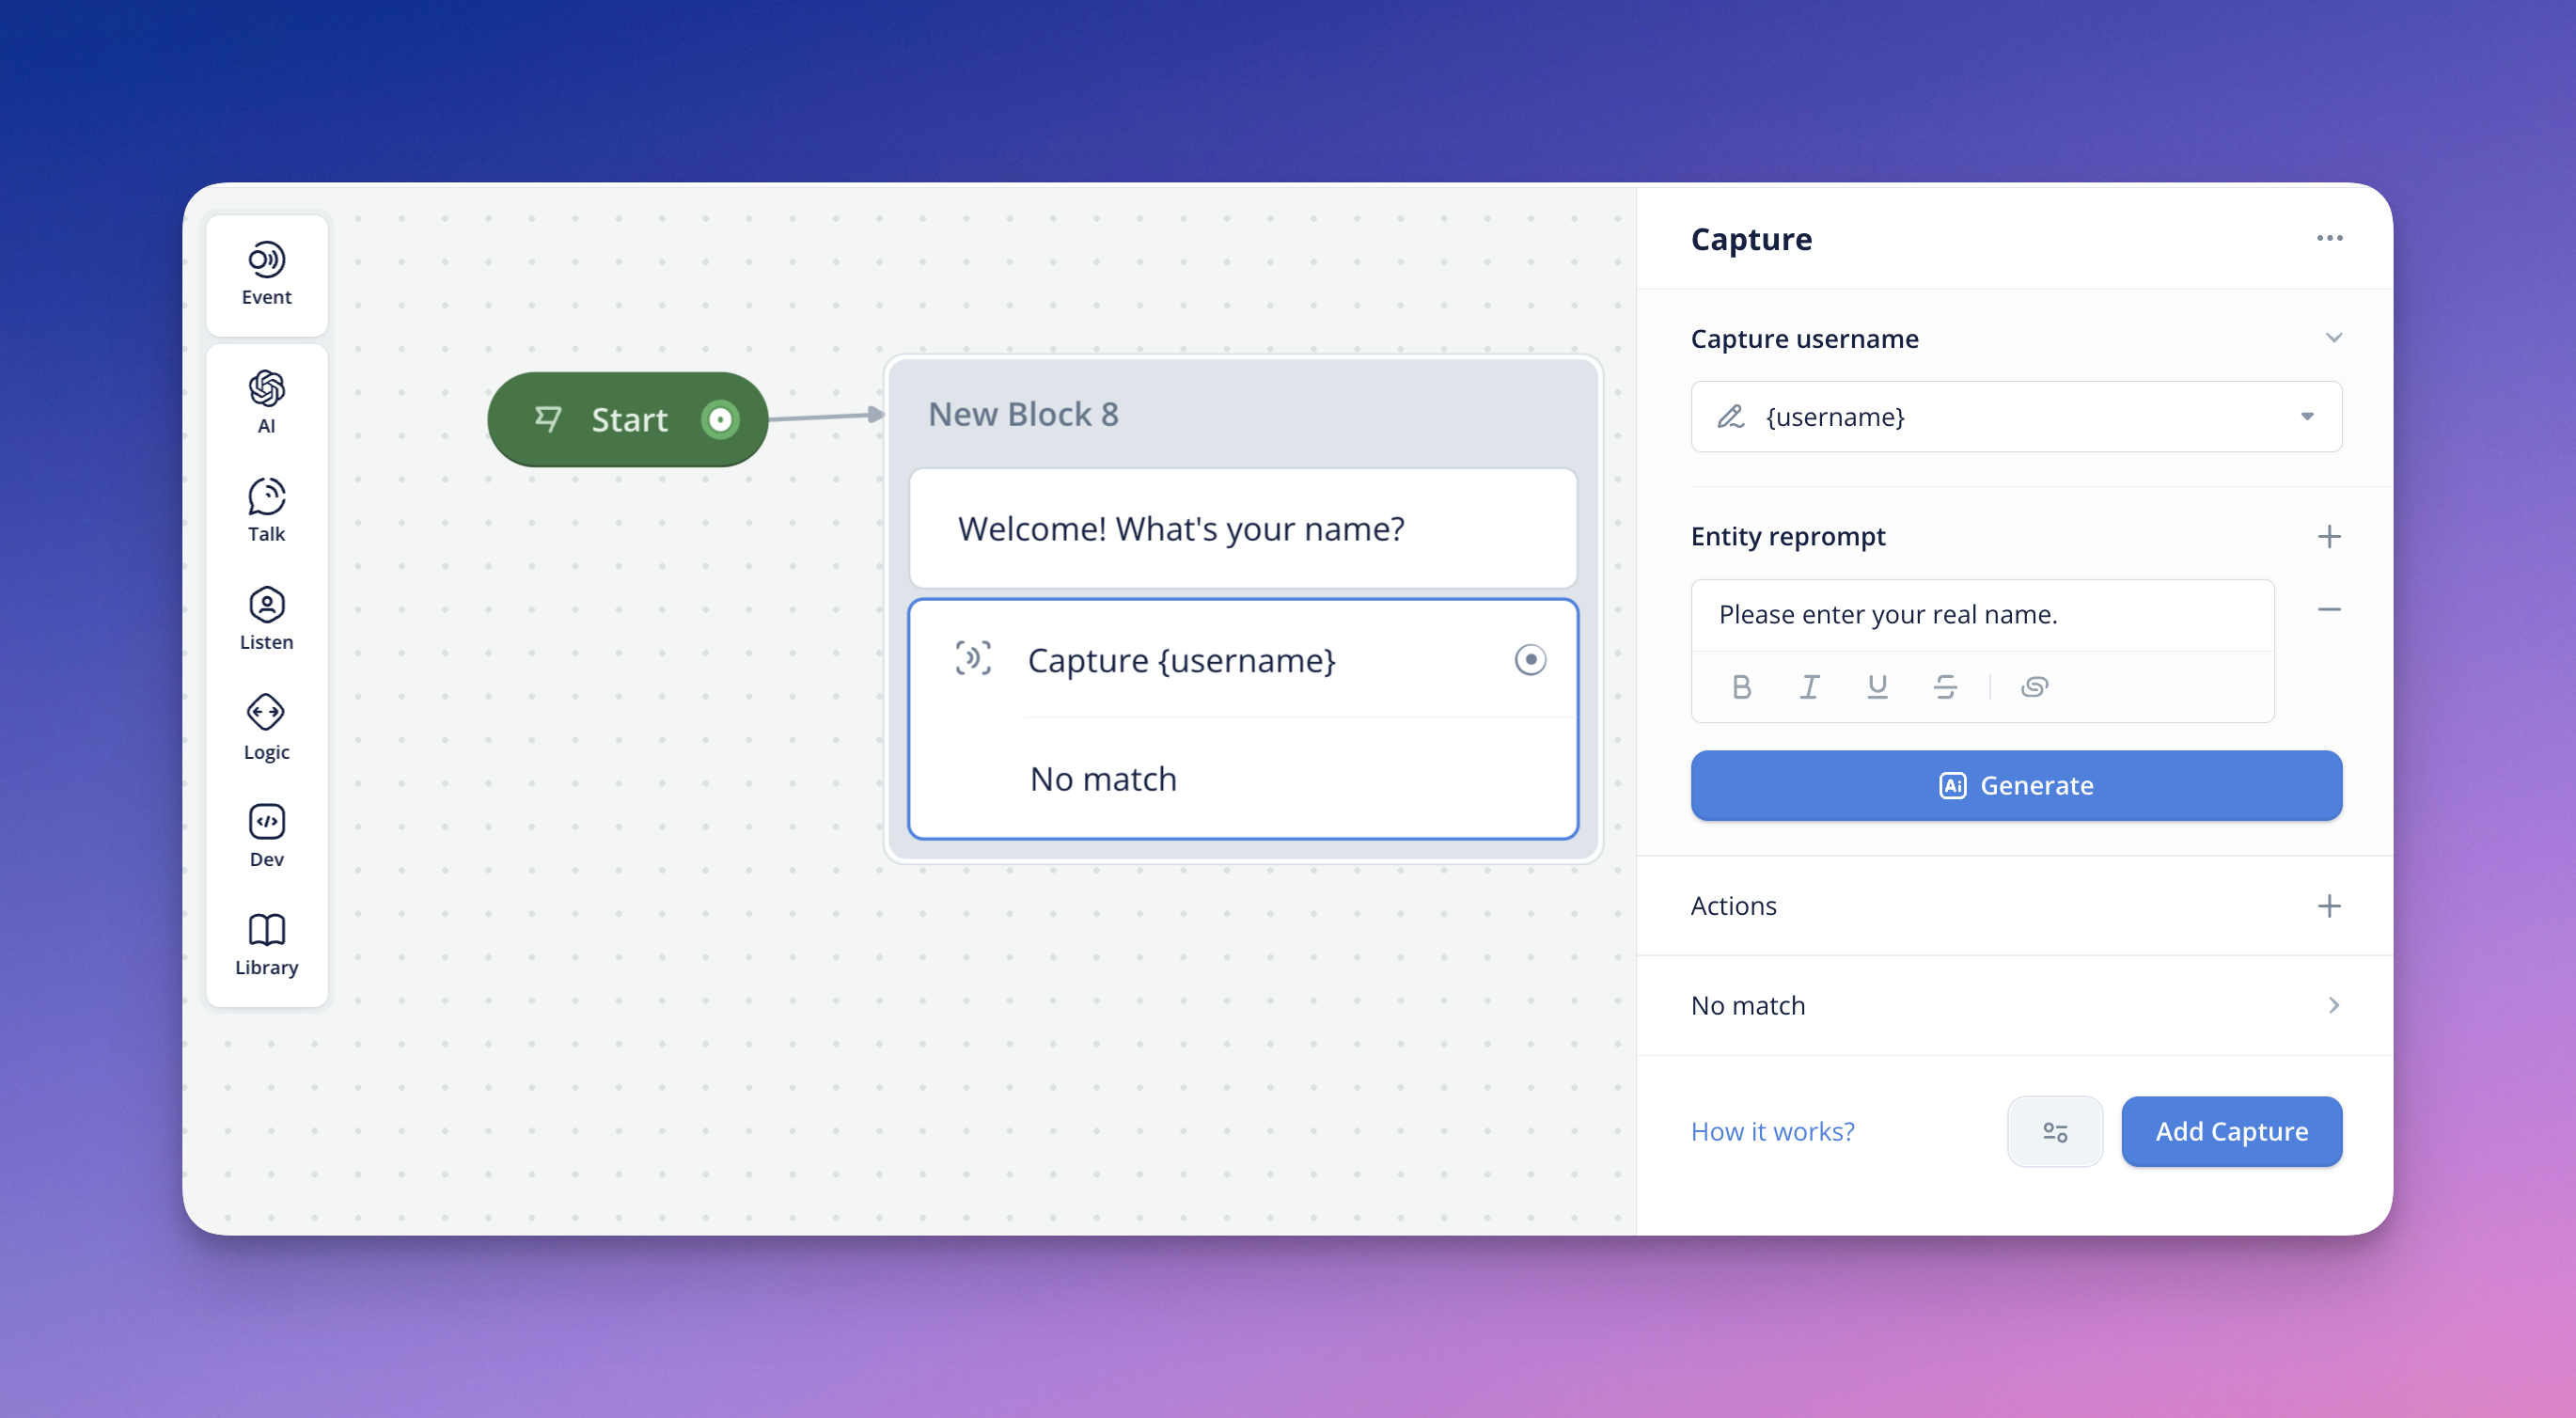
Alternatively, you can pick to capture entities within your users' response. This option lets you extract specific pieces of information out of your user’s utterance (e.g., name, plan type, country).
Capture Step Entity Creation & Editing
You can now enter the workflow for Entity Creation & Editing, Type, Color, and NLU configurations (slot values & synonyms) right inside the Capture Step!
- To Create a New Entity, select the bottom-menu option and configure your newly created Entity in the modal that appears
- To Edit a Selected Entity, select your desired Entity in the entity dropdown menu in the Capture step. Then, select the pencil icon located to the left of the Entity name in this selector menu.
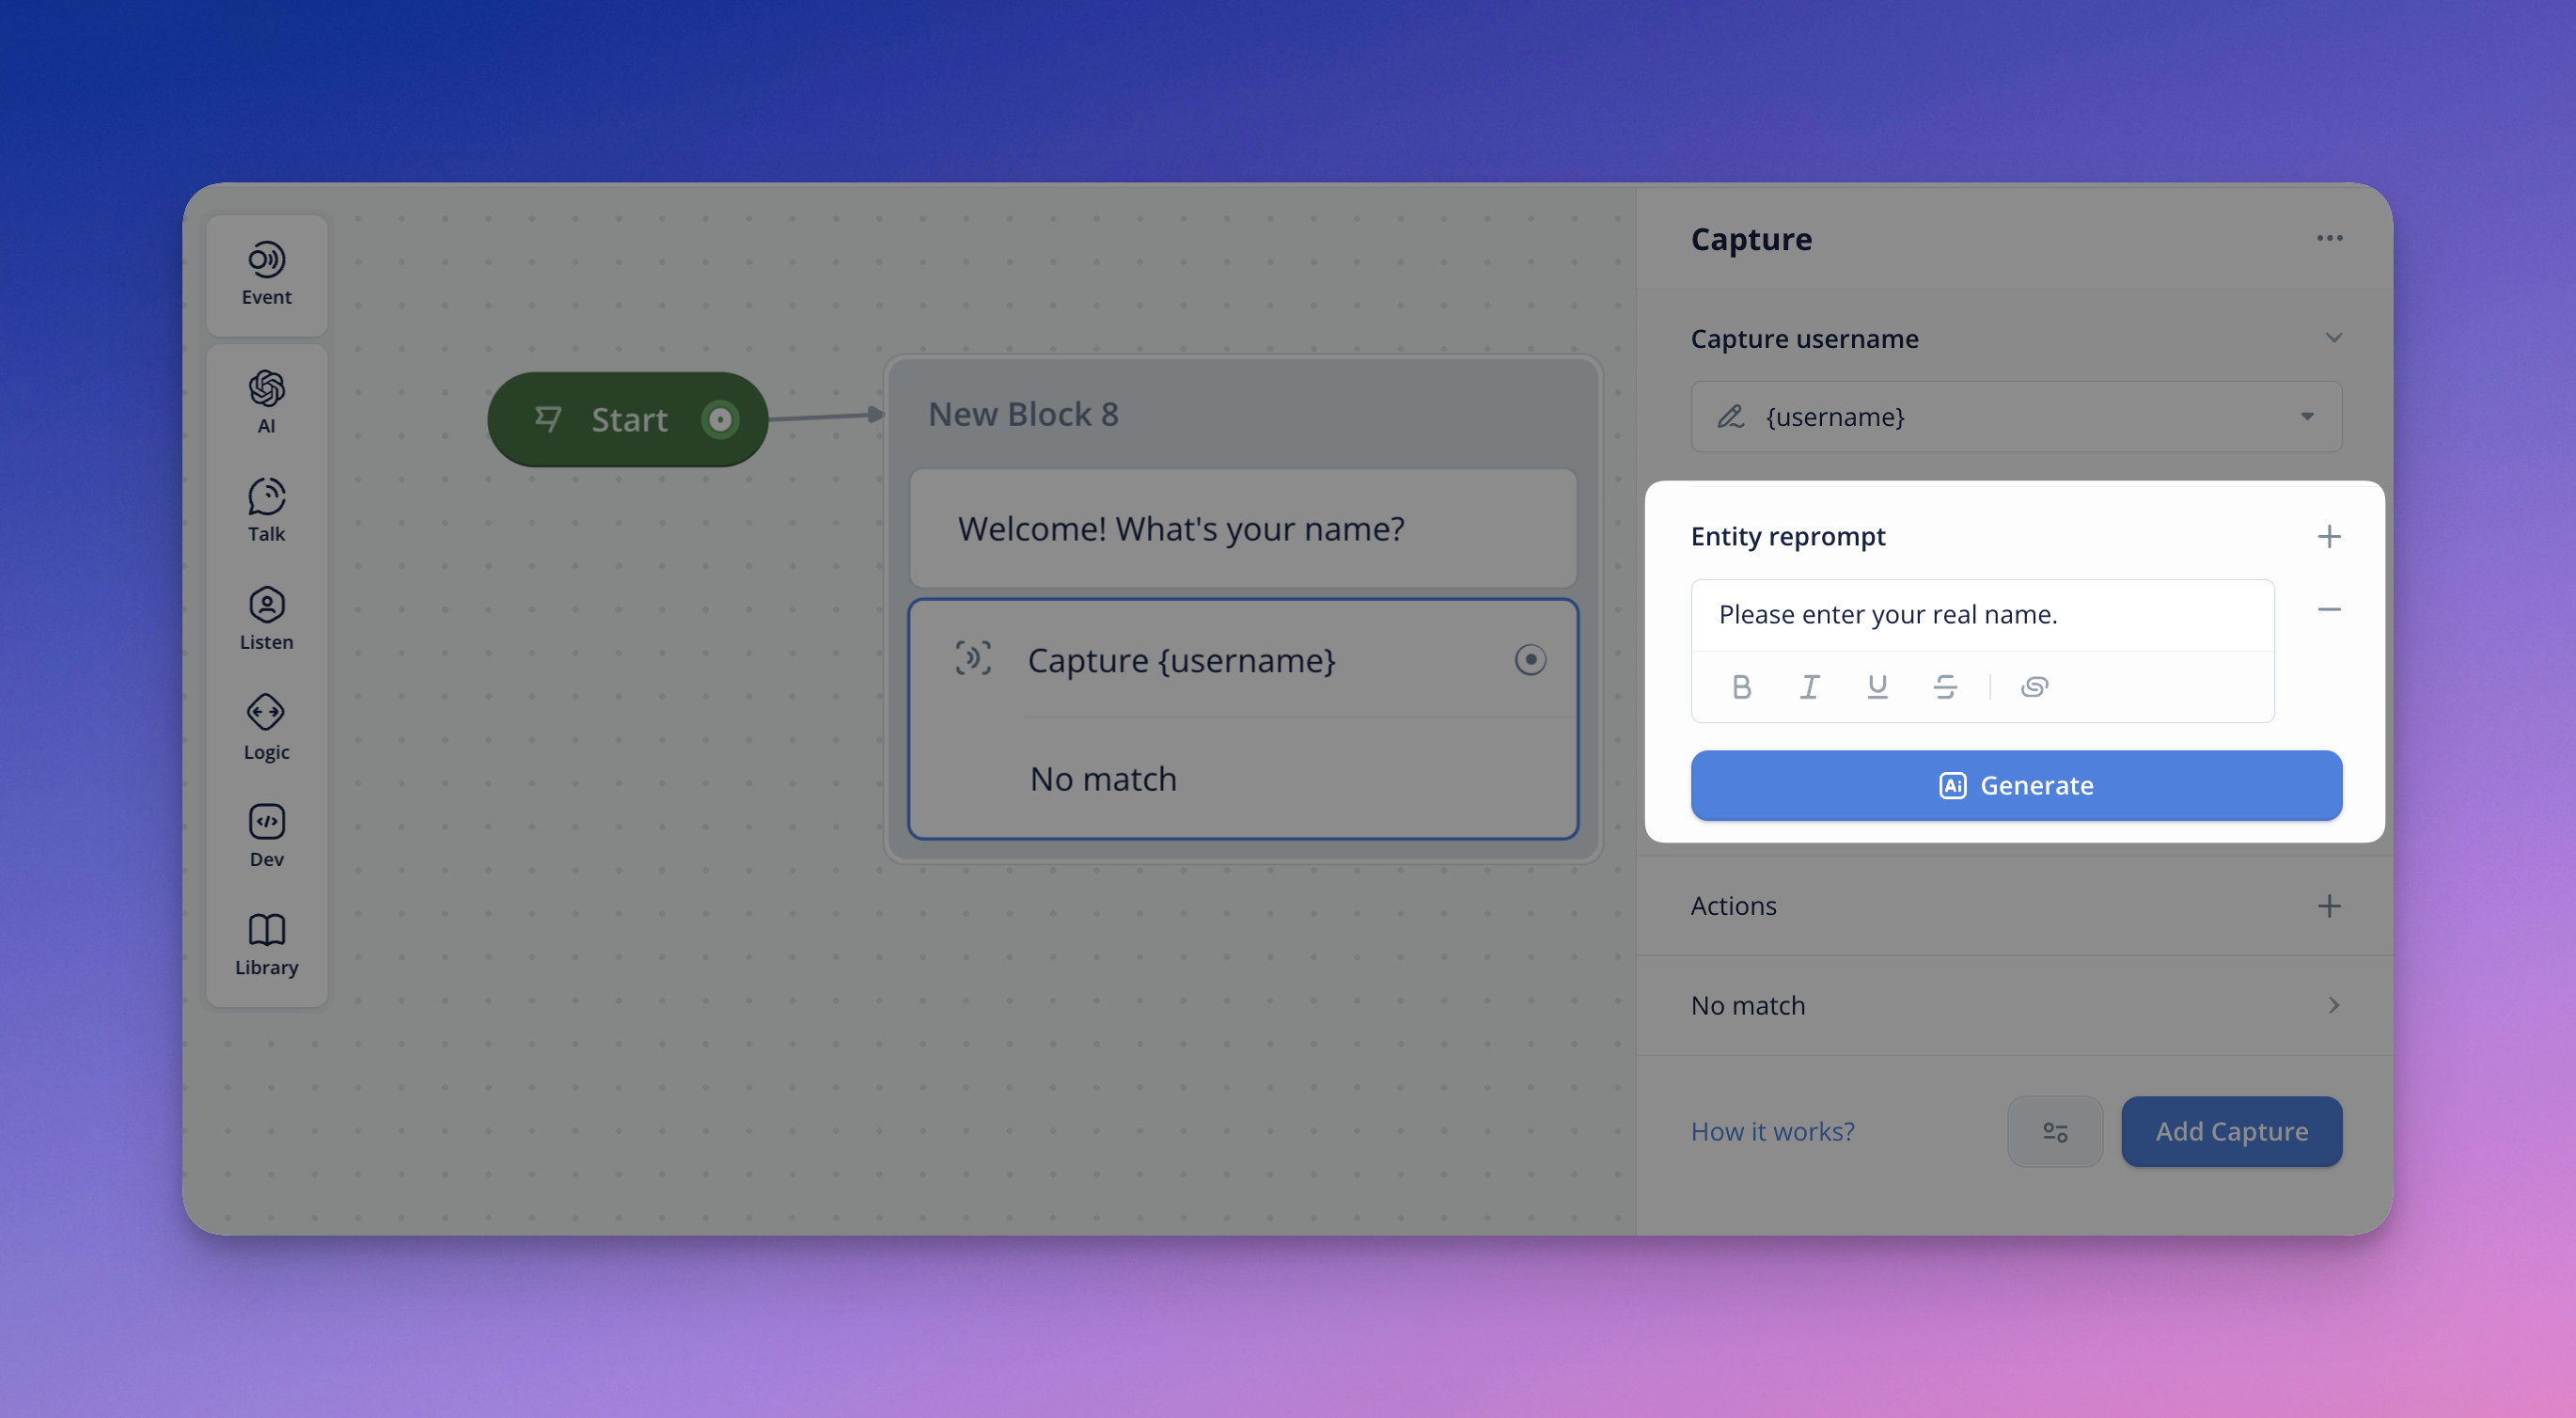
Configuring entity prompts
In some cases, the user’s response may not contain the entity you want to capture. Adding an Entity Prompt lets your assistant ask and follow-up with the user for the required information.
For example, let’s say we want the user to provide their favorite color. If they respond instead with ‘hello’, this will trigger the entity prompt and the assistant will request a valid response from the user.
You can input your desired Entity Prompt responses in the field. And similar to Text steps, Entity Prompt fields support markup styling. Should you not require an entity reprompt anymore, you can delete it with the (-) icon.
Capture Step — Actions
In addition to configuring your Capture step, you can use Actions to nest navigation and backend logic in a single Capture within the step.
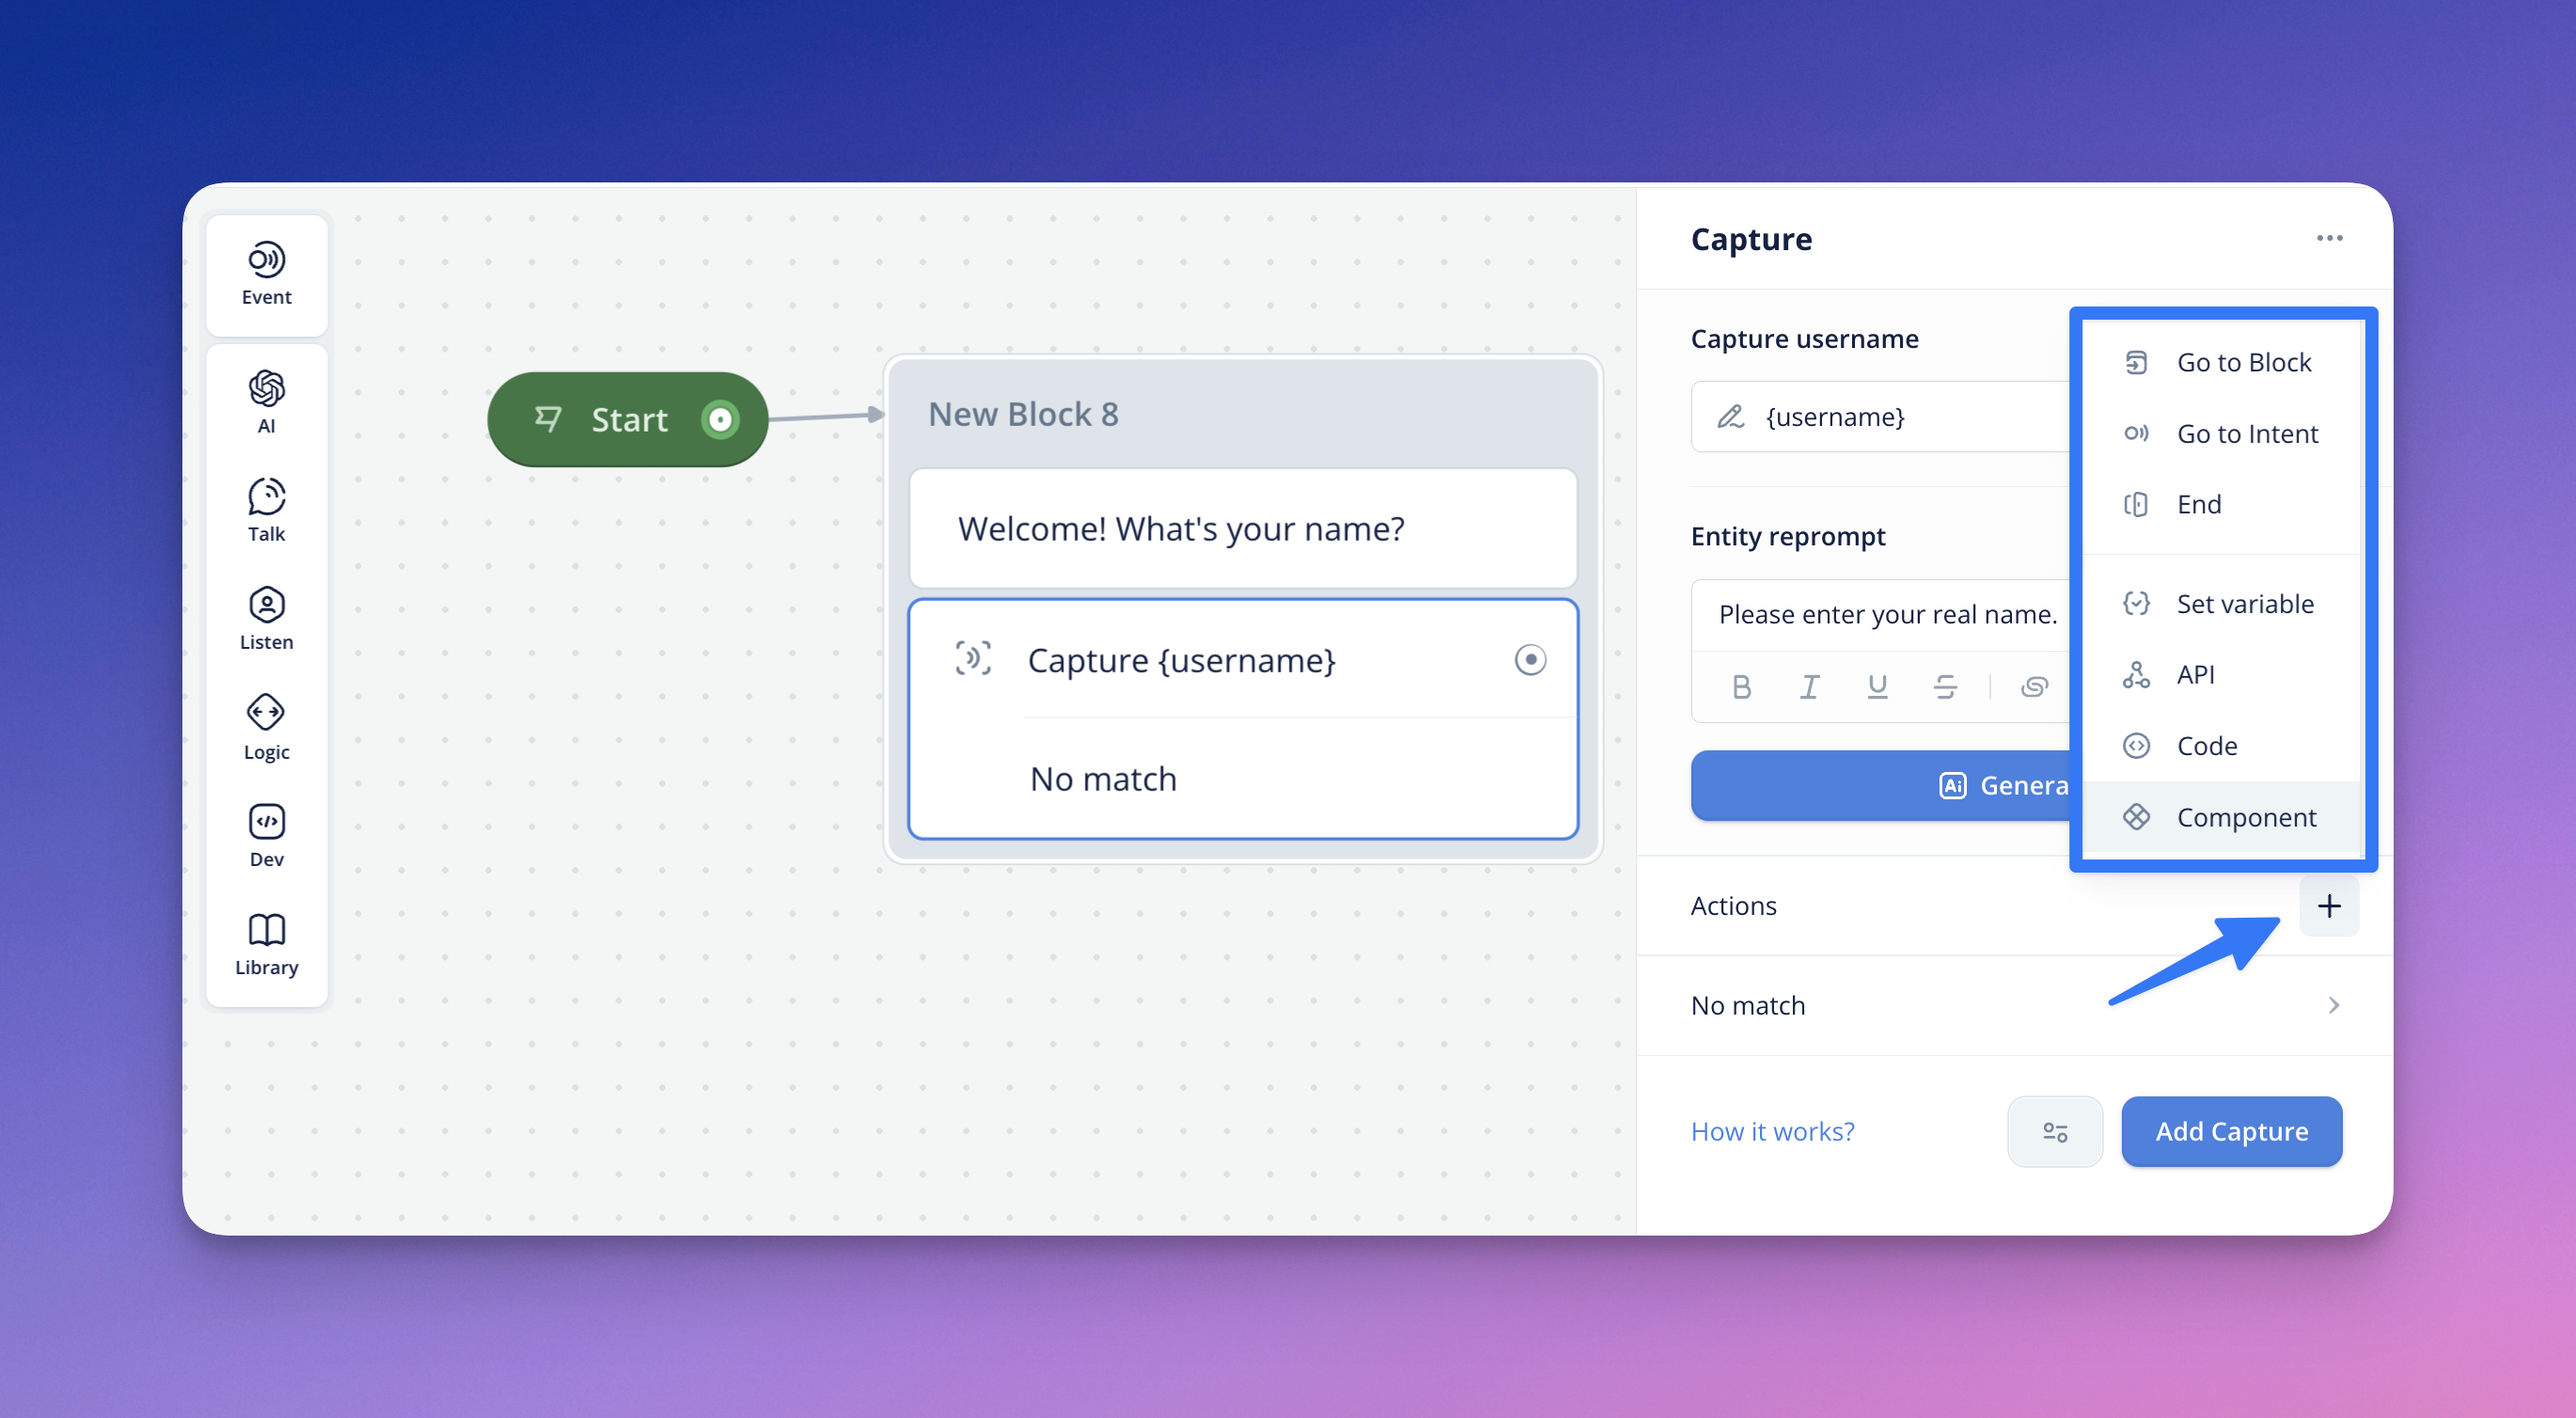
Under the Capture step, you can perform these nested actions per Capture:
- Go to Block- Goes to a specific block referenced within the assistant
- Go to Intent- Goes to an existing intent contained in the assistant
- End- Ends the conversation at its current state
- Set variable-Allows you to set and change the value of variables
- API- Allows you to set up, configure and execute API calls & functions
- Code- Allows you to set up and code custom JavaScript functions & commands
Tip: Learn more about Actions in depth and detail here.
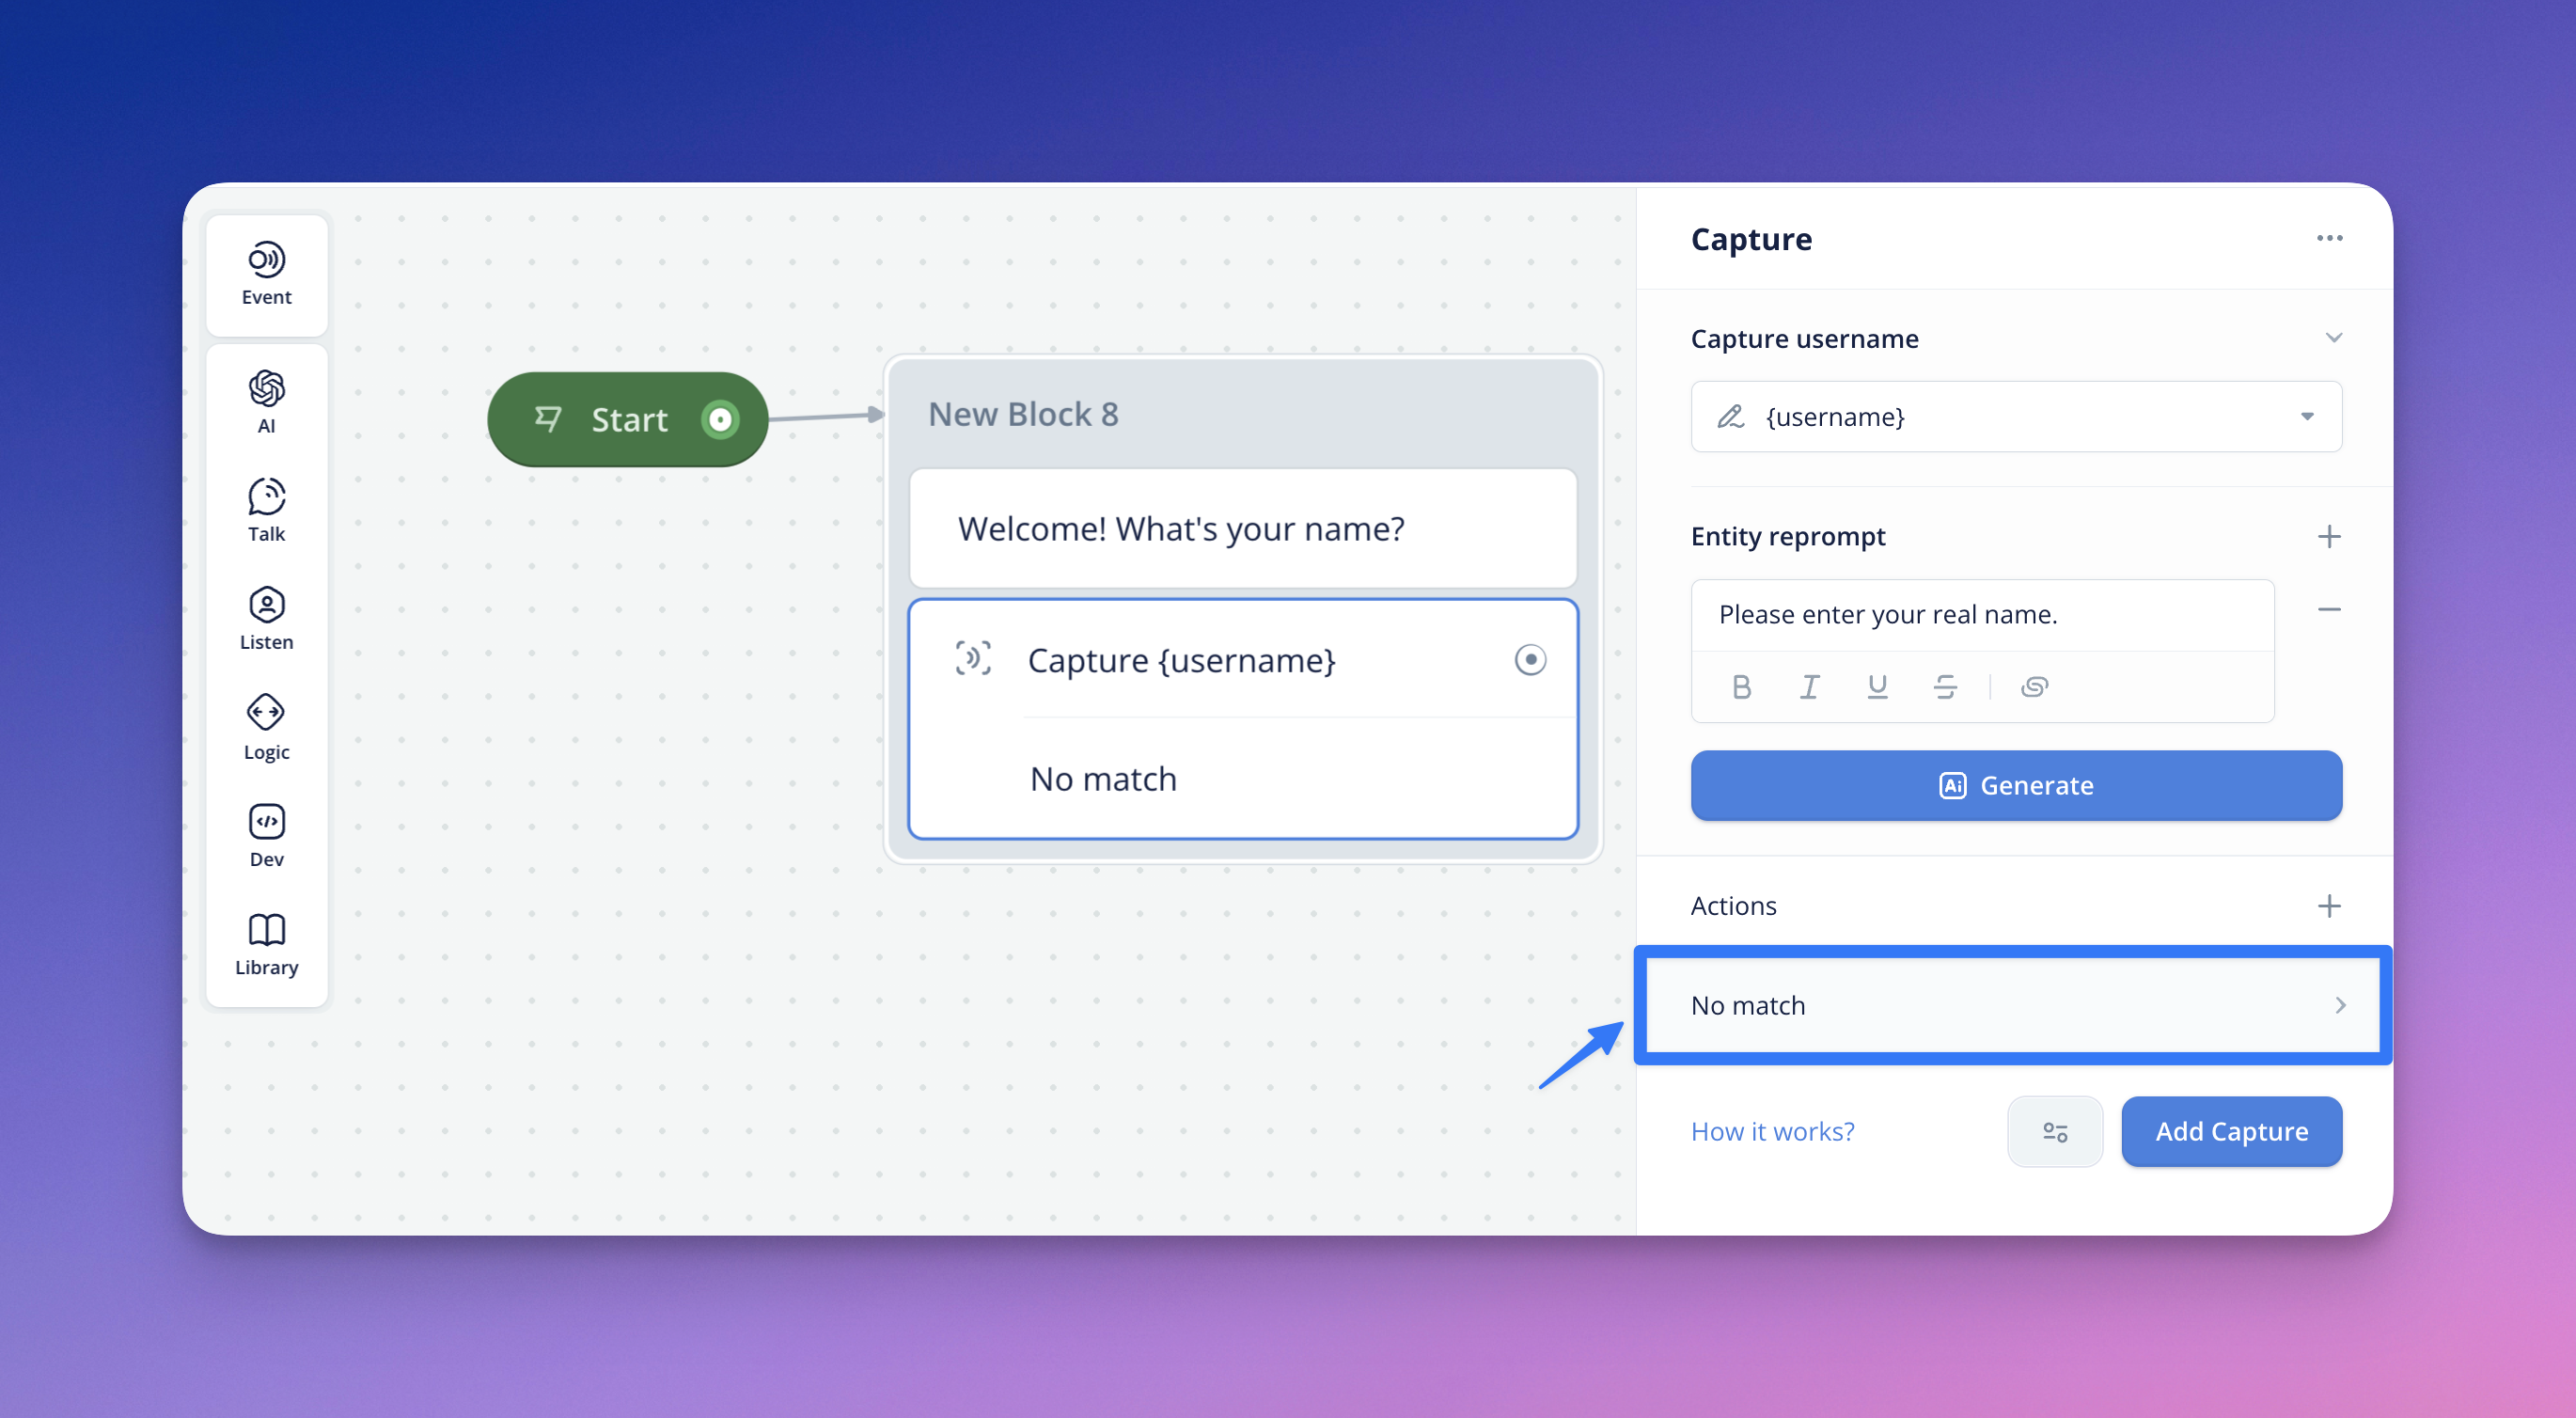
No Match/No Reply — Configurations on Capture Step
There may be instances where the user says something completely unrelated (No Match) to what you are trying to capture; or they simply may not respond (No Reply).
- If the assistant does not hear your user's response, or the user's response is unintelligible, the No Reply Response occurs.
- If the user says something completely unrelated to what we are trying to capture, we can handle those paths with a No Match response, and provide a better experience when it’s not understood.
For either of these cases, you can guide your users to an alternative conversation path with a ‘No Match’ or 'No Reply' response, under the Capture step.
Tip: You can configure No Reply by hitting the settings icon at the footer of the Capture step editor, and hit 'Add no match.' The instructions below apply to both No Match and No Reply.
Under the No Match portion of your entity capture, you can choose to reprompt your users (1) by adding responses (that can be formatted with Text styling) and configure their randomization (2).
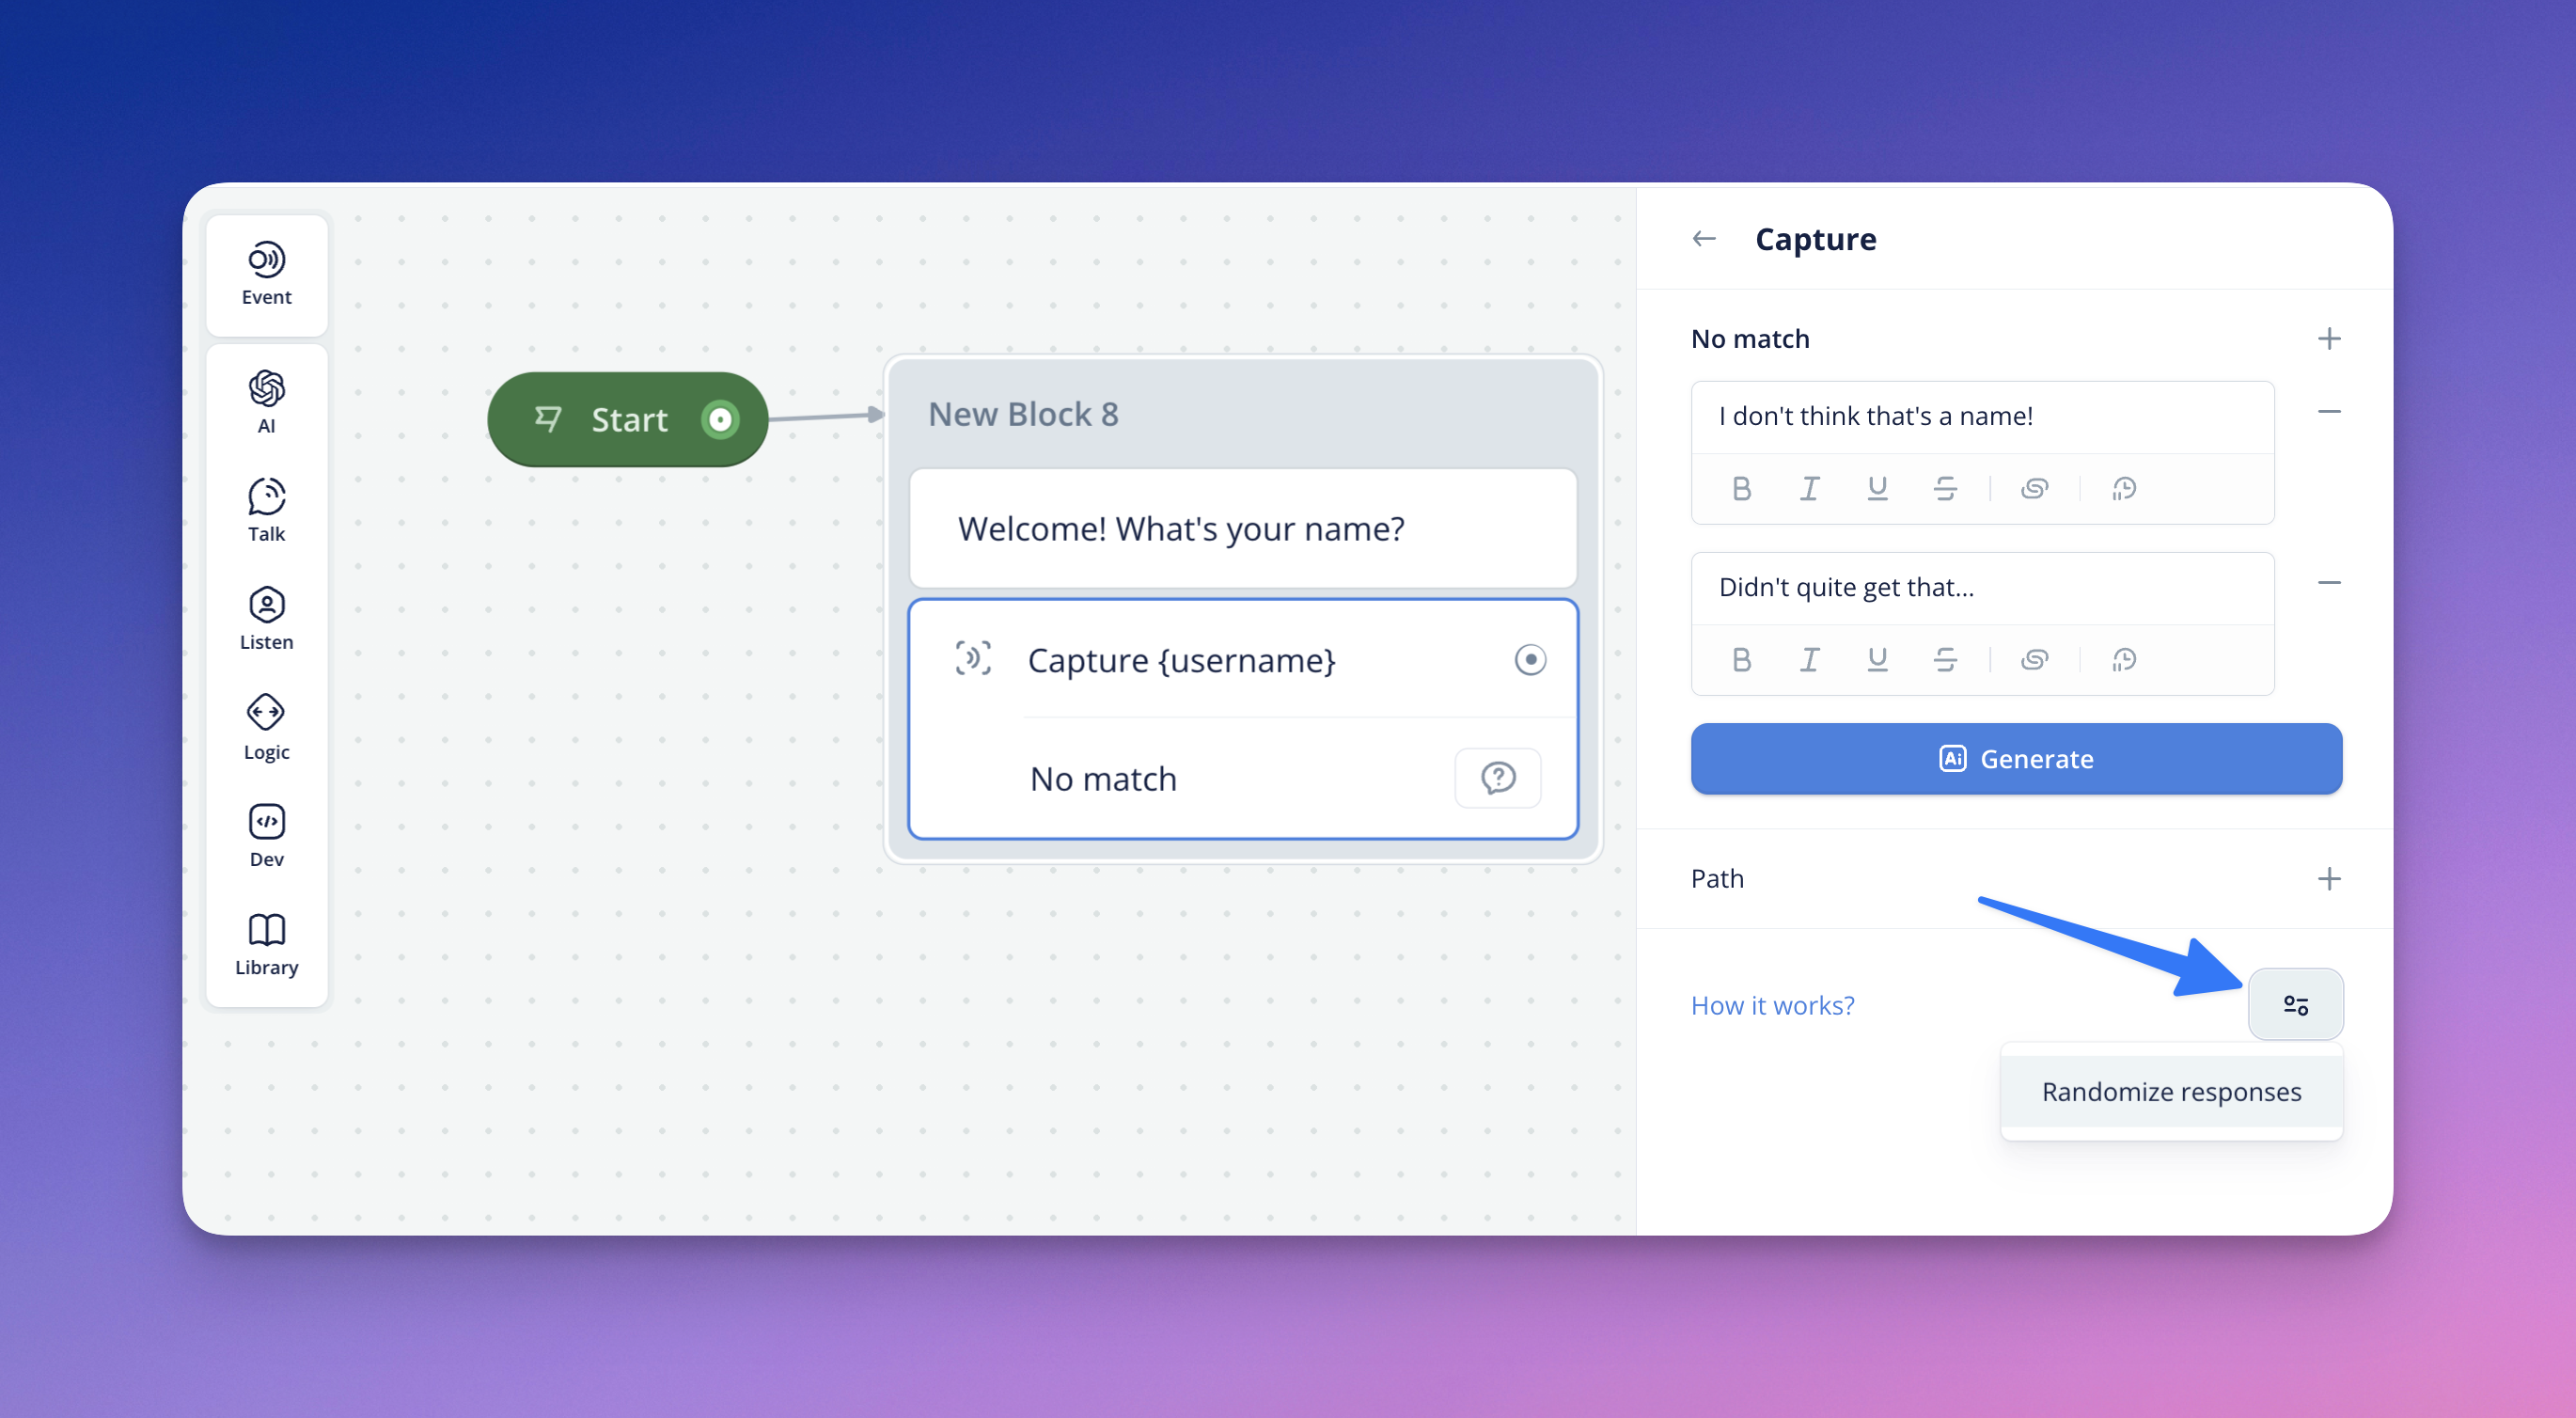
You can also add a No Match path, so that you're able to connect the path to a section in your assistant. This will let you select the conversation path for your fallback.
You can rename the label of the No Match path, so that it can be easily referenced on Canvas.
You can also use Actions to nest navigation and backend logic in a No Match within the Capture step.
Tip: You can configure your No Reply response message, the time delay before triggering no reply response(s), and connect it to a conversation path similar to the No Match workflow outlined above.
Updated about 1 month ago