Creating an API tool
1
2
Configure the request
Define your HTTP request:
3
4
Test the request
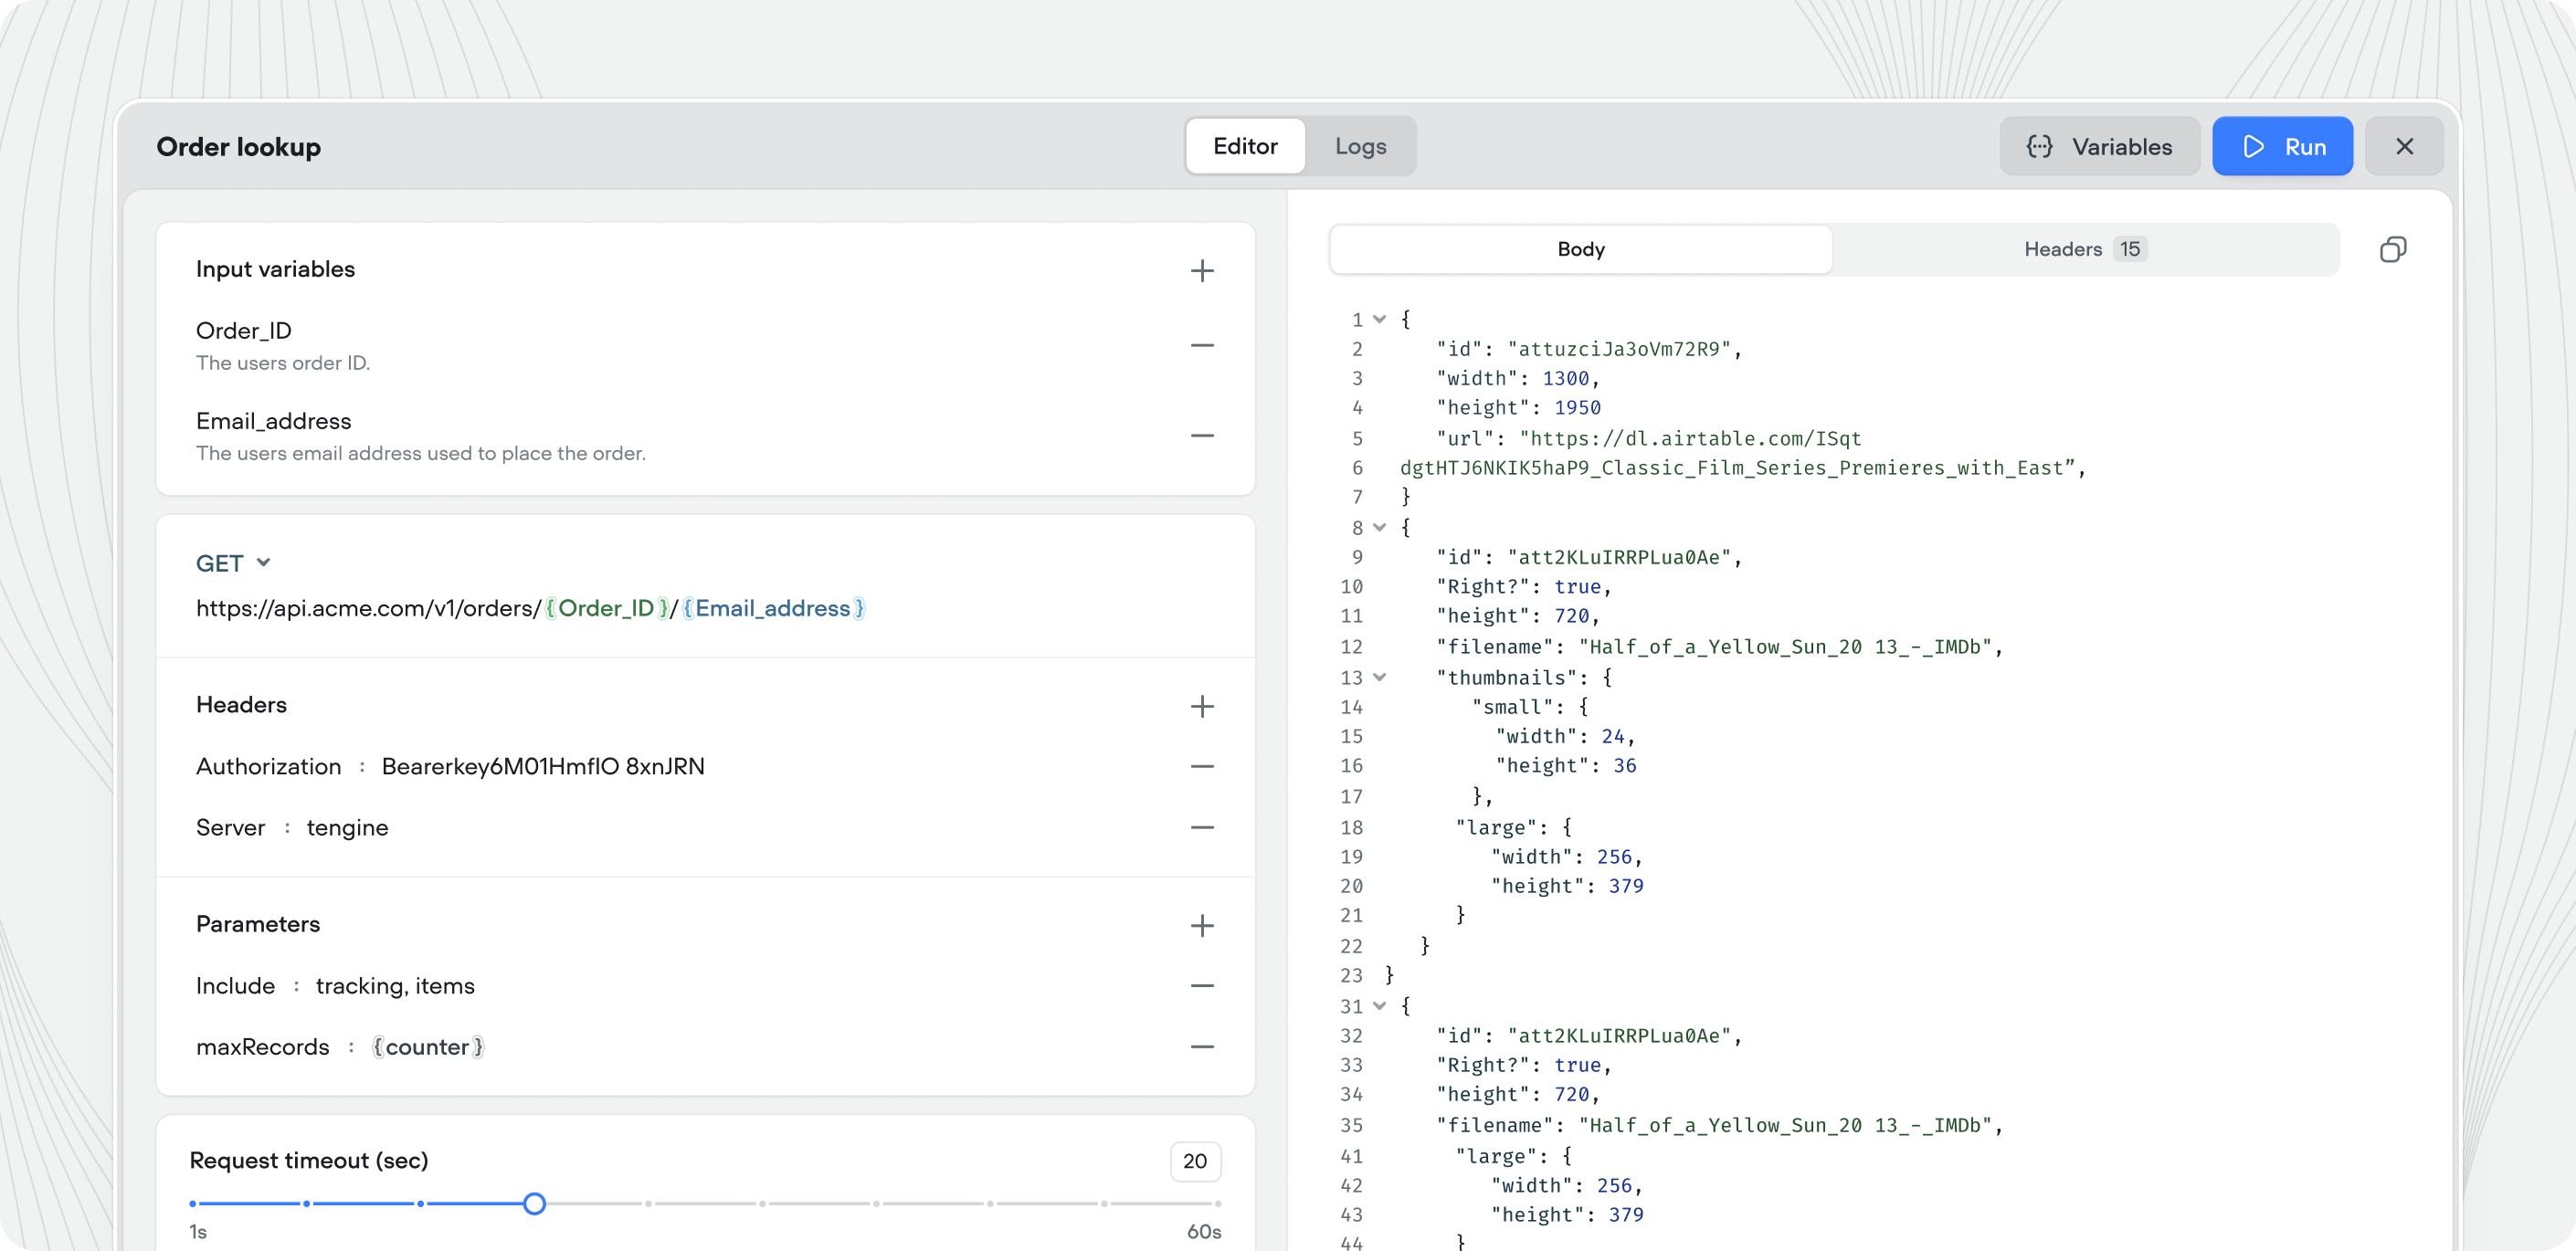
Click Run in the top right corner to test your API call. Click Variables to enter test values, then Run to execute. The response panel shows the JSON body, status code, size, and response time (e.g.
200 OK · 11.3 kB · 354ms). Use Show raw for the unformatted response, or the Headers tab to inspect response headers.Testing the API tool
Click Run in the top right corner of the API tool editor to test your API call. Click Variables to enter test values for your input variables, then click Run to execute the request. The response panel displays the JSON response body along with the status code, response size, and response time (eg:200 OK · 11.3 kB · 354ms). Click Show raw to see the unformatted response, or use the Headers tab to inspect the response headers.
Using the API tool
There are two ways to use an API tool:In a playbook
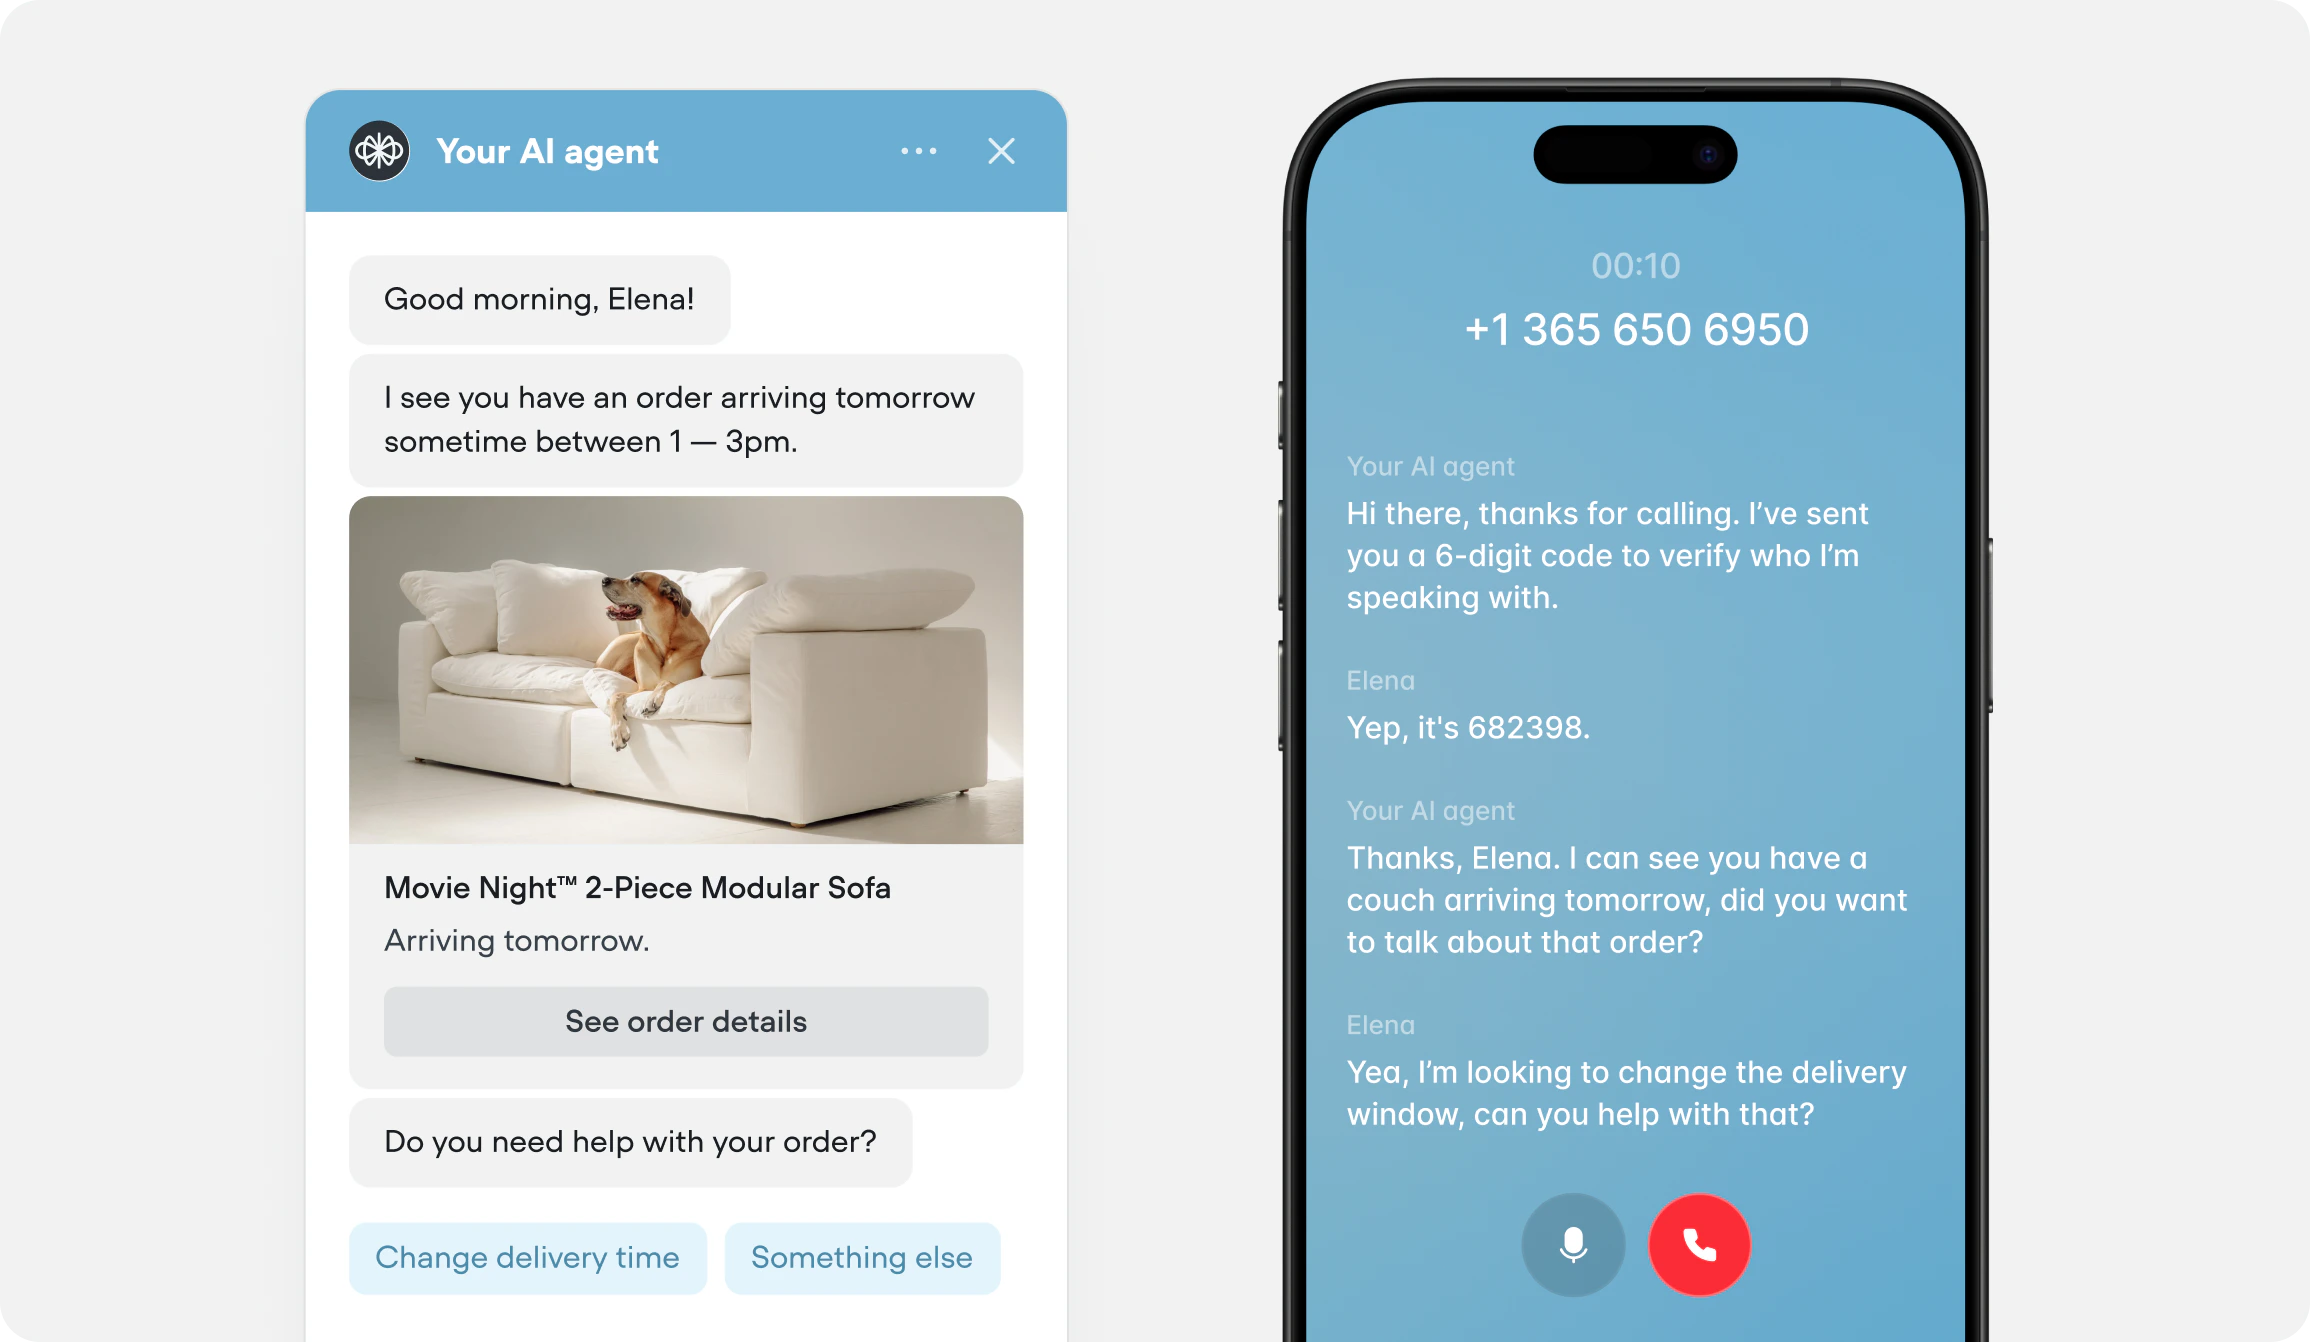
Add the API tool to a playbook’s Tools editor. The agent will call it autonomously when it determines the tool is needed based on the conversation context, the tool’s description, and your playbook instructions. For example, an “Order Lookup” API tool added to an order status playbook — the agent decides when to call it, passes the right input variables, and uses the response to answer the customer.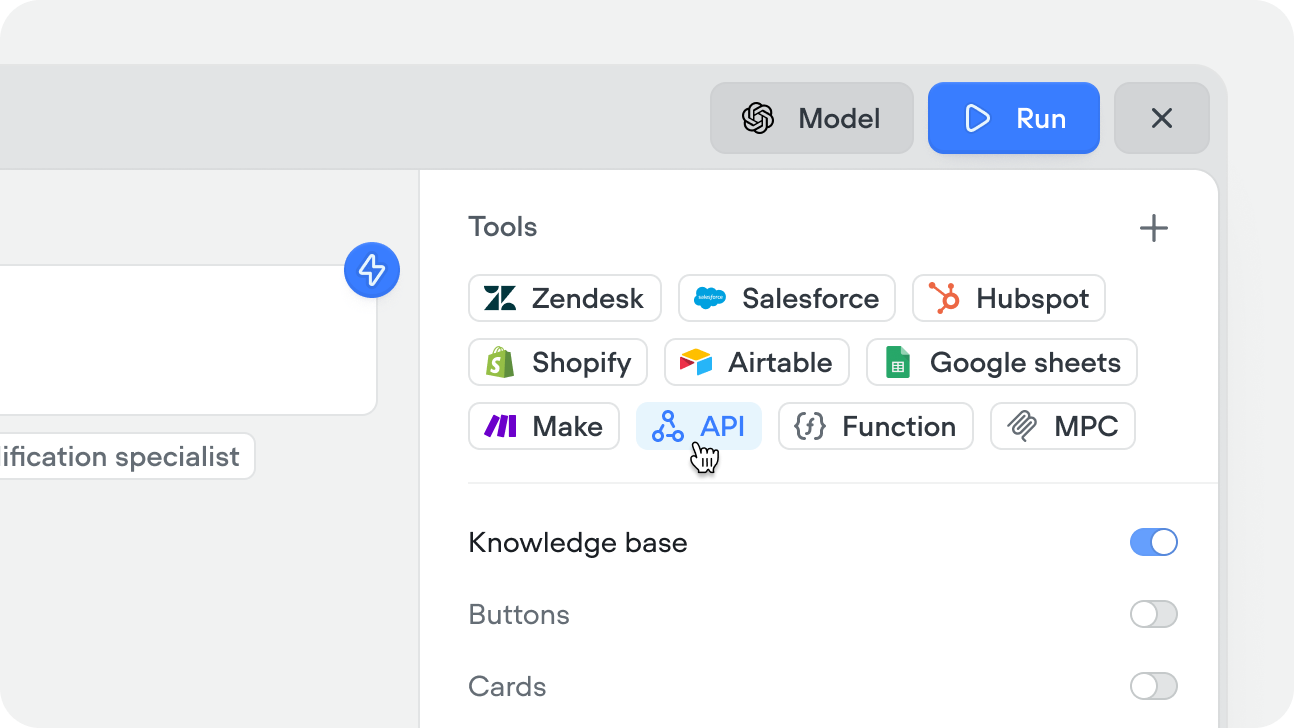
In a workflow
Drag an API step onto the canvas and select the API tool you want to call. Input variables are mapped explicitly in the step config — the agent doesn’t decide whether to call it, the workflow executes it at that point in the flow every time. Use this when the API call is part of a fixed process — for example, always verifying identity before accessing account data, or always sending a confirmation after a booking is made.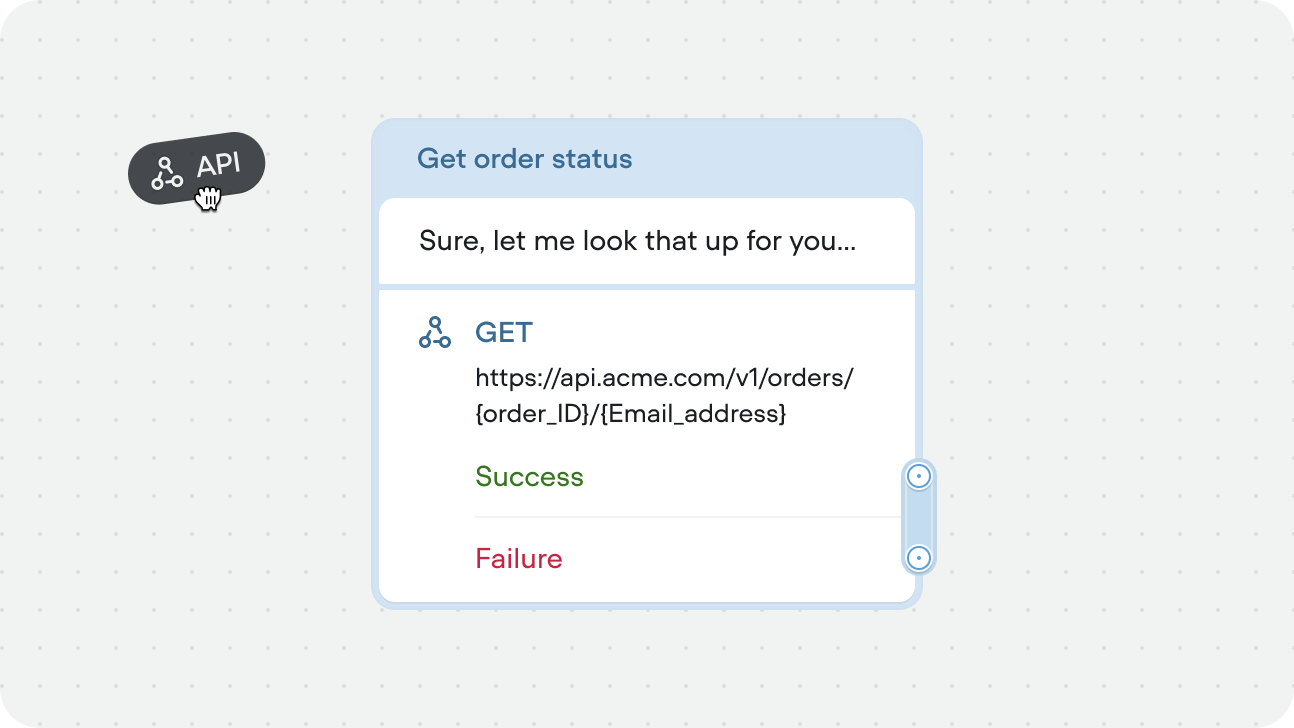
Running API tools asynchronously
Both API tools in workflows or playbooks can run async. The async toggle is available at the instance level, not tool level allowing you to use the same tool, with different config.
Fire and forget
Use async when you don’t need the API response to continue the conversation. The call fires in the background and the agent moves on immediately. This is ideal for logging and side effects — sending an event to an analytics platform, writing to a CRM, triggering a webhook, or any operation where the agent doesn’t need to reference the result. The user gets a faster experience because the conversation never pauses for a background task.Async with deferred response
Use async when the API call is slow or not immediately relevant, but the response still matters. The call fires in the background and the agent continues the conversation naturally. When the response arrives, it’s captured and the agent can reference it on the next turn. For example, during your initialization workflow, you authenticate the user and simultaneously fire an async call to fetch their recent orders. By the time authentication completes and the agent takes over, the order data is already available. The agent can open the conversation with “I see you have a recent order for a queen mattress arriving Thursday — is that what you’re calling about?” instead of asking the user to explain why they’re reaching out.