
Overview
You can quickly launch your agent on your website using our 1-click webchat integration. This will allow you to get a fully-automated web experience installed in minutes.
Web Chat is the easiest way to deploy your Voiceflow Chat agent into production, and is perfectly suited for on-website or support agents.
Configuring the Webchat's Appearance and Functionality
Premium customization options are only available on a paid plan.
The webchat configuration is divided into several key sections that allow you to customize both the functionality and appearance of your chat interface. Each section provides specific controls to tailor the experience to your needs.
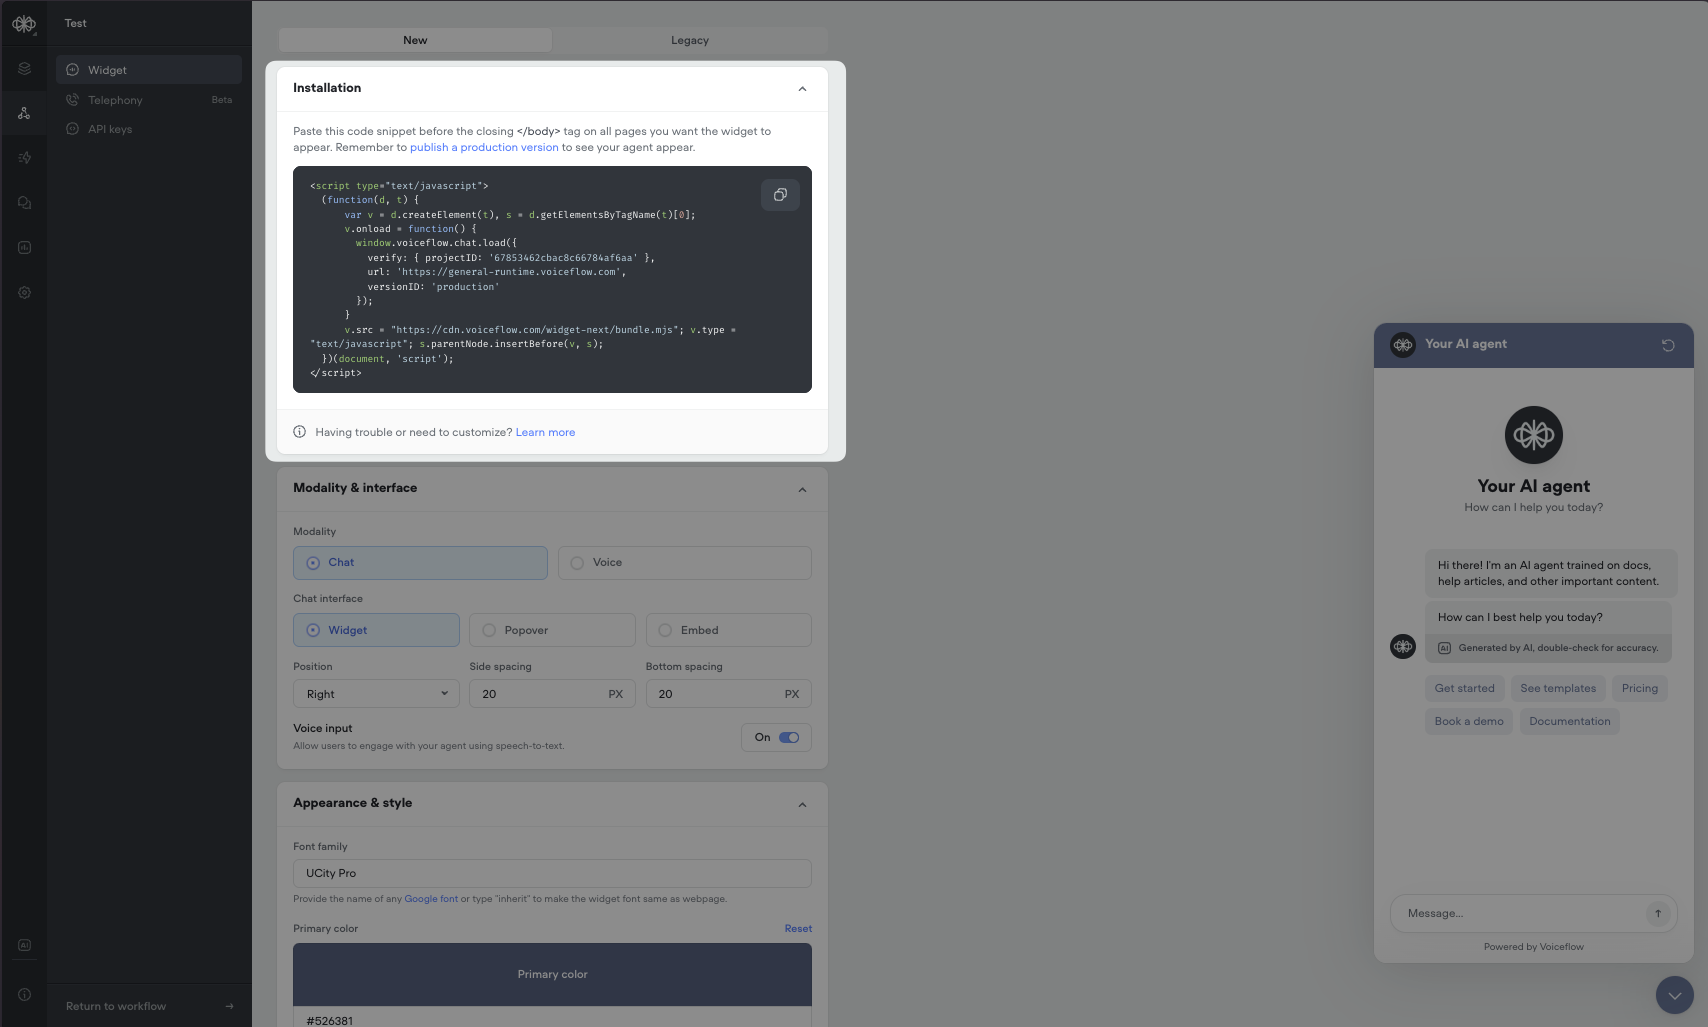
Modality & Interface Configuration
The Modality & Interface section controls how users interact with your chat:
Chat Interface Options:
- Choose between three display modes:
- Widget - Traditional floating chat window
- Popover - Full-screen overlay chat experience
- Embed - Integrated chat interface within your webpage
Position and Spacing:
- Position - Select right or left alignment
- Side Spacing - Set the distance from the selected side (in pixels)
- Bottom Spacing - Adjust the distance from the bottom of the screen (in pixels)
Voice Capabilities:
- Voice Input - Enable speech-to-text functionality for user inputs. Currently only support on Chrome browsers.
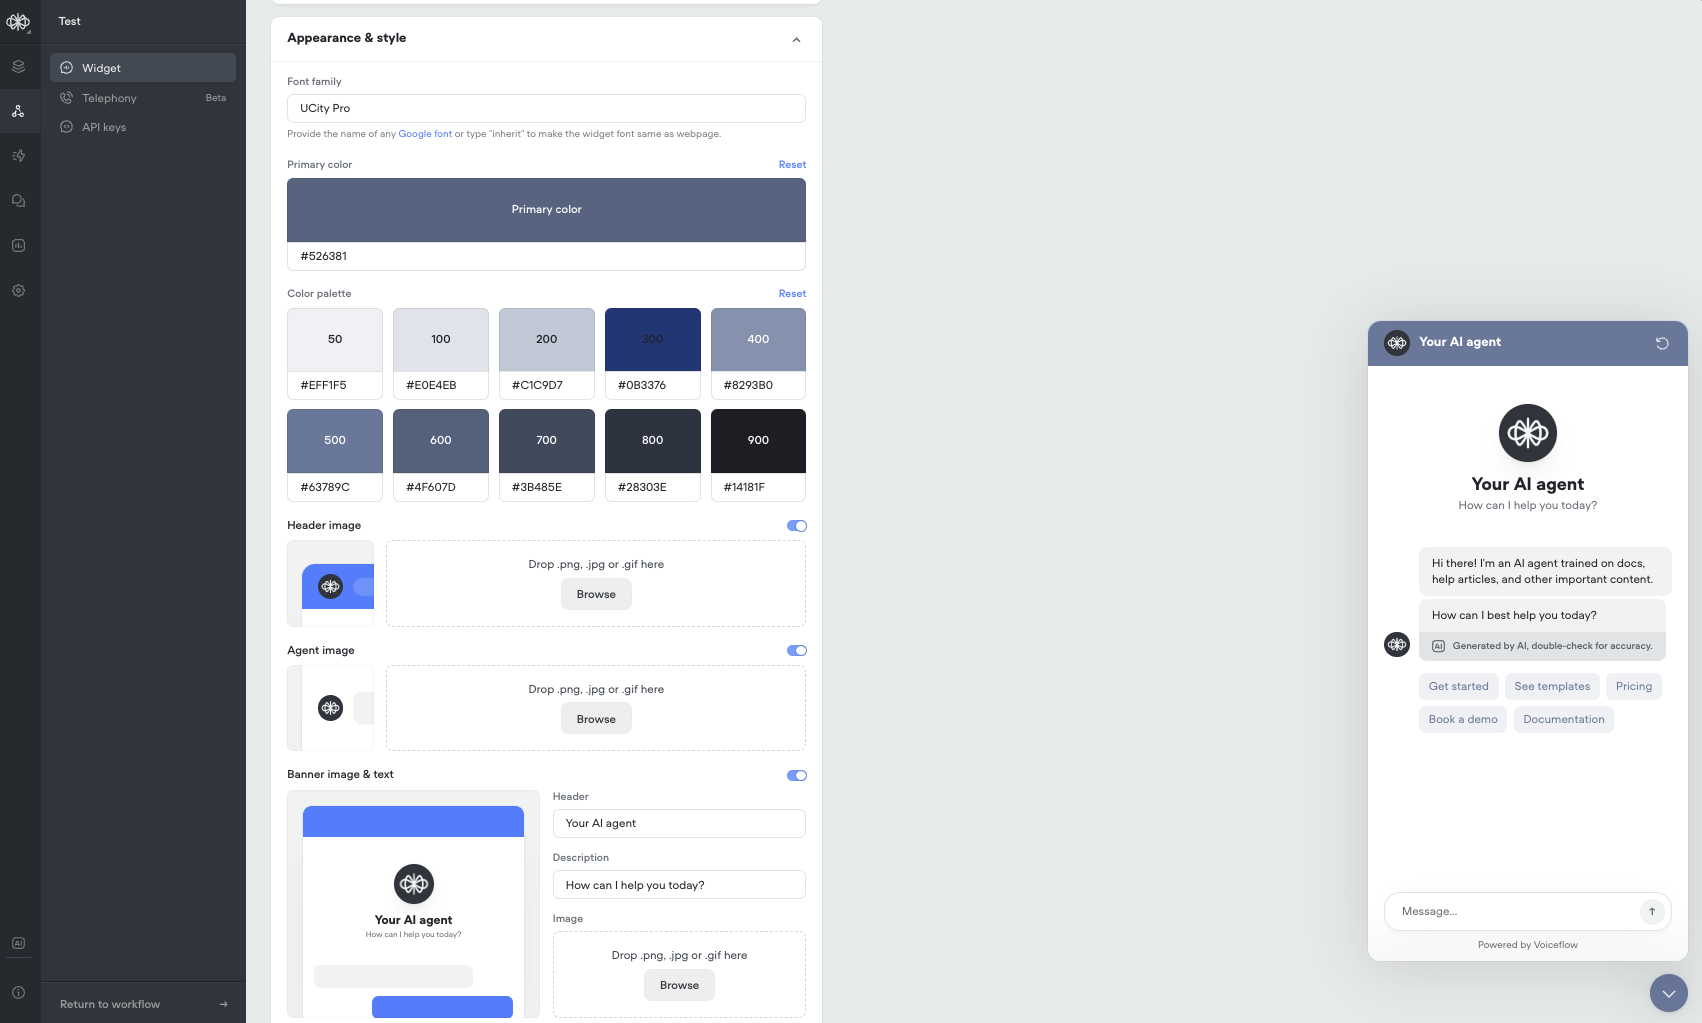
Appearance & Style Configuration
The Appearance & Style section provides comprehensive customization options for the visual elements of your chat interface:
Typography and Colors:
- Font Family - Enter any Google font name or use 'inherit' to match your website's font
- Primary Color - Set your main brand color using a HEX value
- Color Palette - Customize a complete color scheme with 9 different shades (50-900) for various interface elements
Images and Branding:
- Header Image - Add a custom image to appear in the chat header
- Agent Image - Customize the avatar that appears next to your assistant's messages
- Agent Icon - Set a distinct icon for your assistant's identity
Banner Image & Text Configuration
In the Banner section, you can customize the initial presentation of your chat interface:
The banner section allows you to configure the first impression users have of your chat interface. You can customize the header text, which appears prominently at the top of the chat window, and add a description that helps users understand the purpose of your chat assistant. You can also upload a custom banner image to create a more branded experience.
- Header - Set the name that appears at the top of your chat window
- Description - Provide a welcoming message or brief explanation of your assistant's capabilities
- Banner Image - Upload a custom image to appear at the top of your chat interface
Launcher Configuration
The launcher section offers multiple options for how users can initiate conversations with your chat interface:
You can choose from three distinct launcher types:
- Icon Only - A simple circular button with your chosen icon
- Text Button - A traditional button with custom text
- Icon with Text - A button combining both an icon and text
For any launcher type, you can customize:
- Custom Icon - Upload your own icon image (recommended aspect ratio: 1:1)
- Button Text - Add custom text for text-based launcher types
Additional Configuration Options
General Settings:
- AI Disclaimer - Toggle visibility of AI-generated content disclaimers
- Footer Text - Customize or hide the footer message
- Footer Text - Set custom placeholder text for the message input field. Example would be Privacy for your privacy policy.
- Footer Link - Set link for where placeholder text should go if selected.
- Powered By - show or hide the 'Powered by Voiceflow' message at the bottom of your Webchat window
Remember that all these customization options work together to create a cohesive chat experience. Take time to ensure your choices align with your brand guidelines and user experience goals.
Installing the Webchat on your Website
Installation for your Web Chat is easy - copy the JavaScript Snippet provided in the Installation section, and paste it anywhere in your website's code between the … tags. You must include the snippet on every page you want your agent to appear on.
Publishing a Version of your Agent to your Web Chat
In order for your agent to run in your Web Chat, you need to first save a Production Version of your agent. From the designer view for any workflow, you can find the Publish button in the top-right corner, give your new version a name, and hit the Publish button.
Anytime you make changes to your agent, including updating the widget settings, you will need to publish a new version of your Assistant for it to appear in your Web Chat.
Supported HTML elements (in the text step)
All the tags below are supported when used in the text step on Web Chat.
['a','audio','b','blockquote','br','code','dd','del','details','div','dl','dt','em','h1','h2','h3','h4','h5','h6','hr','i','img','input','ins','kbd','li','ol','p','picture','pre','q','rp','rt','ruby','s','samp','section','source','span','strike','strong','sub','summary','sup','table','tbody','td','tfoot','th','thead','tr','tt','ul','var','video']
Note: By default, dangerous HTML elements such as Iframe require additional configuration.
Enabling dangerous HTML elements
Disclaimer: Enabling dangerous HTML elements enables cross-site scripting vulnerabilities (XSS). This means that if you are using someone else's code, it may provide them full access to your private information. Do this at your own risk and only use your own code. You can read more on XSS vulnerabilities and how to prevent them here.
To enable dangerous HTML elements such as Iframe's, set the following configuration to true on your Web Chat installation code. By default, this value is false.
window.voiceflow.chat.load({
  ...
  allowDangerousHTML: true
});
In your own code
You can go a bit further and use your own front-end code to interact with the Webchat widget as you might also want to populate a specific user ID and/or use the available API to do the following actions:
- Load a specific agent
- Set configuration settings when the Webchat widget loads
- Open or close the Webchat widget
- Show or hide the Webchat widget launch bubble
- Interact with the Dialog Manager API and show the result within the Chat Widget
- Show or clear proactive text messages above your widget launch bubble
Updated about 2 months ago