Get User's Timezone
Get User’s Device Timezone
Introduction
In this article we will learn how to get user’s device timezone with the Alexa Settings API and use it in your Voiceflow Alexa project.
Context
Alexa customers can set their time zone, distance measuring unit, and temperature measurement unit in the Alexa app. The Alexa Settings APIs allow developers to retrieve customer preferences for these settings in a unified view.
An access token is used for authorization. All of these APIs refer to deviceId, which is the unique identifier for the customer device for which these settings are being obtained.
⚠️ If you test your skill with the Alexa Simulator, you will not be able to access all of the Alexa Settings API capabilities. If you attempt to query the Alexa Settings API using the deviceId and apiAccessToken values generated by the Alexa Simulator, you will only be able to retrieve the time zone value. If you attempt to retrieve the distance measurement unit or the temperature measurement unit, you will get an 'Error 204 No Content' error message. See Alexa Simulator Limitations
How it works
- Get the {deviceId}, {apiEndpoint} and {apiAccessToken}
- Use the API step to make a call to the Alexa Settings API and retrieve the timezone
- Use the Javascript step to populate {theDate} and {theTime} variables
Step 1 | Create and Populate our variables
The first thing we want to do is to create and initiate some variables
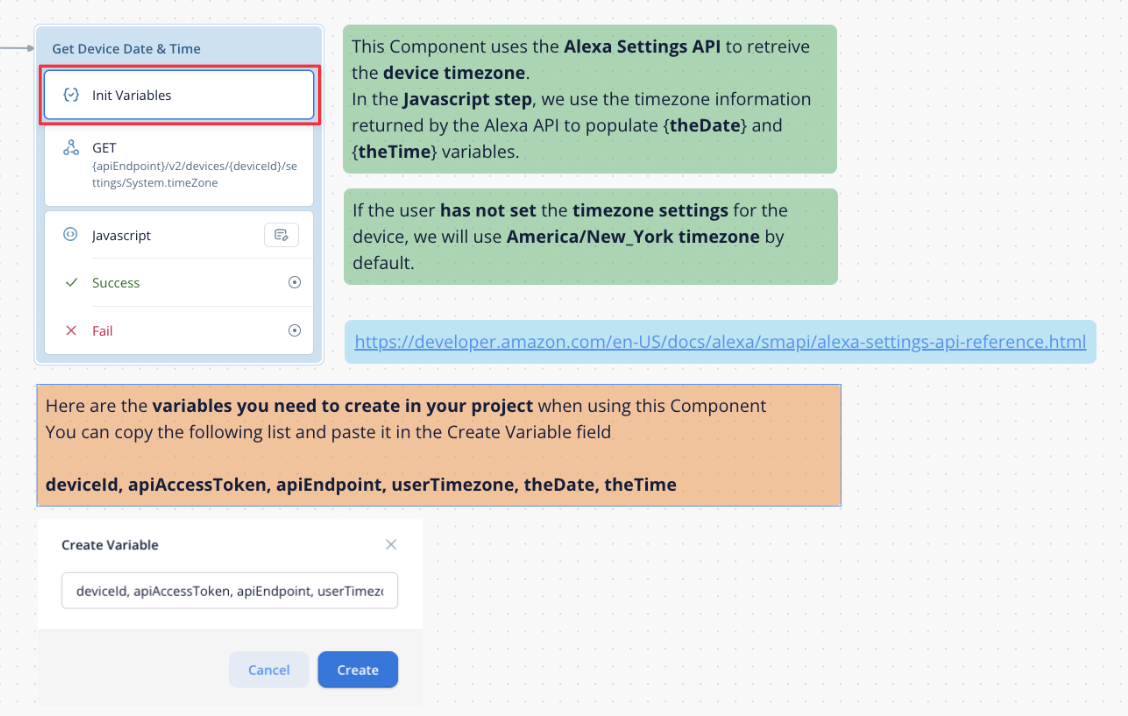
In a Set step we want to add the following steps:
deviceId > _system.device.deviceId || 0
apiAccessToken > _system.apiAccessToken || 0
apiEndpoint > _system.apiEndpoint || 0
userTimezone > 0
theDate > 0
theTime > 0
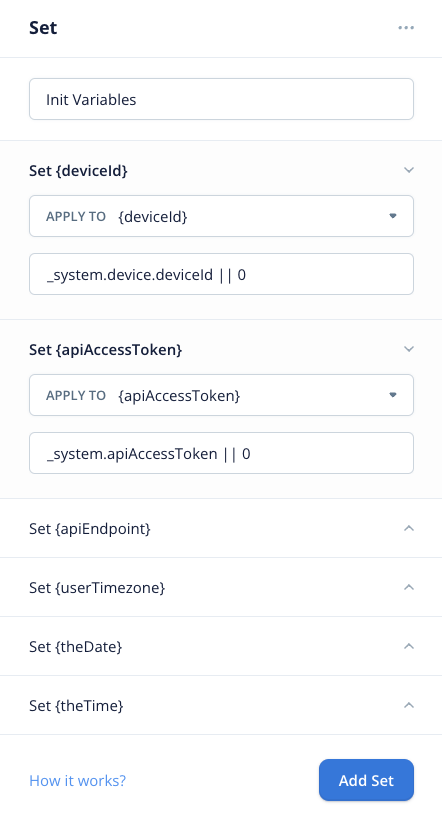
Step 2 | Call the Alexa Settings API
Add an API step and setup it like bellow
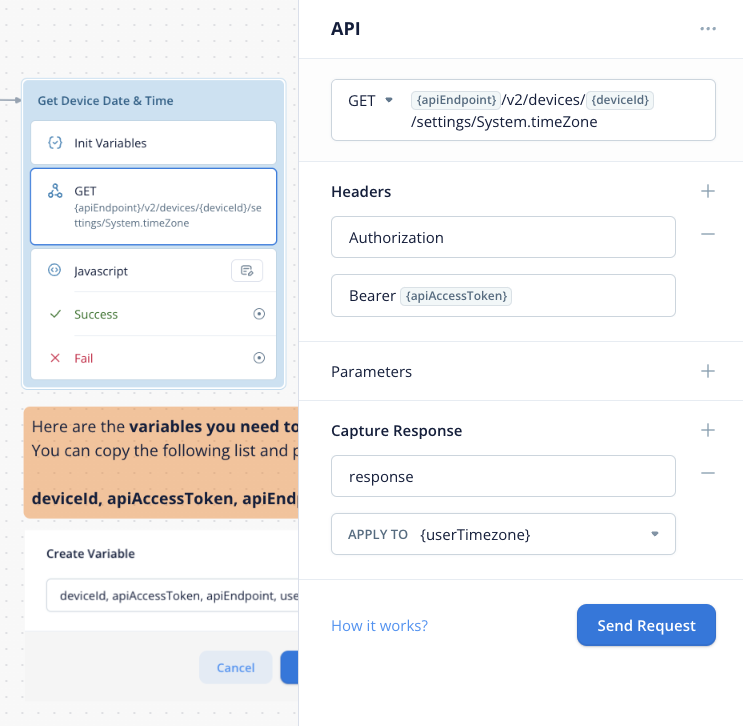
The GET URL
{apiEndpoint}/v2/devices/{deviceId}/settings/System.timeZone
Where {apiEndpoint} and {deviceId} are the value returned by the _system variable and mapped in our previous Set step.
The header
To authenticate the call, we are using the {apiAccessToken} variable
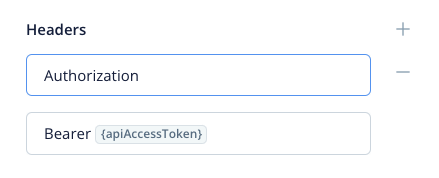
Authorization: Bearer {apiAccessToken}
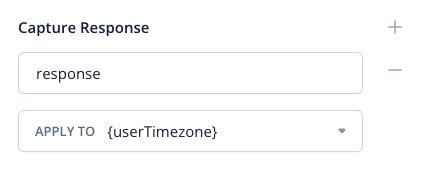
Mapping the response
We want the full/raw response to be mapped to the userTimezone variable
Step 3 | The Javascript code
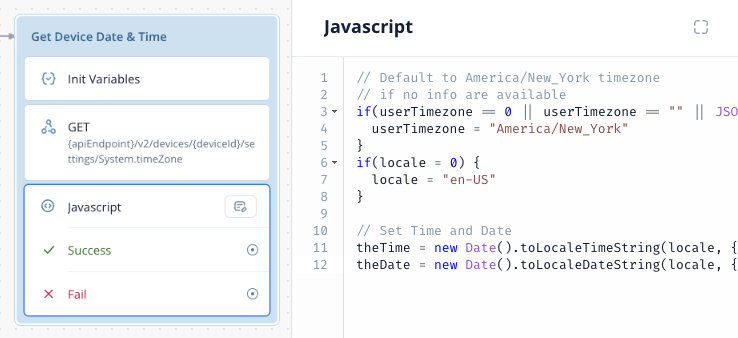
Now that we have the timezone value, we can use it in our code to generate a more human readable date/time.
// Default to America/New_York timezone
// if no info are available
if(userTimezone == 0 || userTimezone == "" || JSON.stringify(userTimezone) == "{}"){
  userTimezone = "America/New_York"
}
if(locale = 0) {
  locale = "en-US"
}

// Set Time and Date
theTime = new Date().toLocaleTimeString(locale, { hour: '2-digit', minute: '2-digit', timeZone: userTimezone})
theDate = new Date().toLocaleDateString(locale, { weekday: 'long', year: 'numeric', month: 'long', day: 'numeric', timeZone: userTimezone})
This code will default {userTimezone} value to “America/New_York” if for any reason we don’t have access to the device’s timezone.
Step 4 | Use the result
You can now use {theDate} and {theTime} variables anywhere in your project.

Step 5 | Upload and Test your skill
Now, let’s upload the project to Alexa
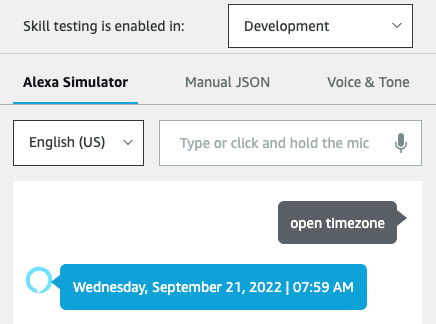
To fully test your skill with actual device’s timezone, the best option is to test the skill on a real device with the timezone setting previously set.
Information
💡 For each upload, you might need to wait around 3-5 minutes for the changes made into your Voiceflow project to populate on the Alexa Developer Console and being able to fully test the skill.
A good way to be sure that you are testing the updated version is to use a Speak step at the very beginning of your project with a version number. That way you can quickly know if you’re testing the correct updated version or if you have to wait a bit for your changes to propagate.
Documentation
Alexa Settings API
Obtain Customer Settings Information with the Alexa Settings API | Alexa Skills Kit
Updated about 1 year ago