> ## Documentation Index
> Fetch the complete documentation index at: https://docs.voiceflow.com/llms.txt
> Use this file to discover all available pages before exploring further.
# MCP tool
> Connect your agent to MCP servers and use their tools.
Voiceflow supports hosted MCP servers accessible from the internet. Local MCP servers are not supported. You can use a service like [Zapier MCP](https://zapier.com) to build a hosted server.
MCP (Model Context Protocol) is a standardized way for AI agents to connect to external services. Unlike API tools where you configure individual endpoints, an MCP server can expose multiple tools at once — each with its own description, parameters, and context that helps your agent understand how and when to use them.
## Creating an MCP tool
You can add MCP tools from a server, or connect to a new server directly from within a [playbook](/documentation/build/playbooks).
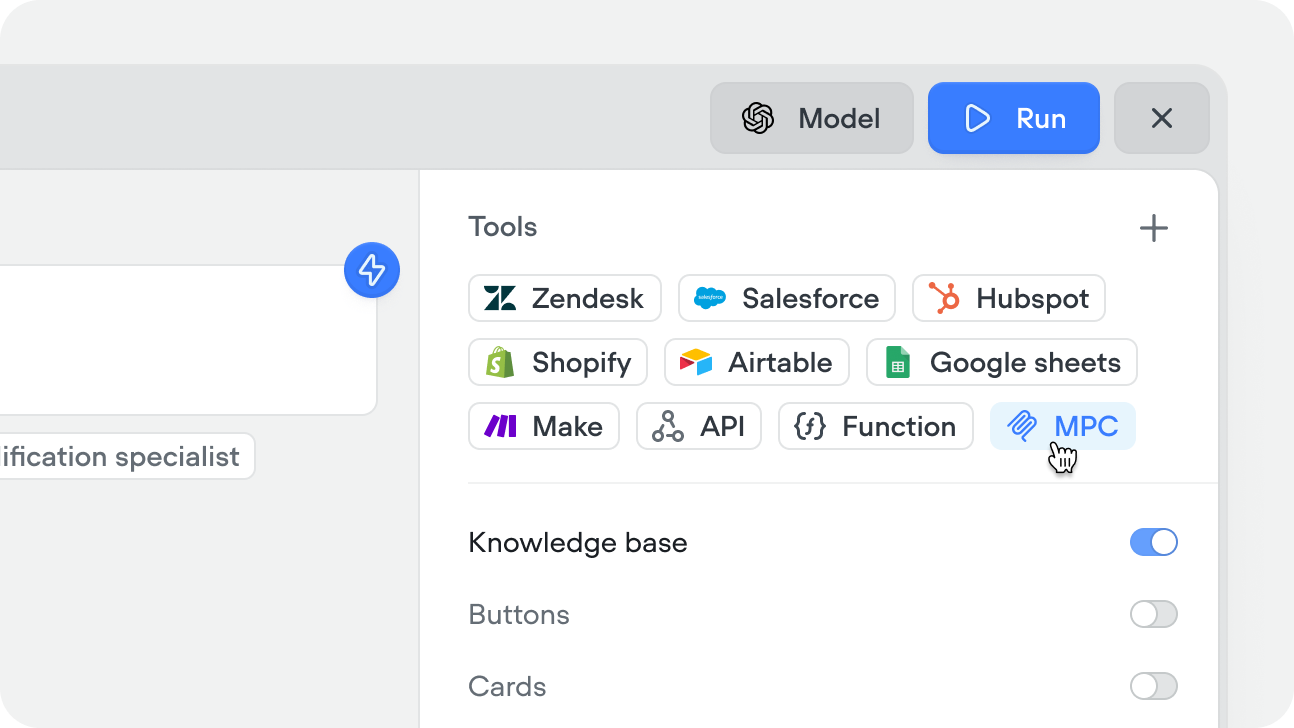 You can also add MCP servers from within a workflow using the [MCP step](/documentation/build/steps/MCP), or from the tools CMS tab. Servers can be managed centrally in Settings → MCP servers.
Enter your server details:
You can also add MCP servers from within a workflow using the [MCP step](/documentation/build/steps/MCP), or from the tools CMS tab. Servers can be managed centrally in Settings → MCP servers.
Enter your server details:
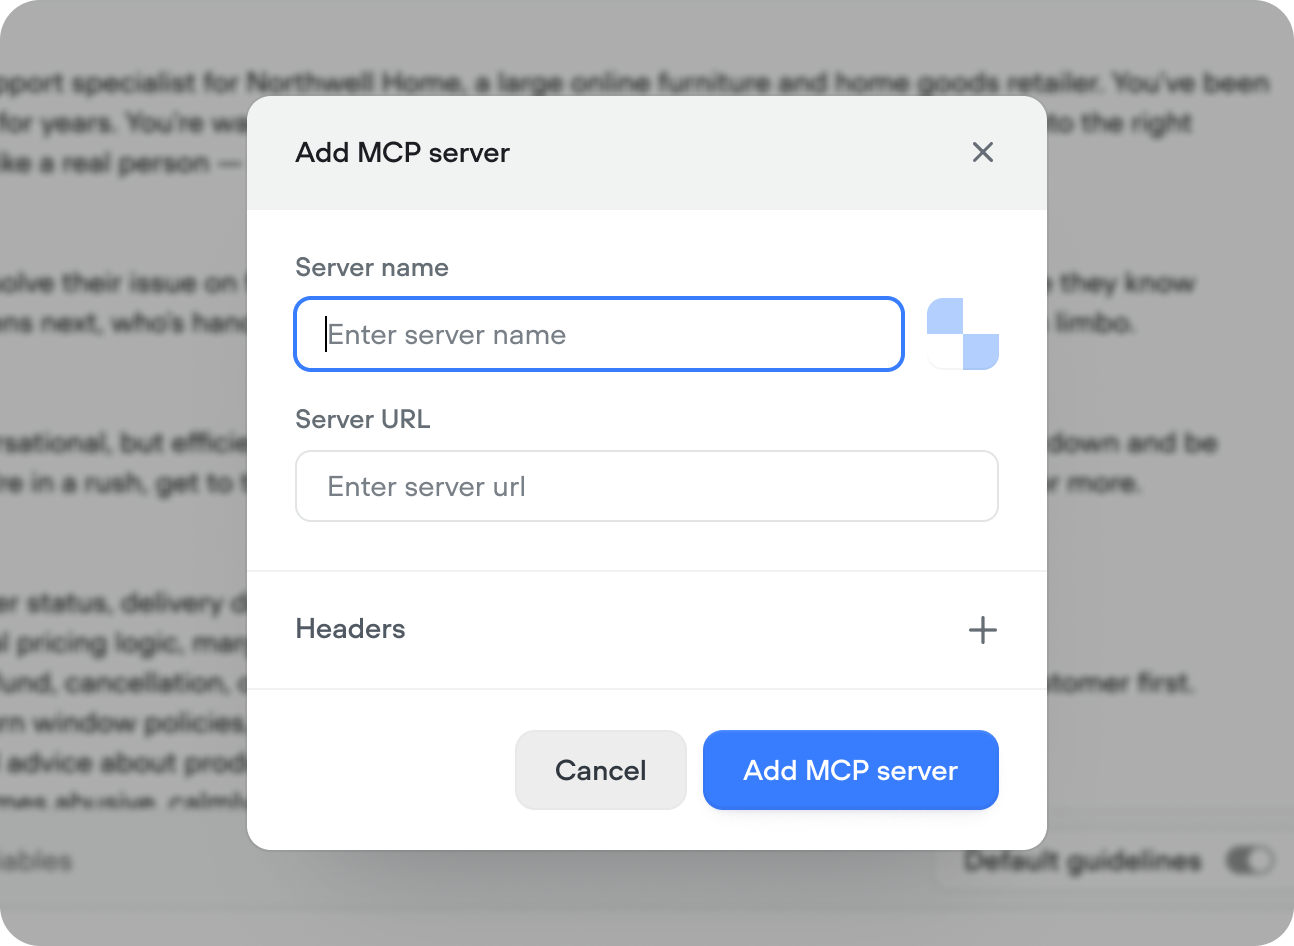 | Field | Description |
| ----------------------- | ------------------------------------------------------------------------ |
| **Server name & image** | A friendly label shown inside Voiceflow and optional image |
| **Server URL** | The root URL of your hosted MCP server |
| **Headers** | Optional key-value pairs for authentication (API keys, tokens) |
| **Image** | Optional icon displayed next to the tool in playbooks and workflow steps |
Once connected, Voiceflow fetches the available tools from your server. Select the ones you want your agent to have access to — you don't have to enable all of them and can refresh the server when you choose to access new tools.
Each tool from an MCP server comes with a name, description, and parameters defined on the server itself. If your agent isn't using a tool correctly, check the tool descriptions on your server — they're what the model reads to decide when and how to call them.
## Using the MCP tool
There are two ways to use an MCP tool:
### In a playbook
Add MCP tools to a playbook's Tools editor. The agent calls the individual tools autonomously based on the conversation context, your playbook instructions, and the tool descriptions from the server. For example, a CRM MCP server might expose "lookup contact", "create ticket", and "update deal stage" tools. Add the individual tools to a support playbook and the agent will call the right tool at the right time.
Give the tools a clear name and description inside Voiceflow that covers both what the tool is for and when the agent should reach for it.
### In a workflow
Drag an [MCP step](/documentation/build/steps/MCP) onto the canvas and select the specific tool you want to call. Input variables are mapped explicitly in the step config — the workflow executes it at that point in the flow every time.
Use this when the MCP call is part of a fixed process — for example, always logging a ticket after a complaint, or always syncing a record after a form is completed.
| Field | Description |
| ----------------------- | ------------------------------------------------------------------------ |
| **Server name & image** | A friendly label shown inside Voiceflow and optional image |
| **Server URL** | The root URL of your hosted MCP server |
| **Headers** | Optional key-value pairs for authentication (API keys, tokens) |
| **Image** | Optional icon displayed next to the tool in playbooks and workflow steps |
Once connected, Voiceflow fetches the available tools from your server. Select the ones you want your agent to have access to — you don't have to enable all of them and can refresh the server when you choose to access new tools.
Each tool from an MCP server comes with a name, description, and parameters defined on the server itself. If your agent isn't using a tool correctly, check the tool descriptions on your server — they're what the model reads to decide when and how to call them.
## Using the MCP tool
There are two ways to use an MCP tool:
### In a playbook
Add MCP tools to a playbook's Tools editor. The agent calls the individual tools autonomously based on the conversation context, your playbook instructions, and the tool descriptions from the server. For example, a CRM MCP server might expose "lookup contact", "create ticket", and "update deal stage" tools. Add the individual tools to a support playbook and the agent will call the right tool at the right time.
Give the tools a clear name and description inside Voiceflow that covers both what the tool is for and when the agent should reach for it.
### In a workflow
Drag an [MCP step](/documentation/build/steps/MCP) onto the canvas and select the specific tool you want to call. Input variables are mapped explicitly in the step config — the workflow executes it at that point in the flow every time.
Use this when the MCP call is part of a fixed process — for example, always logging a ticket after a complaint, or always syncing a record after a form is completed.