> ## Documentation Index
> Fetch the complete documentation index at: https://docs.voiceflow.com/llms.txt
> Use this file to discover all available pages before exploring further.
# The agent instructions editor
> Add headings, lists, and callouts, reorder blocks by dragging, and reference your tools directly while writing agent and playbook instructions.
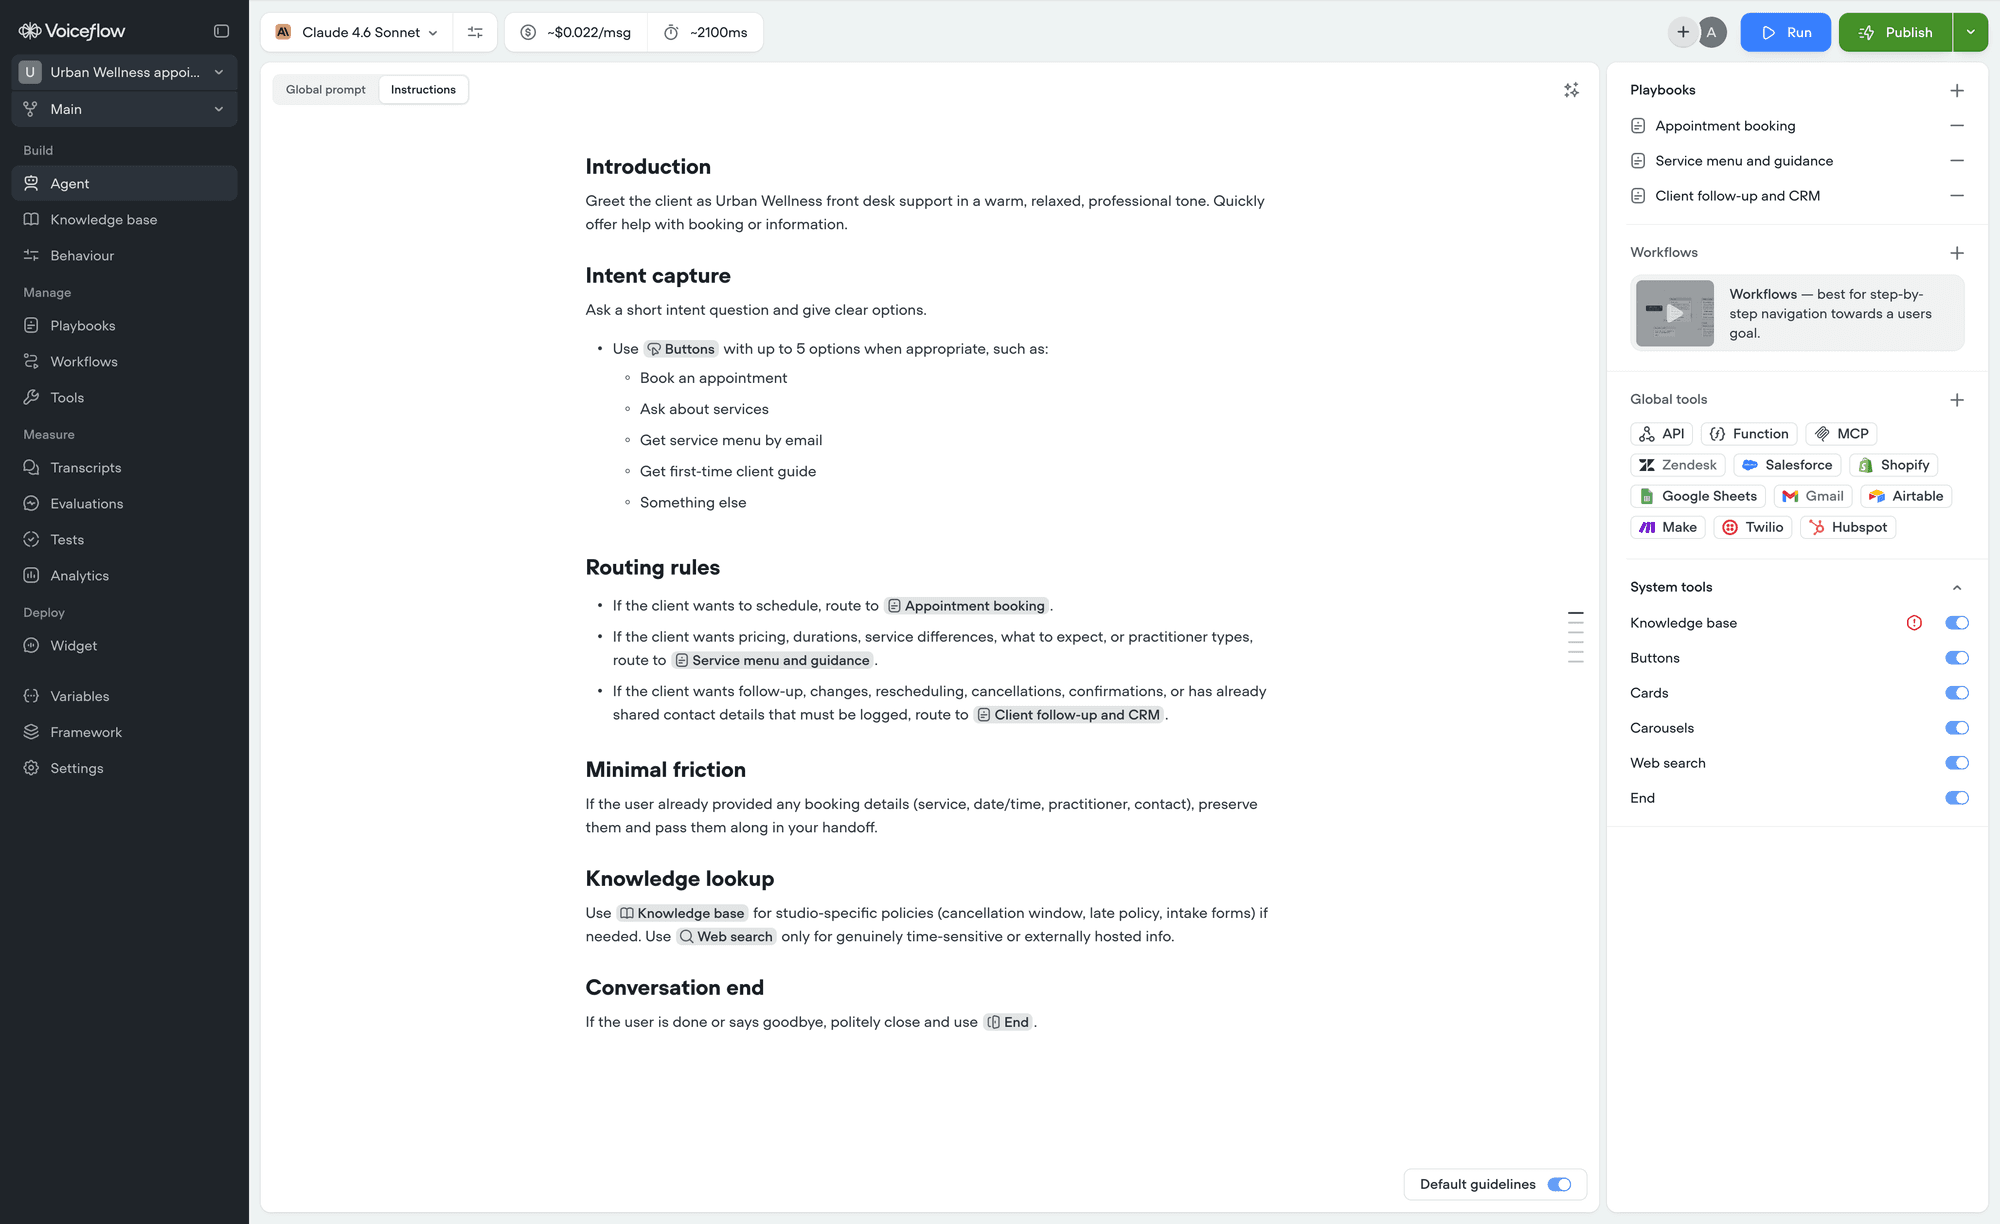 The editor is where you write everything your agent reads: the [global prompt](/documentation/build/global-prompt), your [agent instructions](/documentation/build/instructions), and the instructions inside every [playbook](/documentation/build/playbooks).
It works like a document editor. You can add headings, lists, and callouts, drag lines around to reorder them, and format text as you type. Structure is not decoration - well-organized instructions are easier for you to maintain, and easier for the model to follow.
## Three things worth knowing first
* **Type / to insert anything.** One menu covers headings, lists, callouts, steps, and references to your tools.
* **You can point at your tools instead of naming them.** A [reference](/documentation/build/editor/references) links to the real tool, playbook, or workflow, so renaming it never breaks your instructions.
* **Markdown works as you type.** Typing `## ` makes a heading, `**text**` makes it bold. See [markdown shortcuts](/documentation/build/editor/markdown).
## Adding blocks with the insert menu
Type / on any empty line to open the insert menu. Keep typing to filter, use the arrow keys to move through the results, and press Enter to insert. Press Esc to close the menu and go back to typing.
The editor is where you write everything your agent reads: the [global prompt](/documentation/build/global-prompt), your [agent instructions](/documentation/build/instructions), and the instructions inside every [playbook](/documentation/build/playbooks).
It works like a document editor. You can add headings, lists, and callouts, drag lines around to reorder them, and format text as you type. Structure is not decoration - well-organized instructions are easier for you to maintain, and easier for the model to follow.
## Three things worth knowing first
* **Type / to insert anything.** One menu covers headings, lists, callouts, steps, and references to your tools.
* **You can point at your tools instead of naming them.** A [reference](/documentation/build/editor/references) links to the real tool, playbook, or workflow, so renaming it never breaks your instructions.
* **Markdown works as you type.** Typing `## ` makes a heading, `**text**` makes it bold. See [markdown shortcuts](/documentation/build/editor/markdown).
## Adding blocks with the insert menu
Type / on any empty line to open the insert menu. Keep typing to filter, use the arrow keys to move through the results, and press Enter to insert. Press Esc to close the menu and go back to typing.
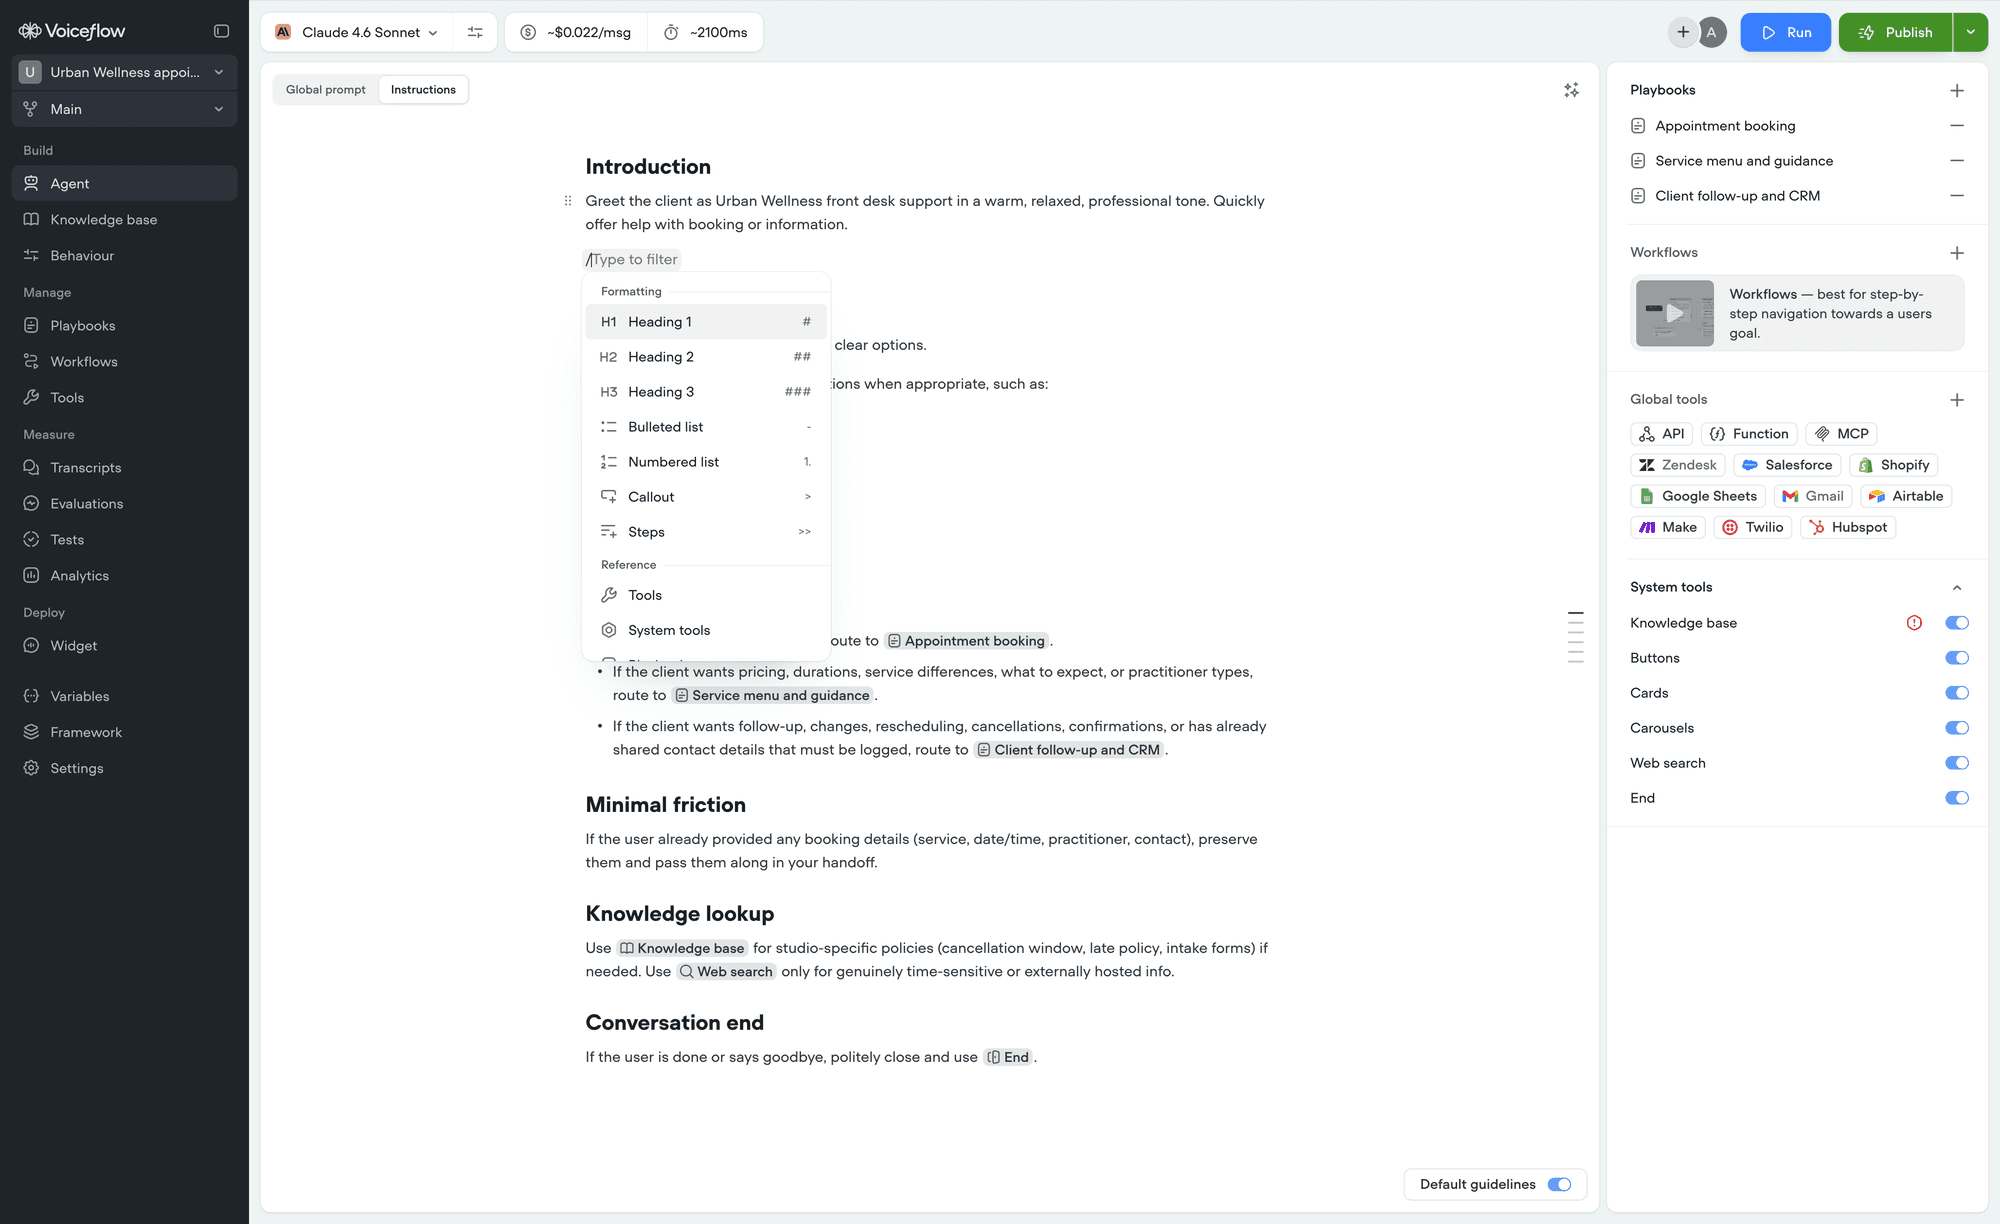 The menu has two sections.
**Formatting** turns the current line into a block:
| Option | Markdown shortcut |
| ----------------- | ----------------- |
| **Heading 1** | `#` |
| **Heading 2** | `##` |
| **Heading 3** | `###` |
| **Bulleted list** | `-` |
| **Numbered list** | `1.` |
| **Callout** | `>` |
| **Steps** | `>>` |
**Reference** inserts a link to something your agent can use - a tool, system tool, playbook, or workflow. Categories with nothing in them yet appear greyed out. See [references](/documentation/build/editor/references) for the full detail.
The / menu only opens at the start of a line or after a space, so you can still type things like `and/or` without interrupting yourself.
## Changing formatting on selected text
Select any text and a small toolbar appears above it.
The menu has two sections.
**Formatting** turns the current line into a block:
| Option | Markdown shortcut |
| ----------------- | ----------------- |
| **Heading 1** | `#` |
| **Heading 2** | `##` |
| **Heading 3** | `###` |
| **Bulleted list** | `-` |
| **Numbered list** | `1.` |
| **Callout** | `>` |
| **Steps** | `>>` |
**Reference** inserts a link to something your agent can use - a tool, system tool, playbook, or workflow. Categories with nothing in them yet appear greyed out. See [references](/documentation/build/editor/references) for the full detail.
The / menu only opens at the start of a line or after a space, so you can still type things like `and/or` without interrupting yourself.
## Changing formatting on selected text
Select any text and a small toolbar appears above it.
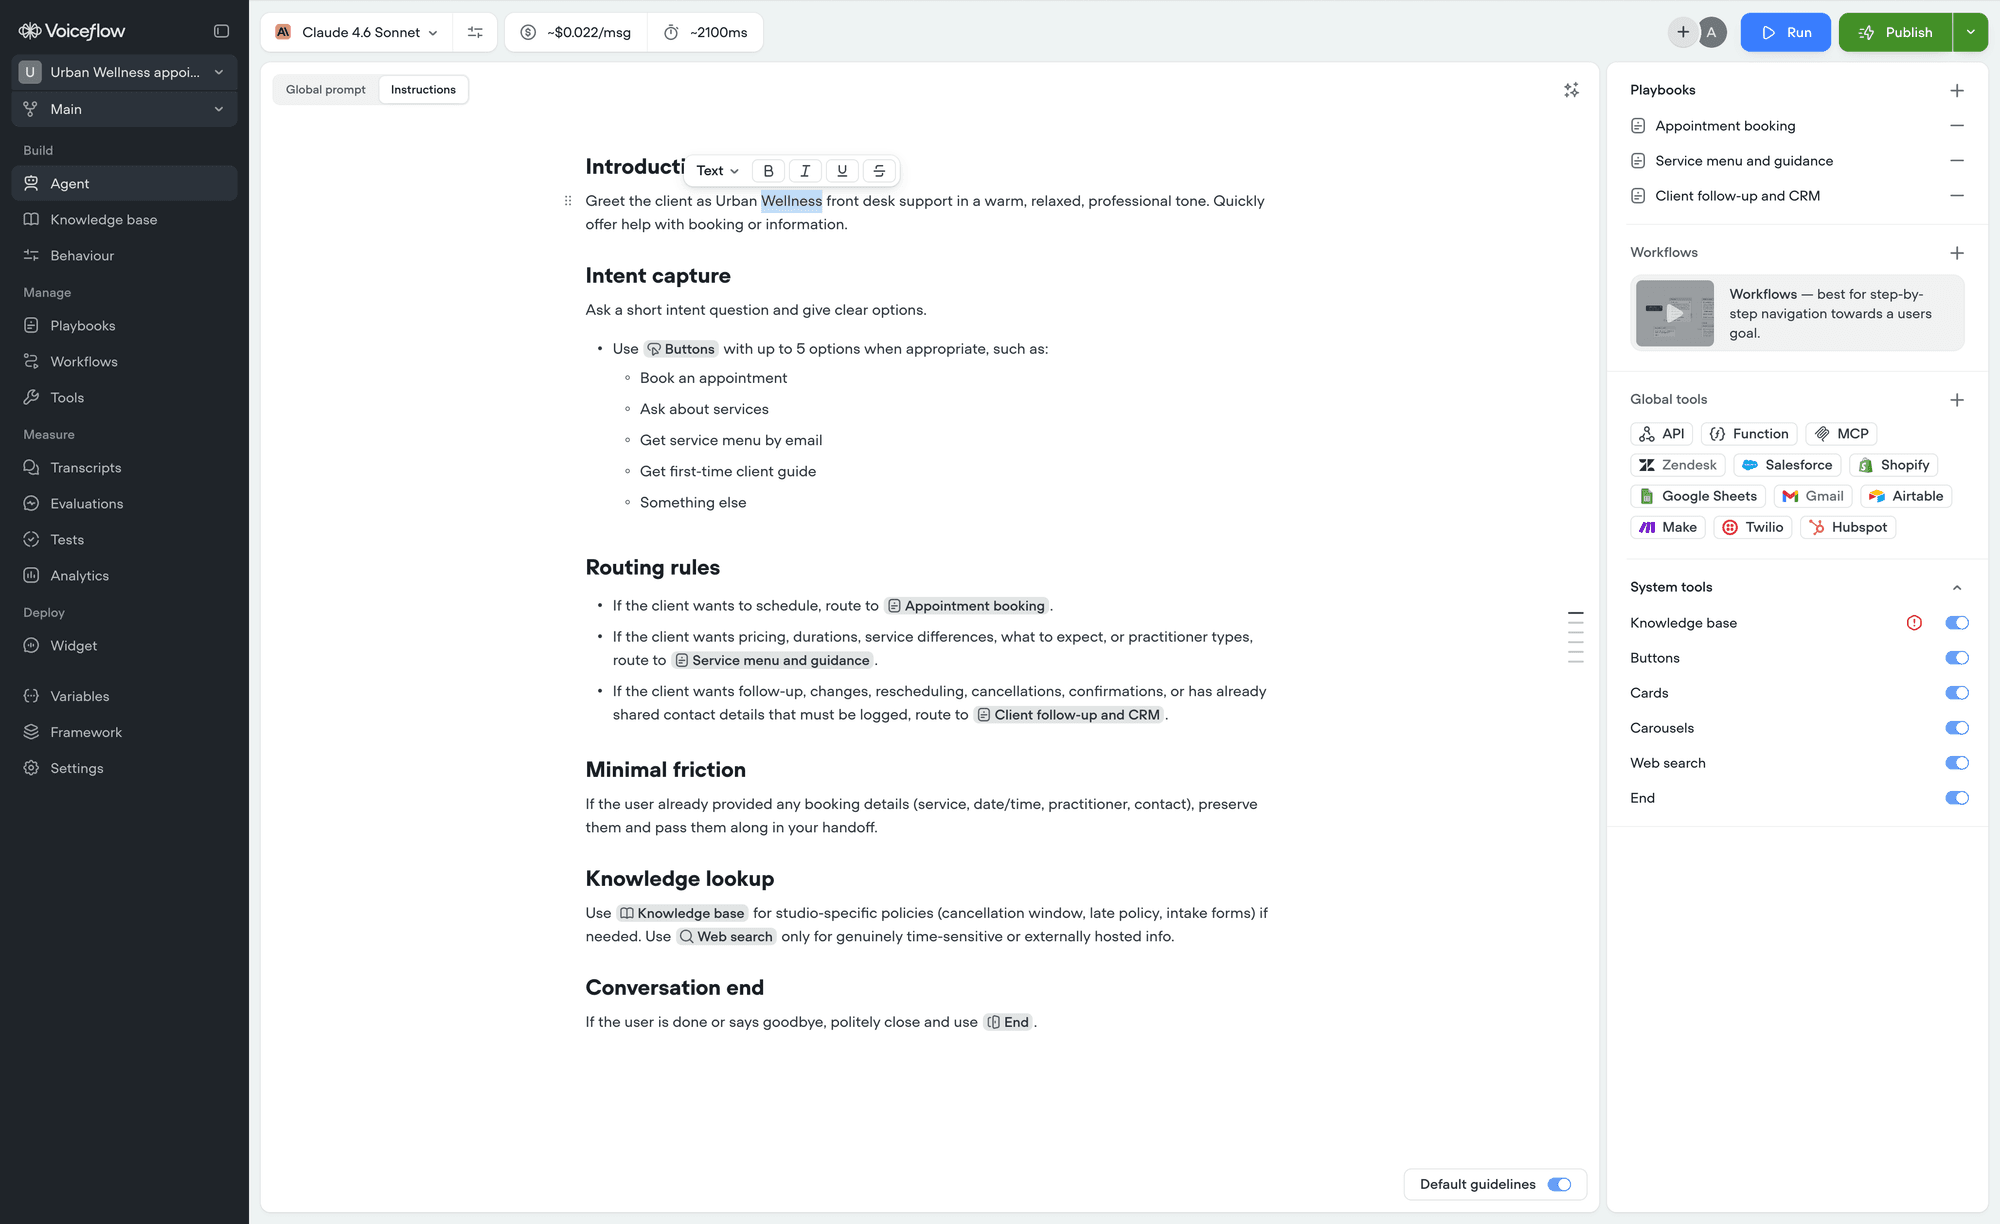 On the left is the **Turn into** dropdown, showing what the current line is. Open it to convert the line to something else - a heading, a list, a callout, or back to plain text. If you have several lines selected, all of them convert together.
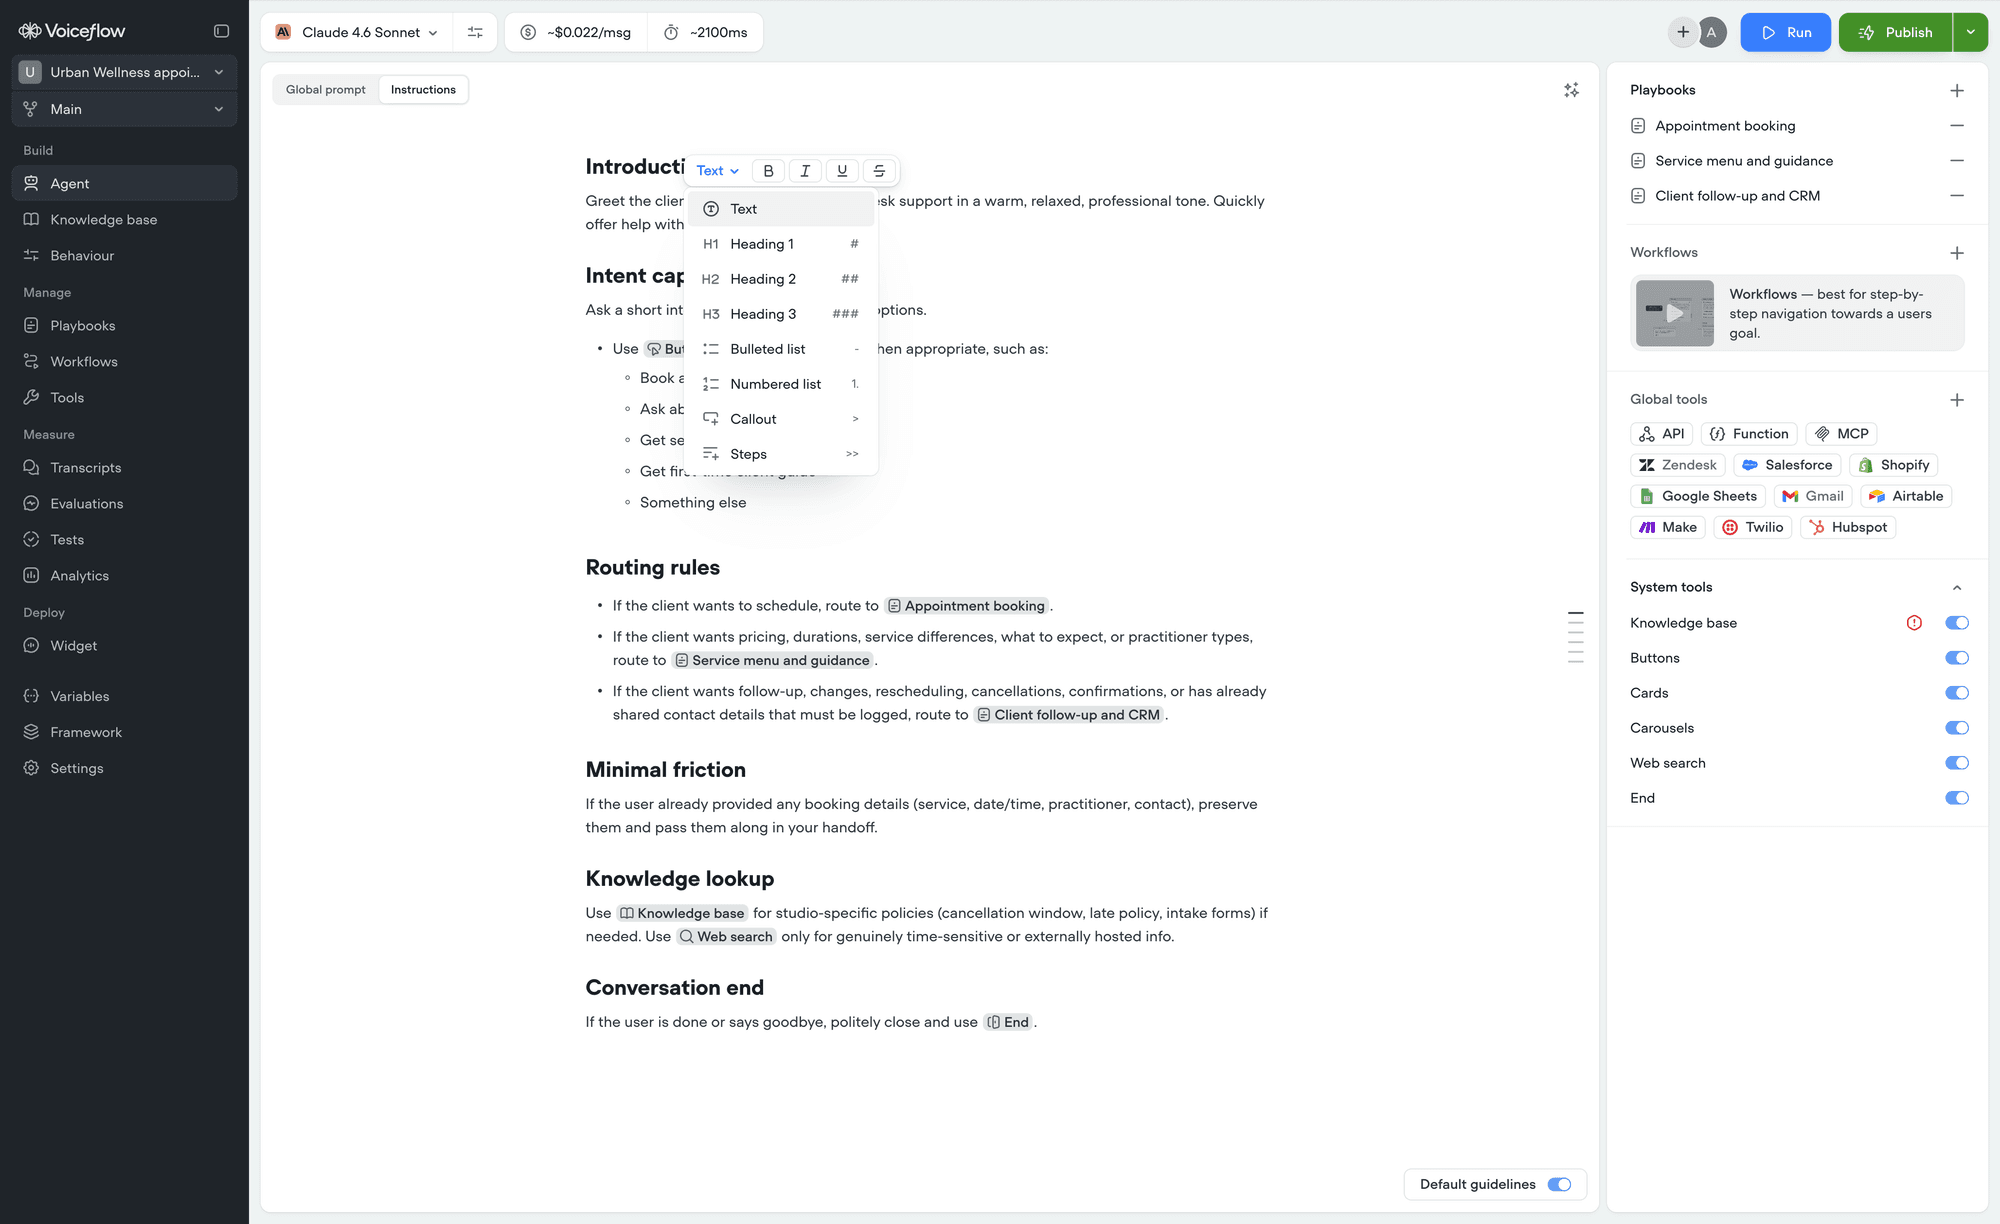 To the right are **Bold**, **Italic**, **Underline**, and **Strikethrough**. Press Esc to dismiss the toolbar.
Paste a URL into the editor and it becomes a link. Click any link to edit its address or the text it shows, or to remove it.
## Reordering and selecting blocks
Hover over any line and a drag handle appears in the left margin. Drag it to move the line, and a dark line shows where it will land. Whole lists move as one block. Dragging near the top or bottom of the editor scrolls the page for you, and pressing Esc mid-drag cancels the move.
To the right are **Bold**, **Italic**, **Underline**, and **Strikethrough**. Press Esc to dismiss the toolbar.
Paste a URL into the editor and it becomes a link. Click any link to edit its address or the text it shows, or to remove it.
## Reordering and selecting blocks
Hover over any line and a drag handle appears in the left margin. Drag it to move the line, and a dark line shows where it will land. Whole lists move as one block. Dragging near the top or bottom of the editor scrolls the page for you, and pressing Esc mid-drag cancels the move.
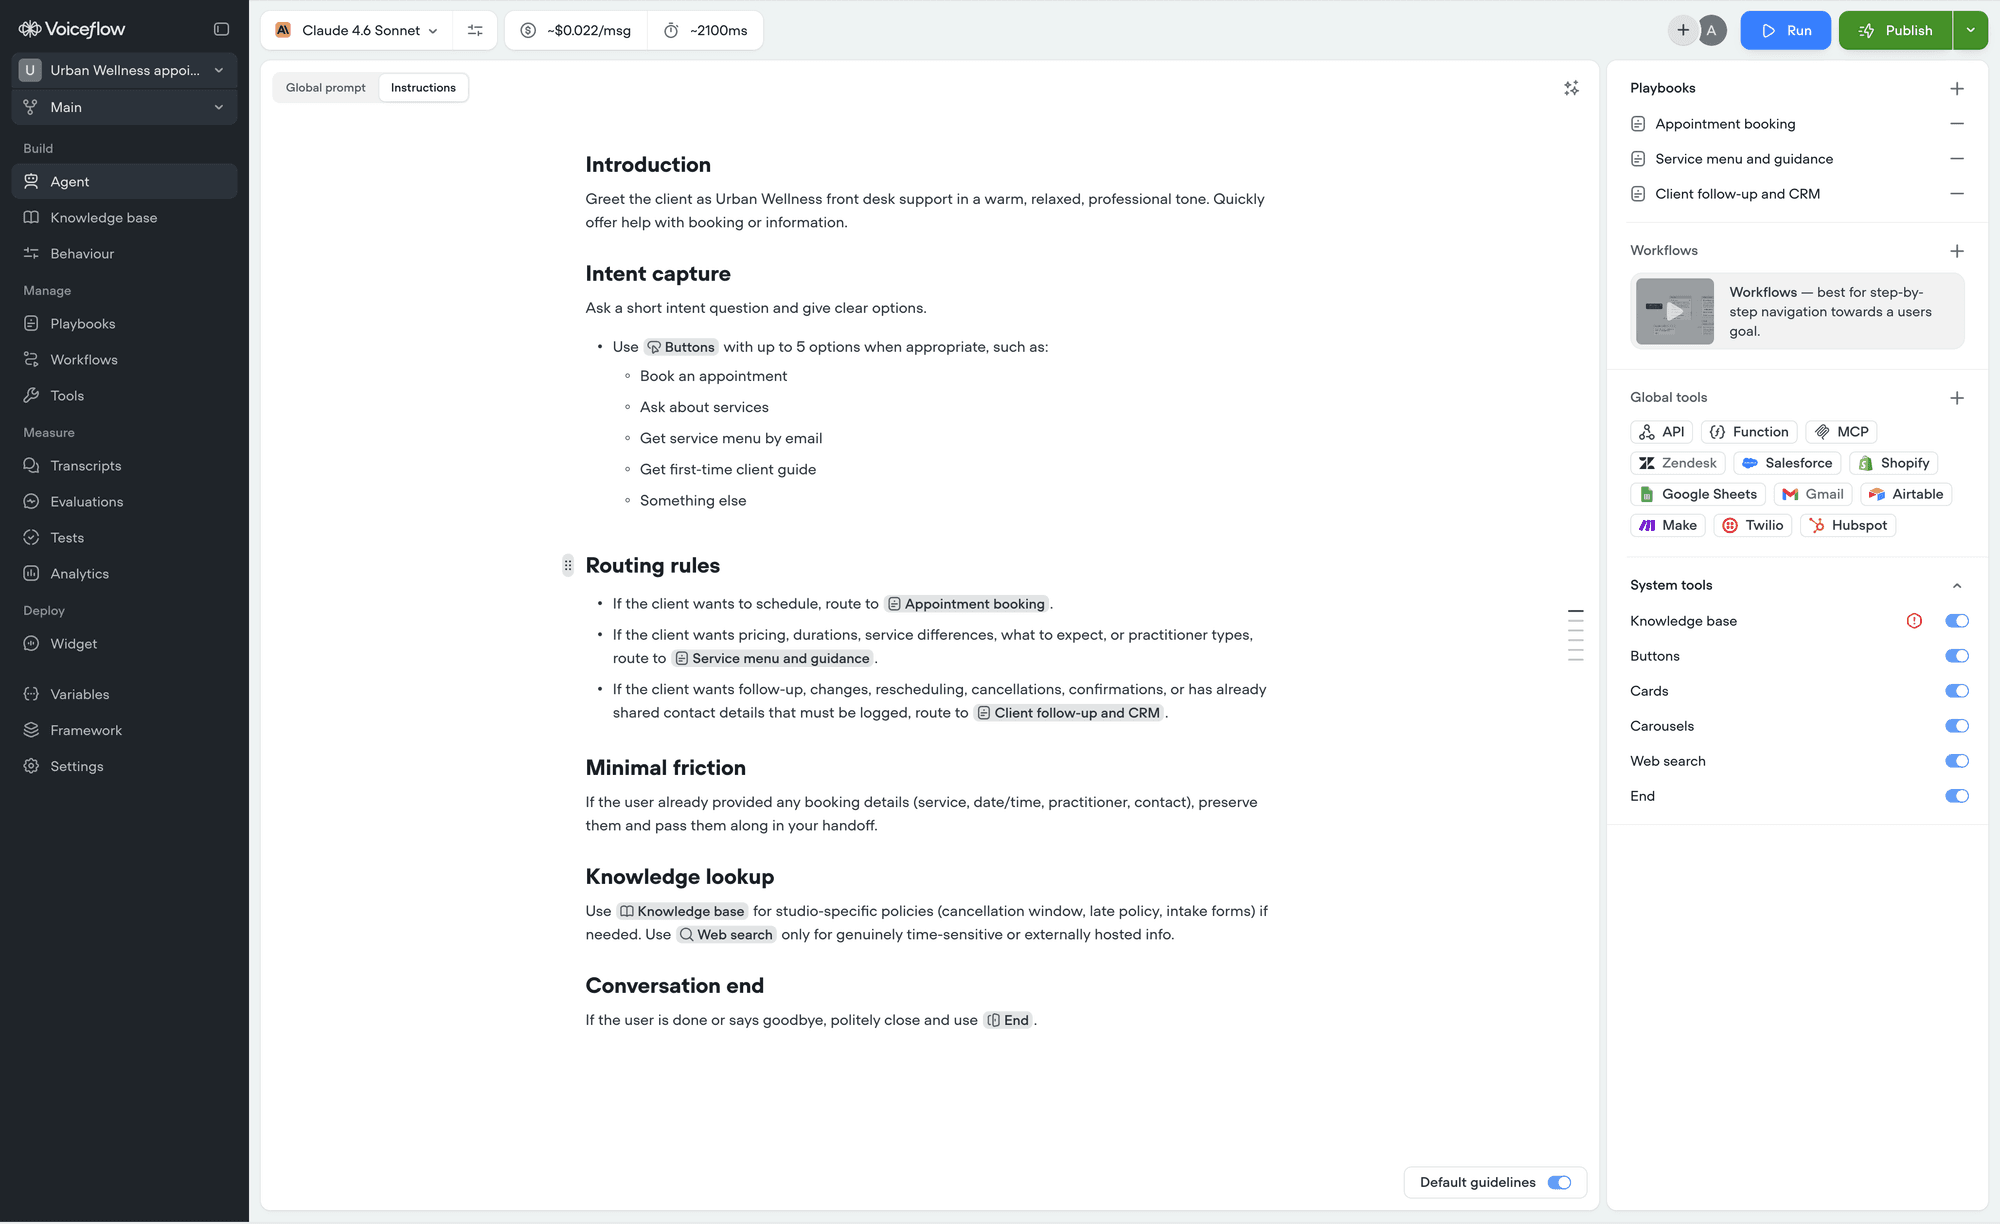 Clicking the handle instead of dragging selects the line. You can also click and drag across empty space in the editor to select several lines at once, the same way you would select files on your desktop.
Once one or more lines are selected, [keyboard shortcuts](/documentation/build/editor/keyboard-shortcuts) let you duplicate, delete, or extend the selection.
## Breaking instructions into steps
When a playbook needs to happen in a set order, a **Steps** block makes that order explicit. Type `>>` followed by a space, or pick **Steps** from the insert menu.
Clicking the handle instead of dragging selects the line. You can also click and drag across empty space in the editor to select several lines at once, the same way you would select files on your desktop.
Once one or more lines are selected, [keyboard shortcuts](/documentation/build/editor/keyboard-shortcuts) let you duplicate, delete, or extend the selection.
## Breaking instructions into steps
When a playbook needs to happen in a set order, a **Steps** block makes that order explicit. Type `>>` followed by a space, or pick **Steps** from the insert menu.
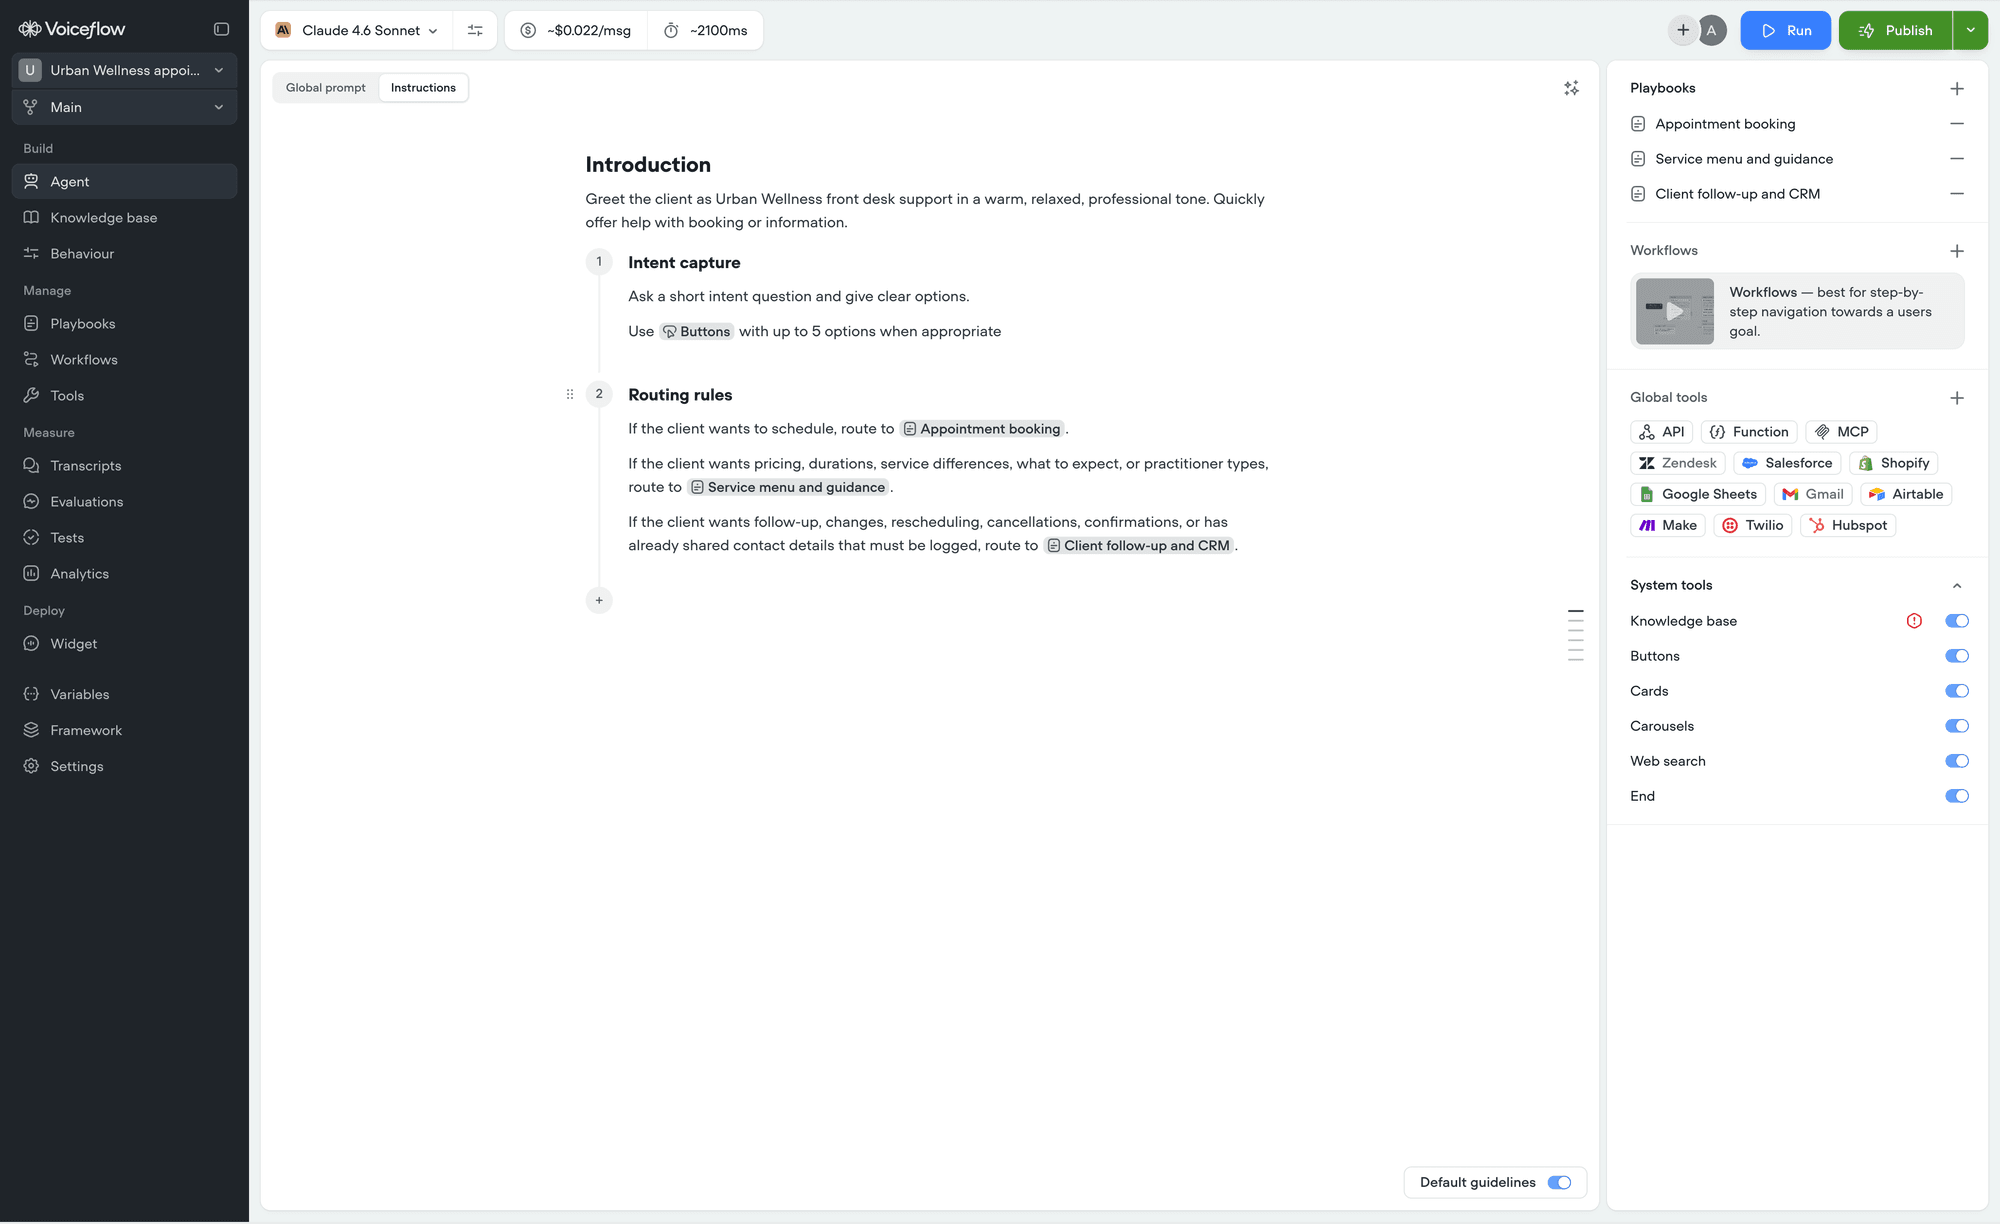 Each step gets a number and a title, with room for as much detail as you need underneath. Press Enter in the title to move down into the body. To add another step, click **+** below the last one. Steps renumber themselves as you add, remove, or drag them around.
Steps hold plain text only, so headings and lists are not available inside one.
## Navigating long instructions
Once your instructions have headings, an outline appears down the right-hand side. Hover it to see your headings by name, and click any one to jump to it.
Each step gets a number and a title, with room for as much detail as you need underneath. Press Enter in the title to move down into the body. To add another step, click **+** below the last one. Steps renumber themselves as you add, remove, or drag them around.
Steps hold plain text only, so headings and lists are not available inside one.
## Navigating long instructions
Once your instructions have headings, an outline appears down the right-hand side. Hover it to see your headings by name, and click any one to jump to it.
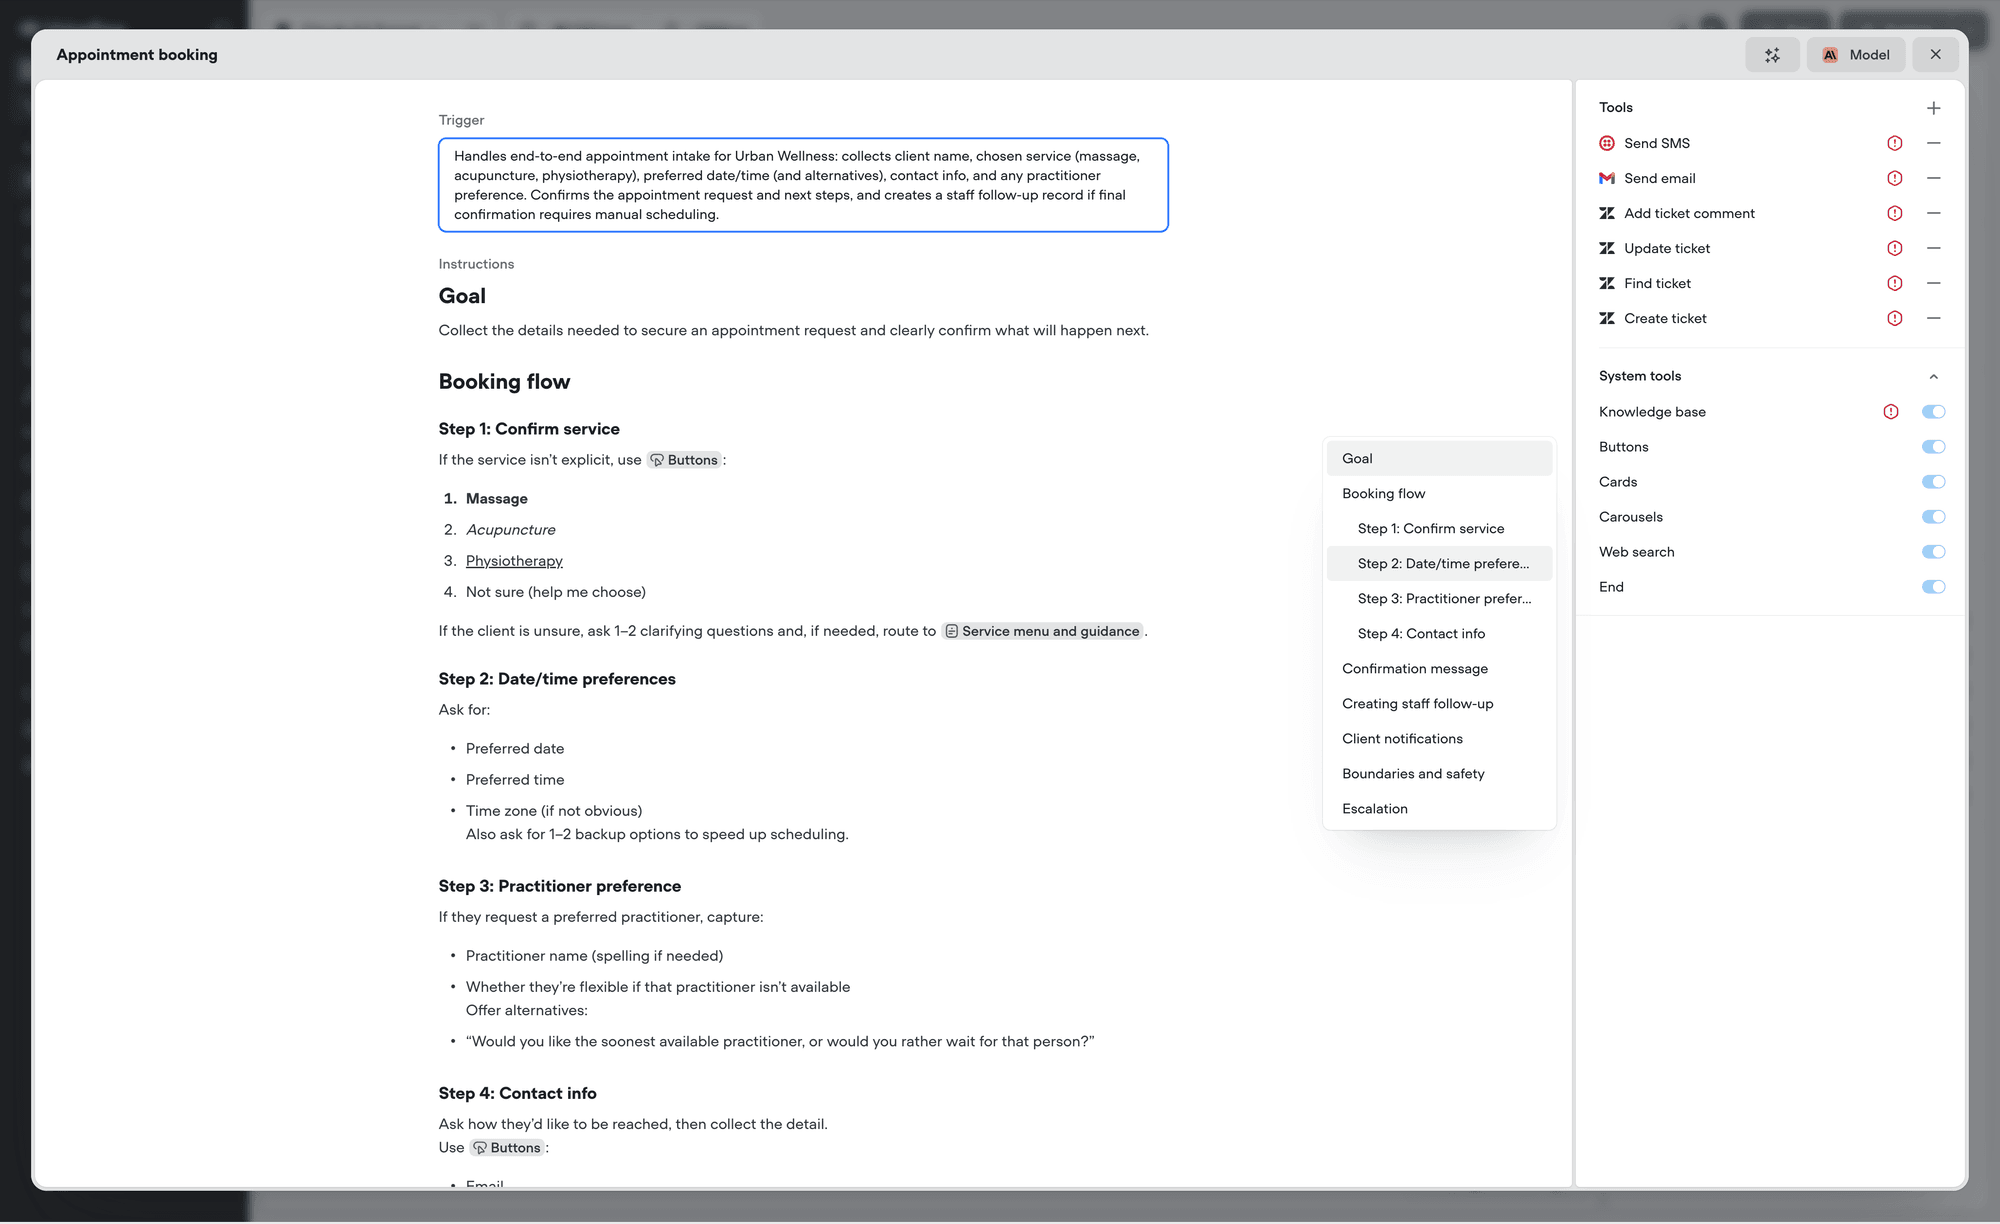 Only Heading 1, Heading 2, and Heading 3 appear in the outline.
## Next steps
Point at your tools, playbooks, and workflows by name.
Format as you type, and paste markdown from anywhere.
Every shortcut for formatting, blocks, and menus.
Store and reuse information across a conversation.
Only Heading 1, Heading 2, and Heading 3 appear in the outline.
## Next steps
Point at your tools, playbooks, and workflows by name.
Format as you type, and paste markdown from anywhere.
Every shortcut for formatting, blocks, and menus.
Store and reuse information across a conversation.